
ServiceNow Personal Developer Instance (PDI) - MID Server Setup for macOS
 Geoff Topley | ServiceNow Developer
·
Jan 02, 2023
·
article
Geoff Topley | ServiceNow Developer
·
Jan 02, 2023
·
article

<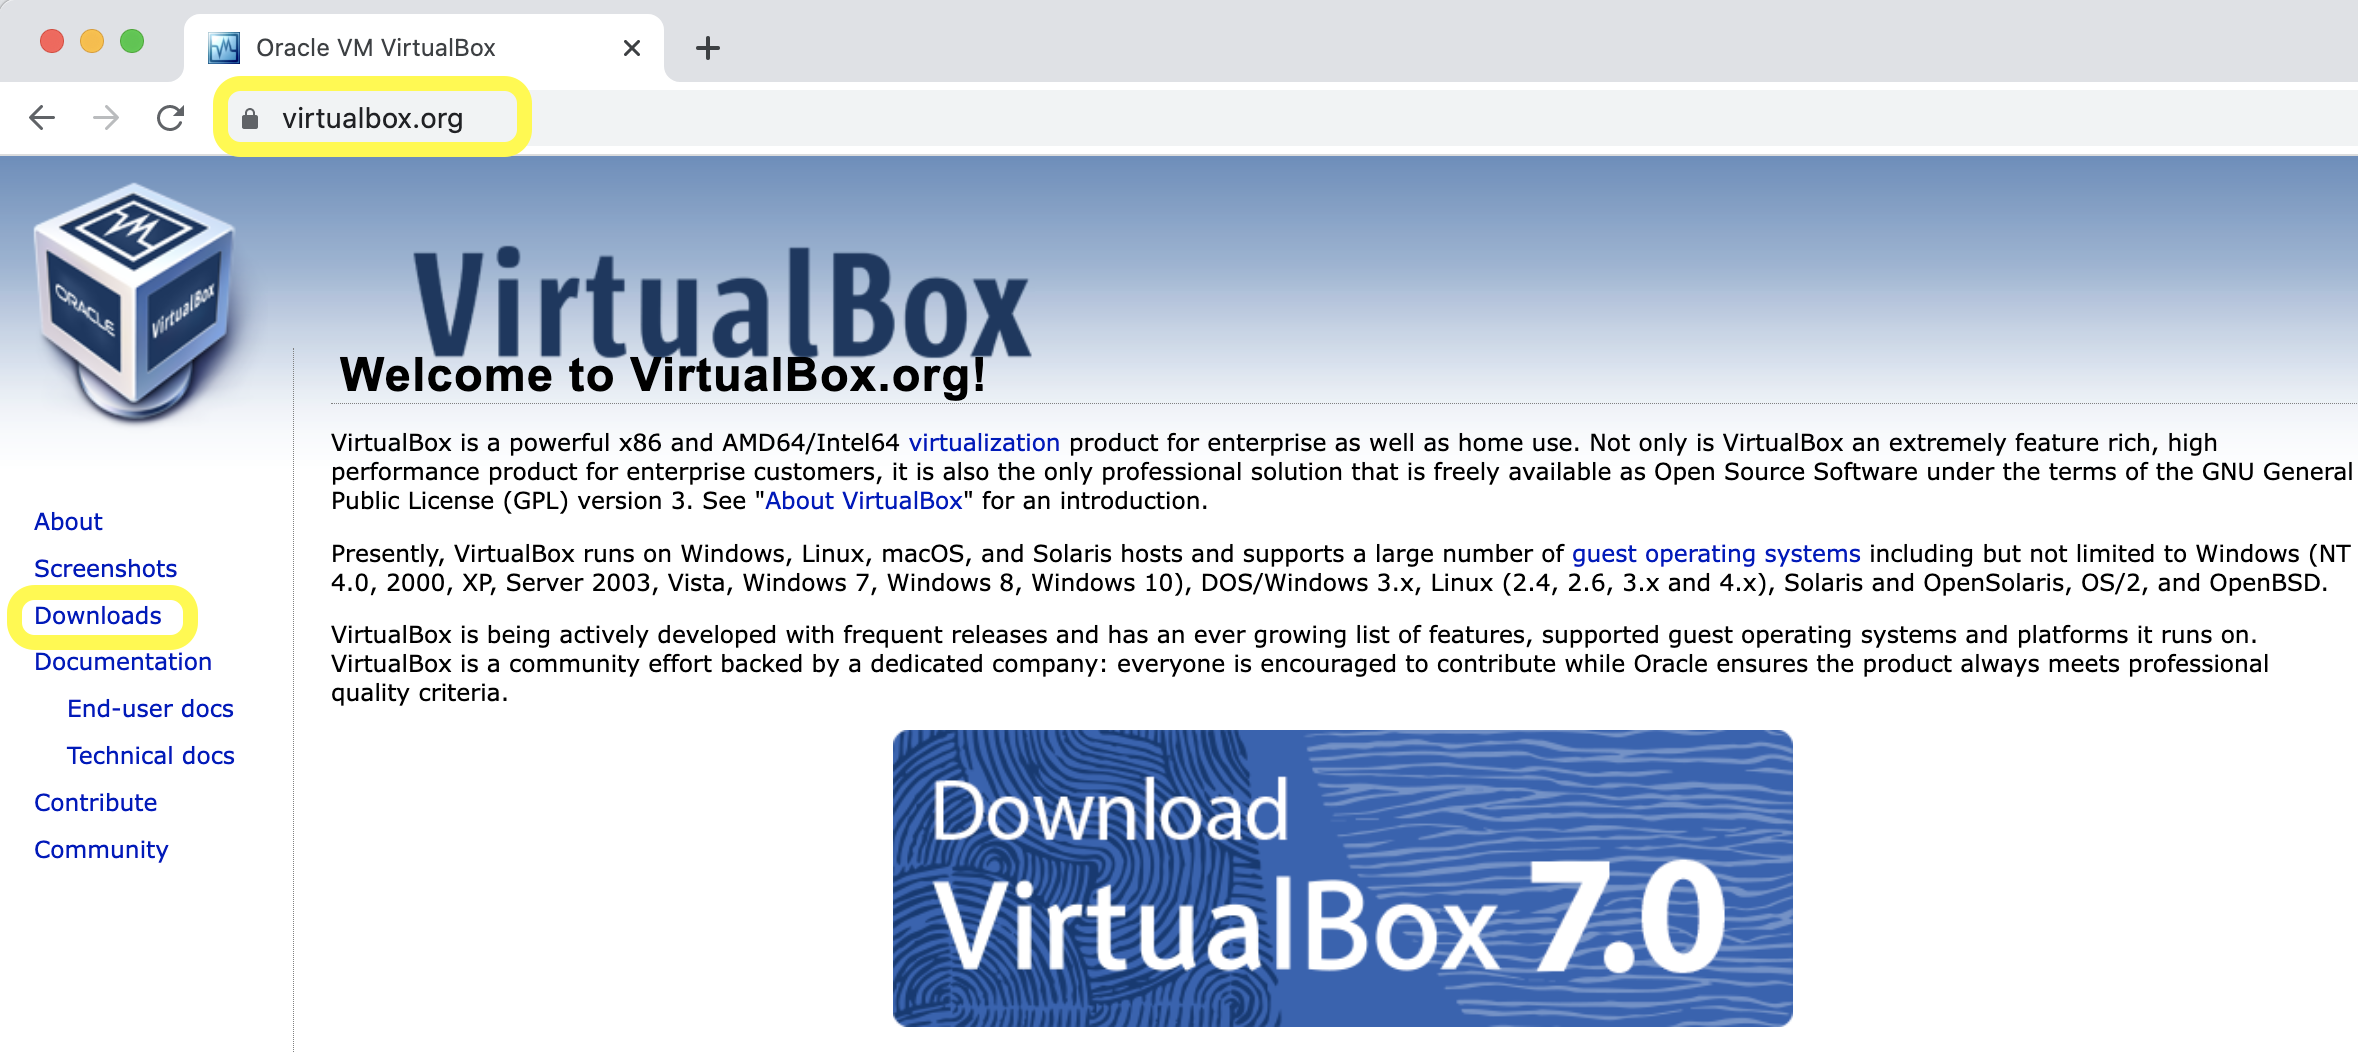
- Select 'macOS / Intel hosts' and allow the download to complete
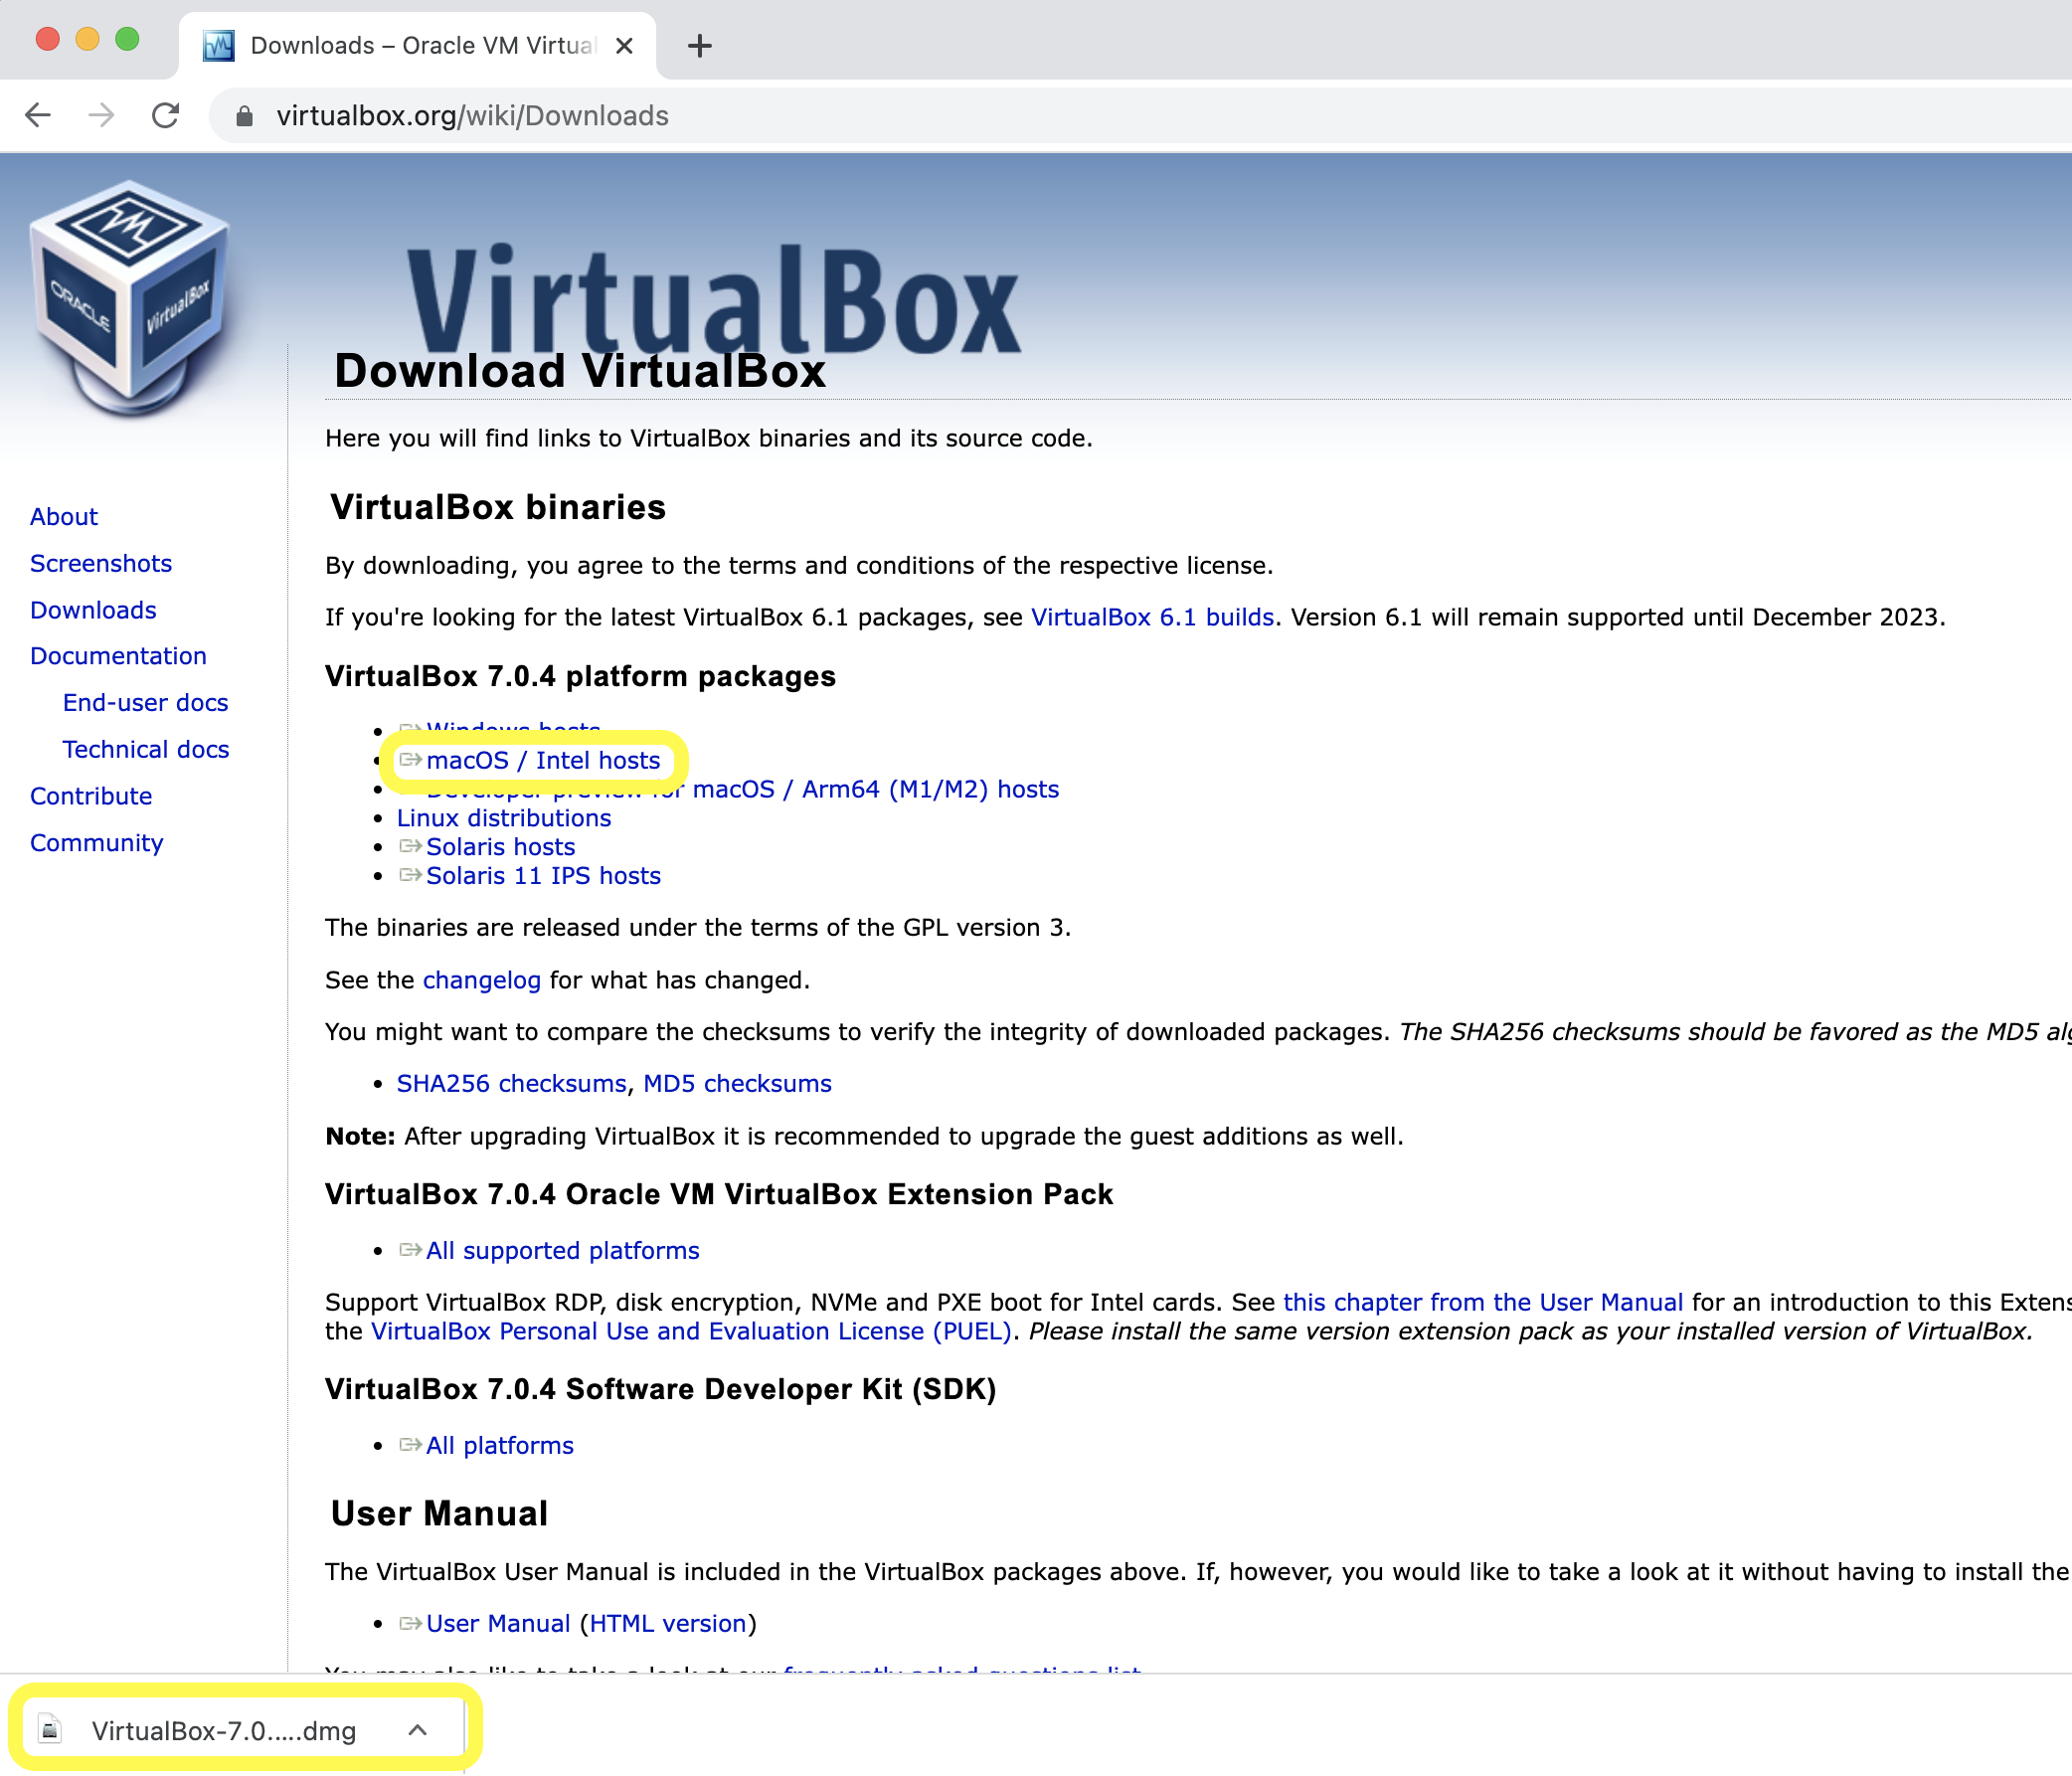
- Follow the instructions to install the download
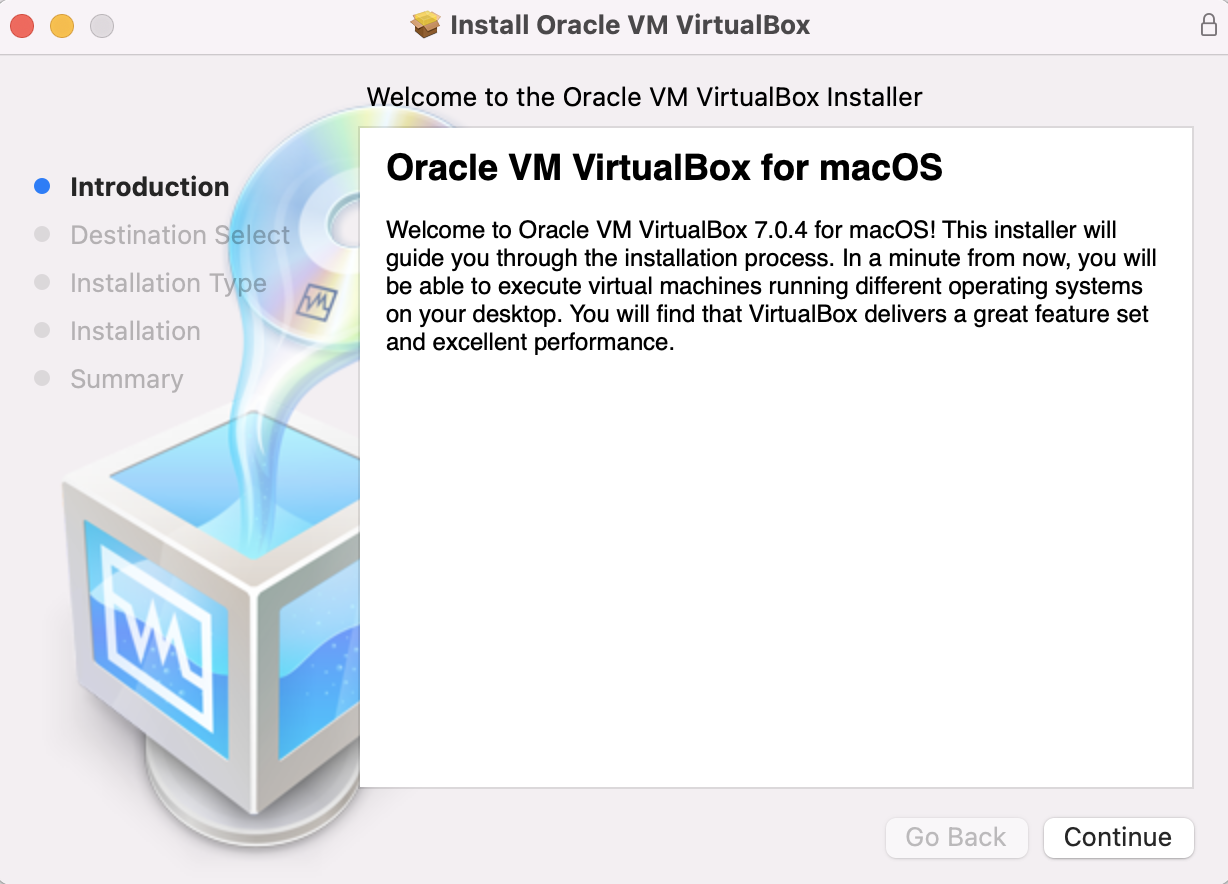
- Open VirtualBox via your Applications
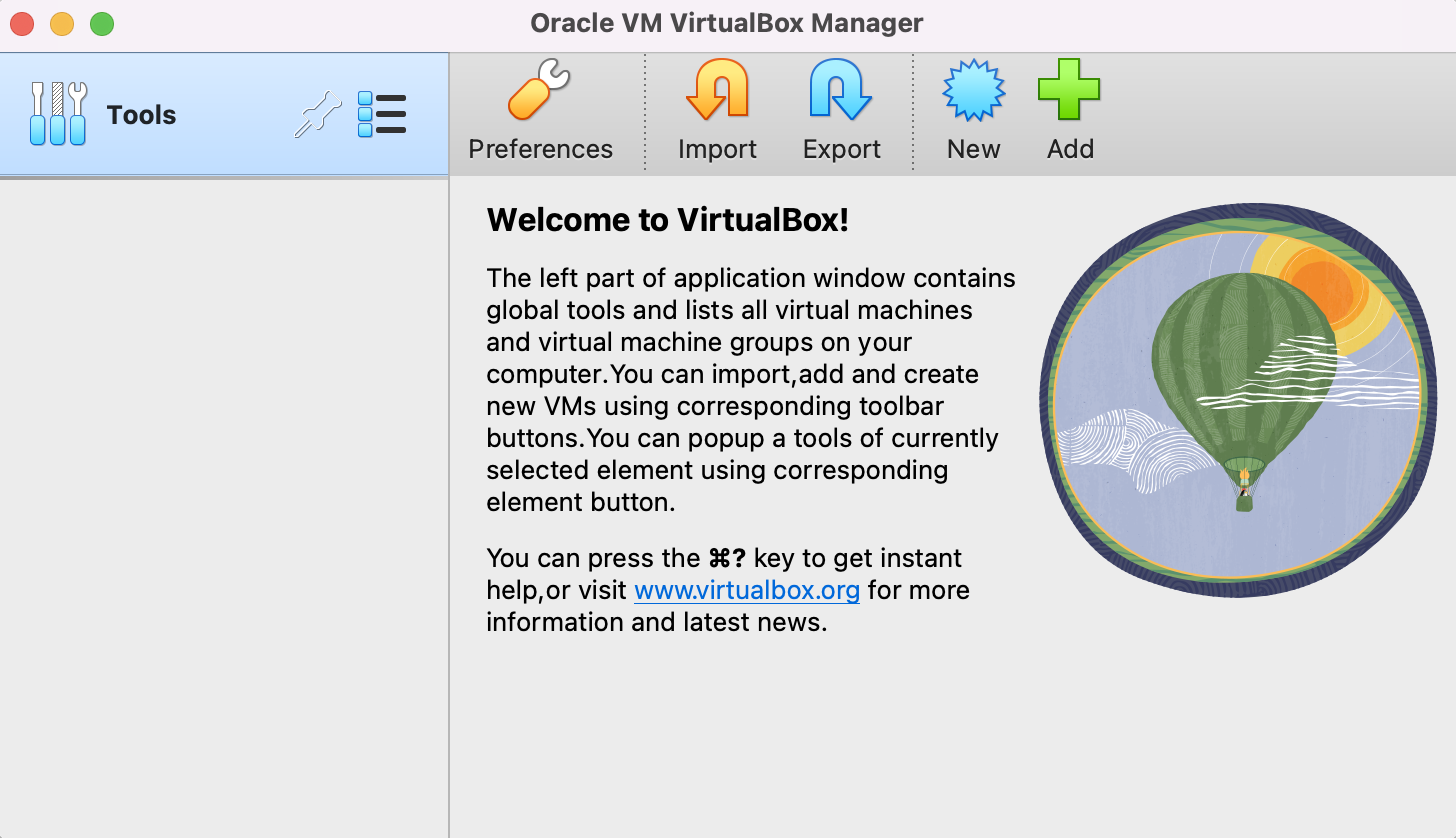
Part 2: Windows Server 2019
Introduction
Microsoft Evaluation Center allows you to download an evaluation version of Windows Server 2019 in the format of an ISO file, also known as an ISO image (a disc image of the installation files).
Steps to download Windows 2019 Server ISO
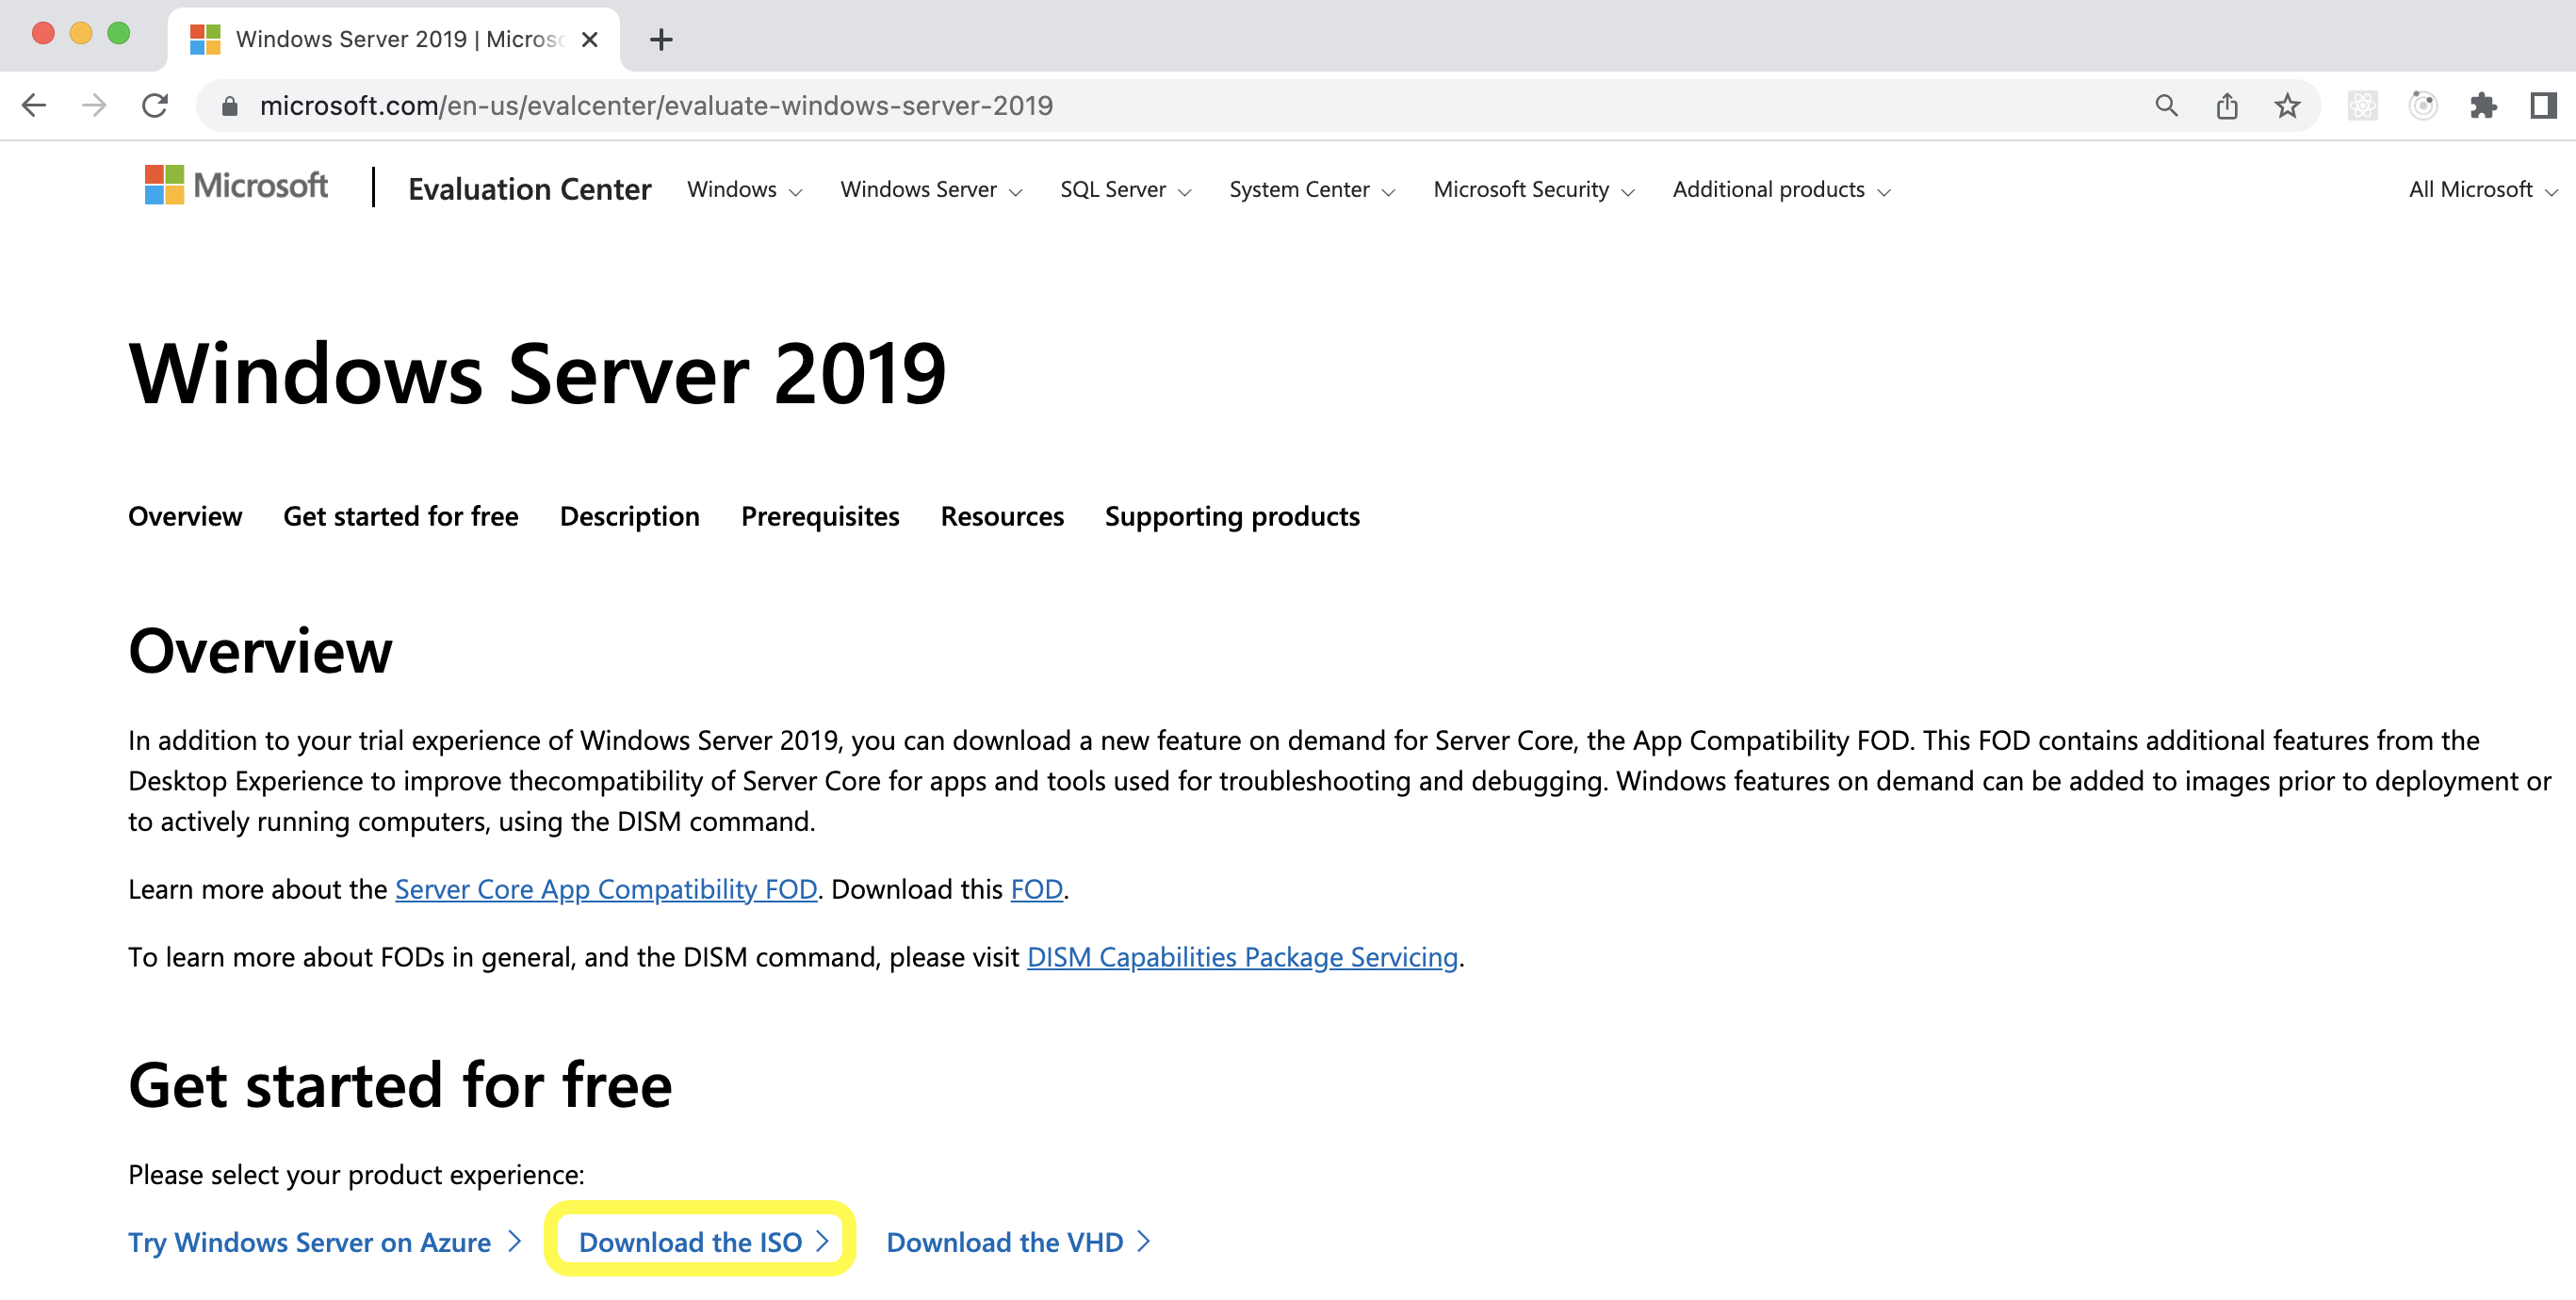
- Visit https://www.microsoft.com/en-us/evalcenter/evaluate-windows-server-2019 and click on 'Download the ISO'
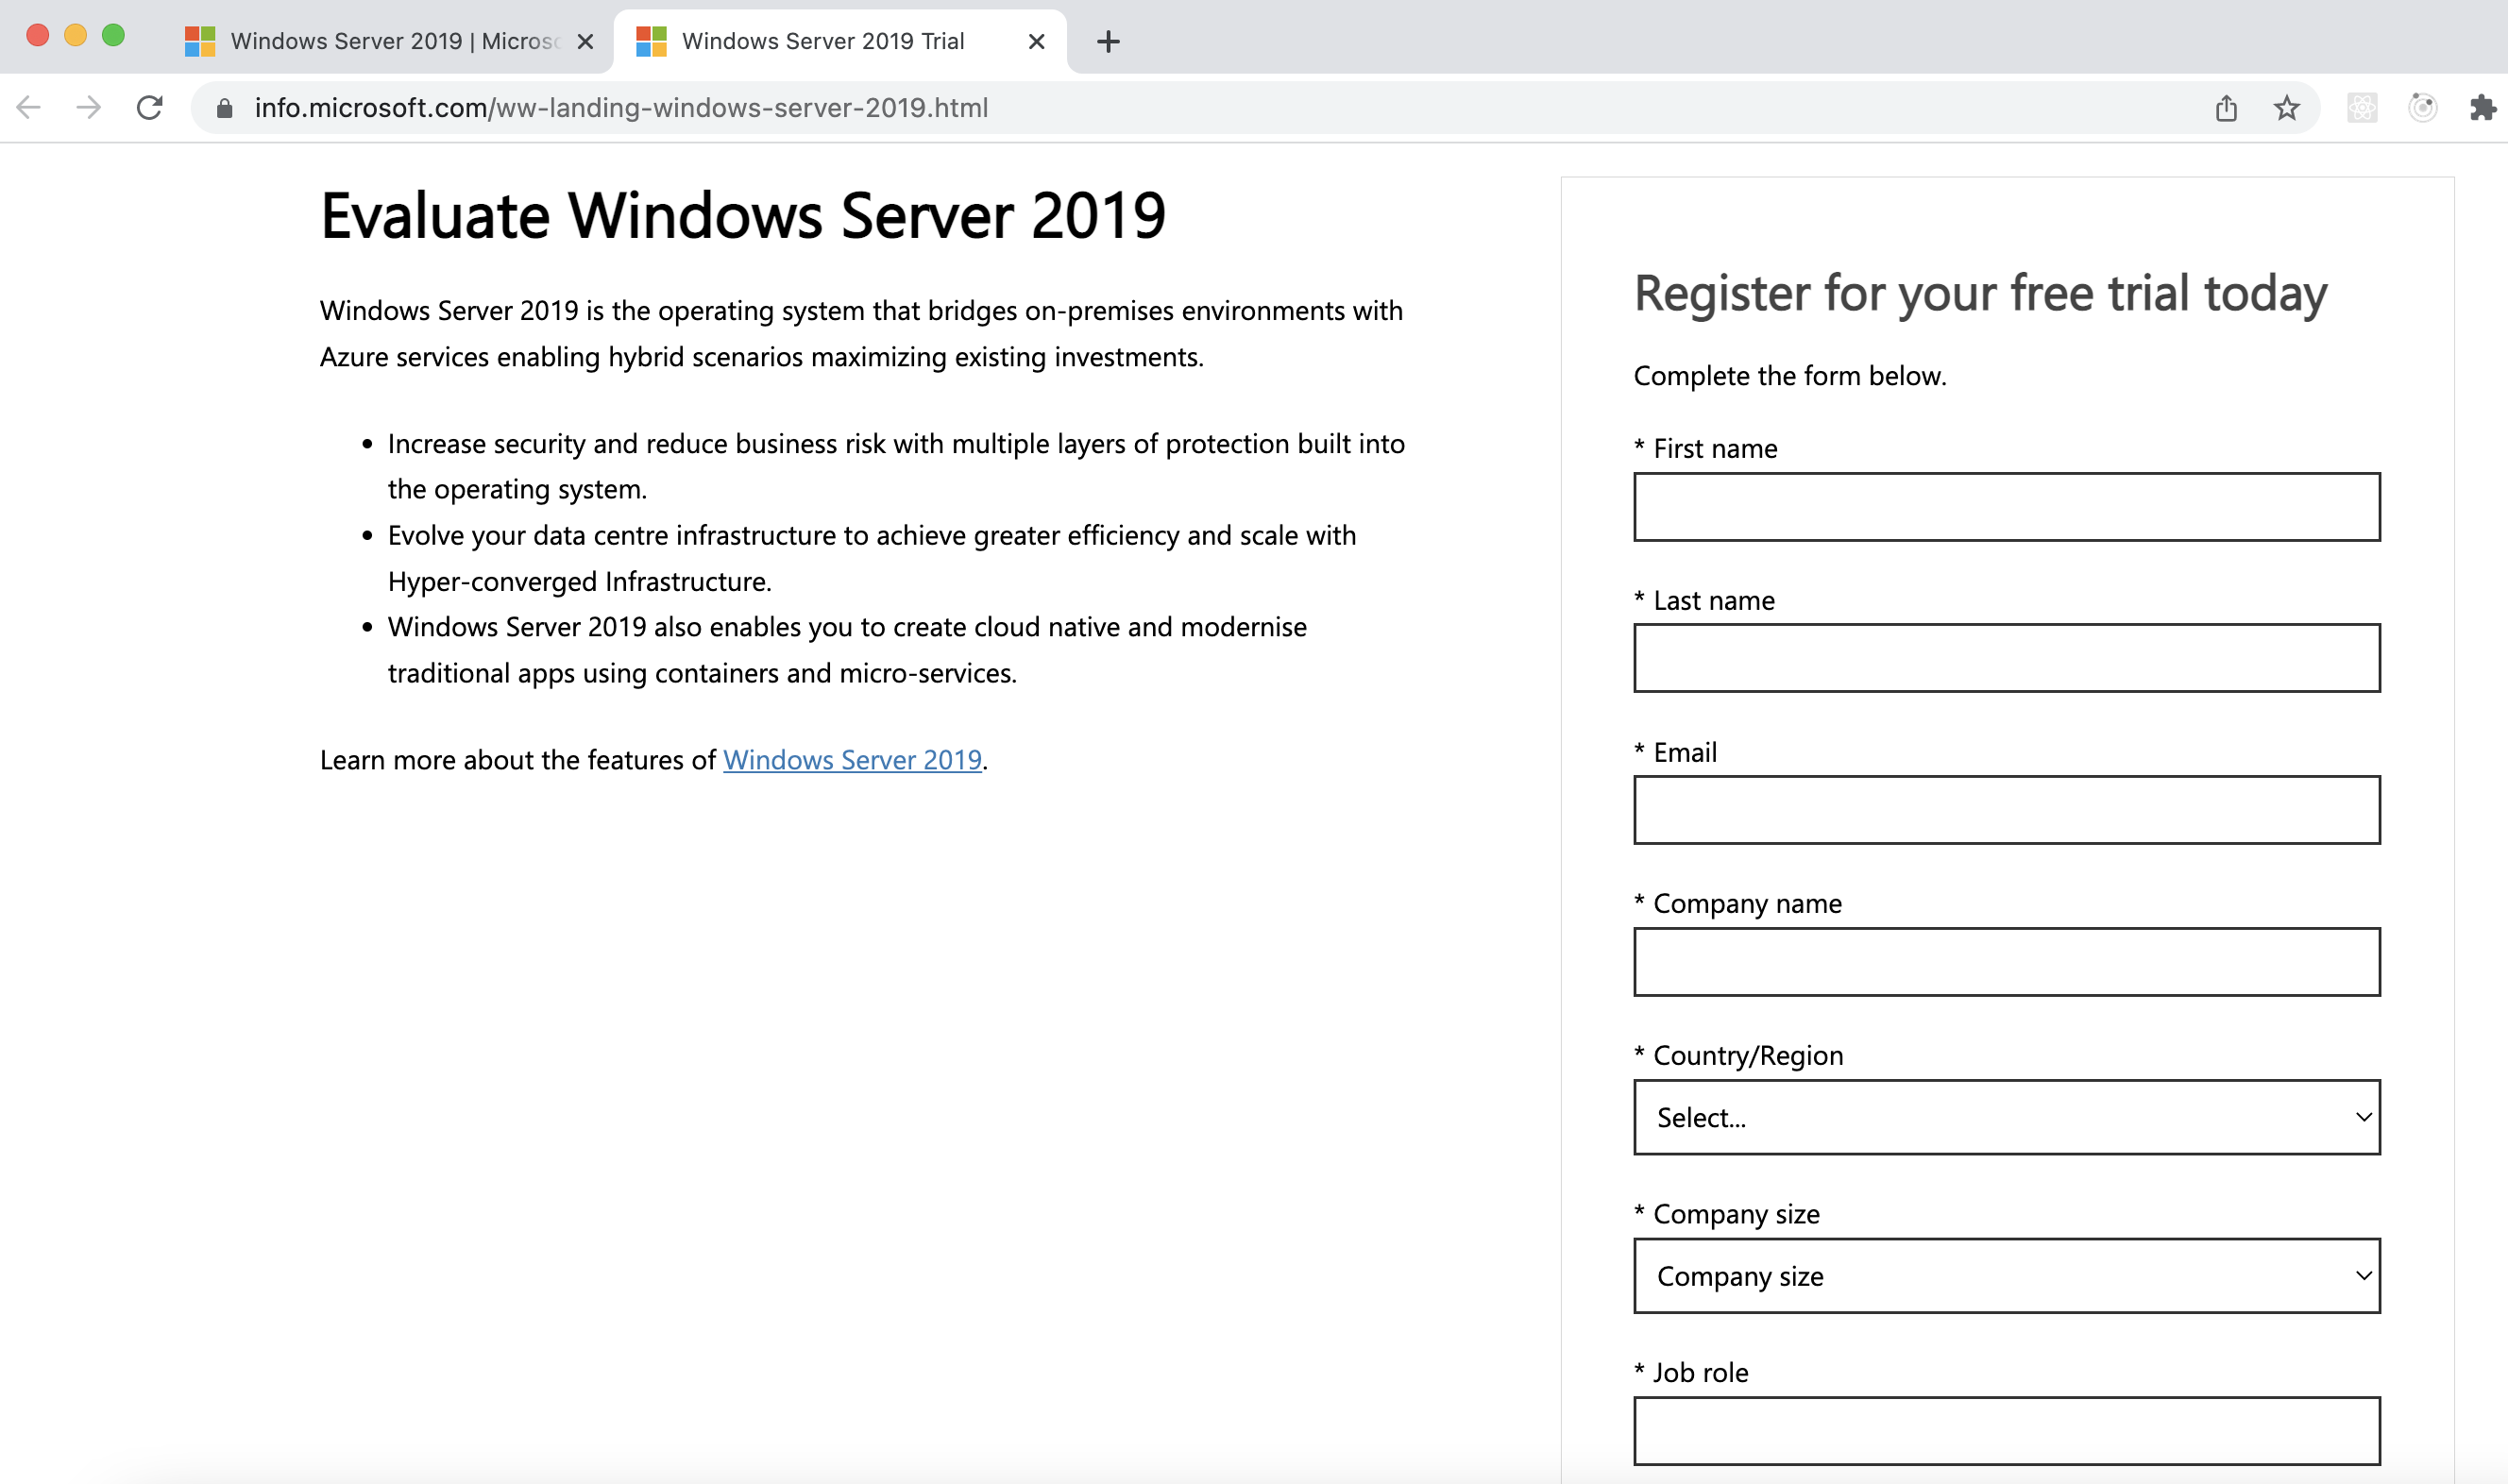
- Complete the registration details and click the 'Download now' button
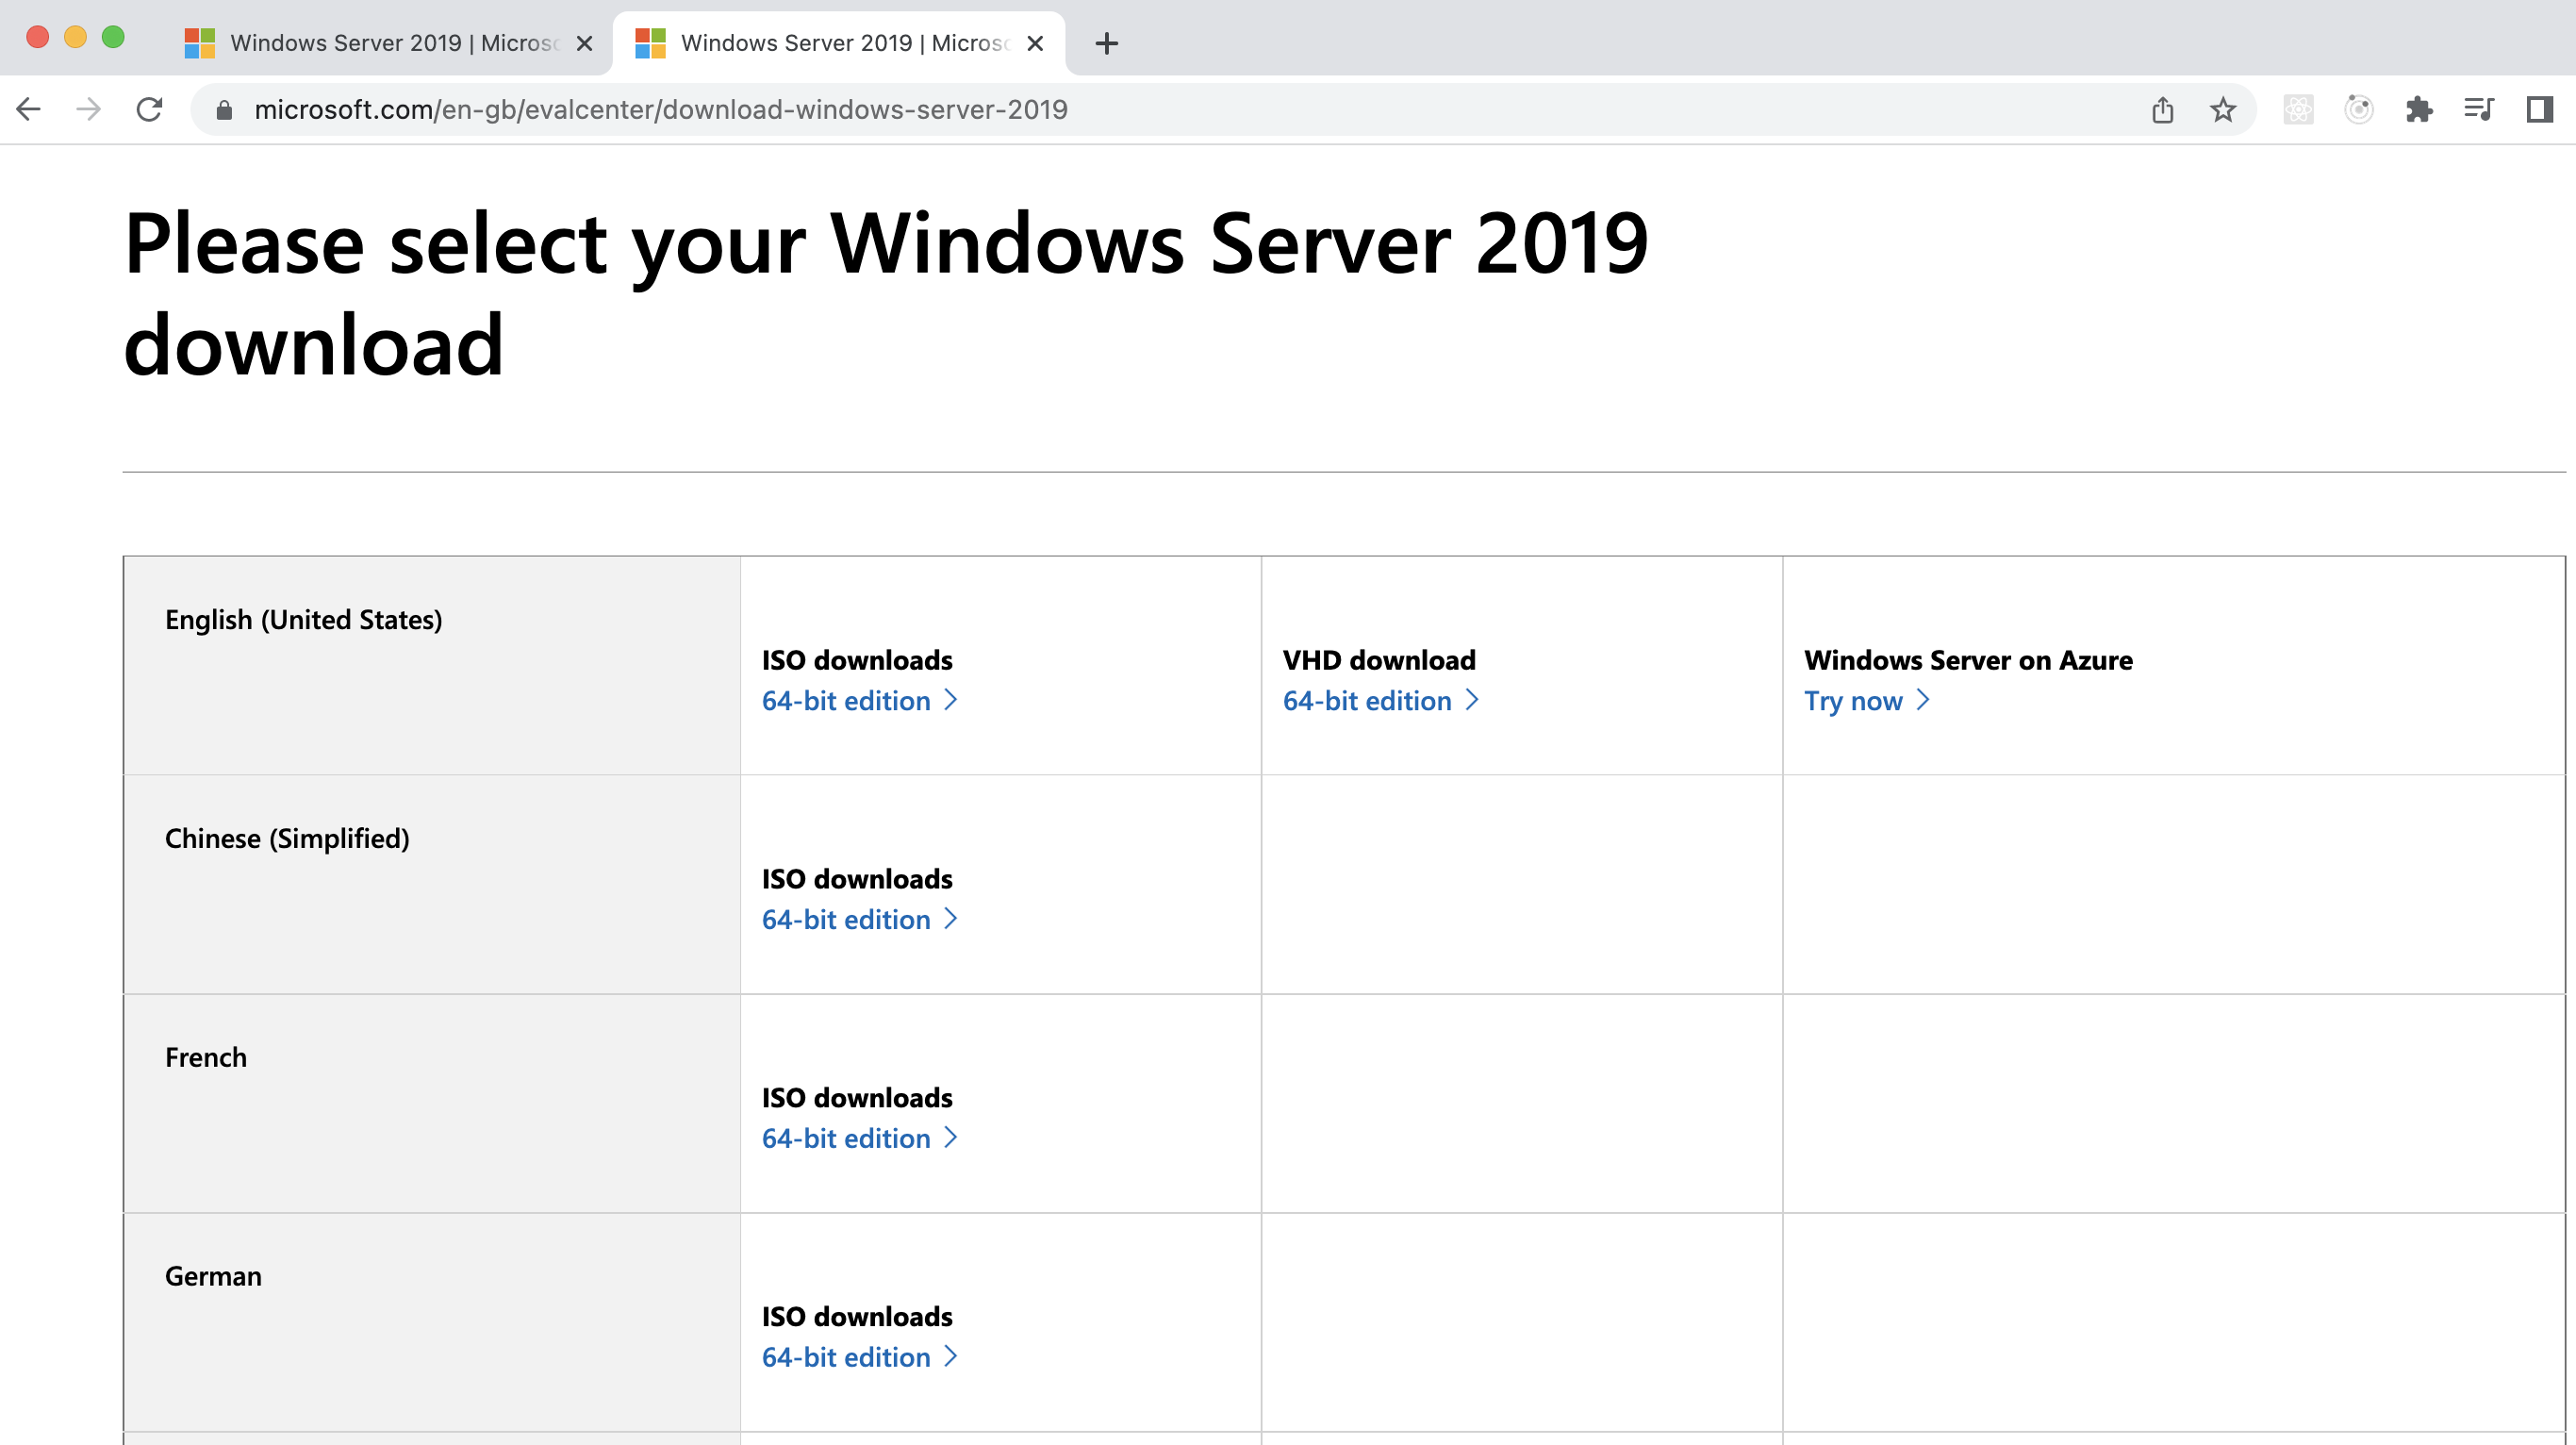
- Download one of the language-applicable ISO downloads to obtain the required .iso file
Part 3: Configure Windows Server 2019 on VirtualBox
Introduction
Now that the Windows Server 2019 ISO file is downloaded the installation can be configured on VirtualBox
Steps to configure Windows 2019 Server on VirtualBox
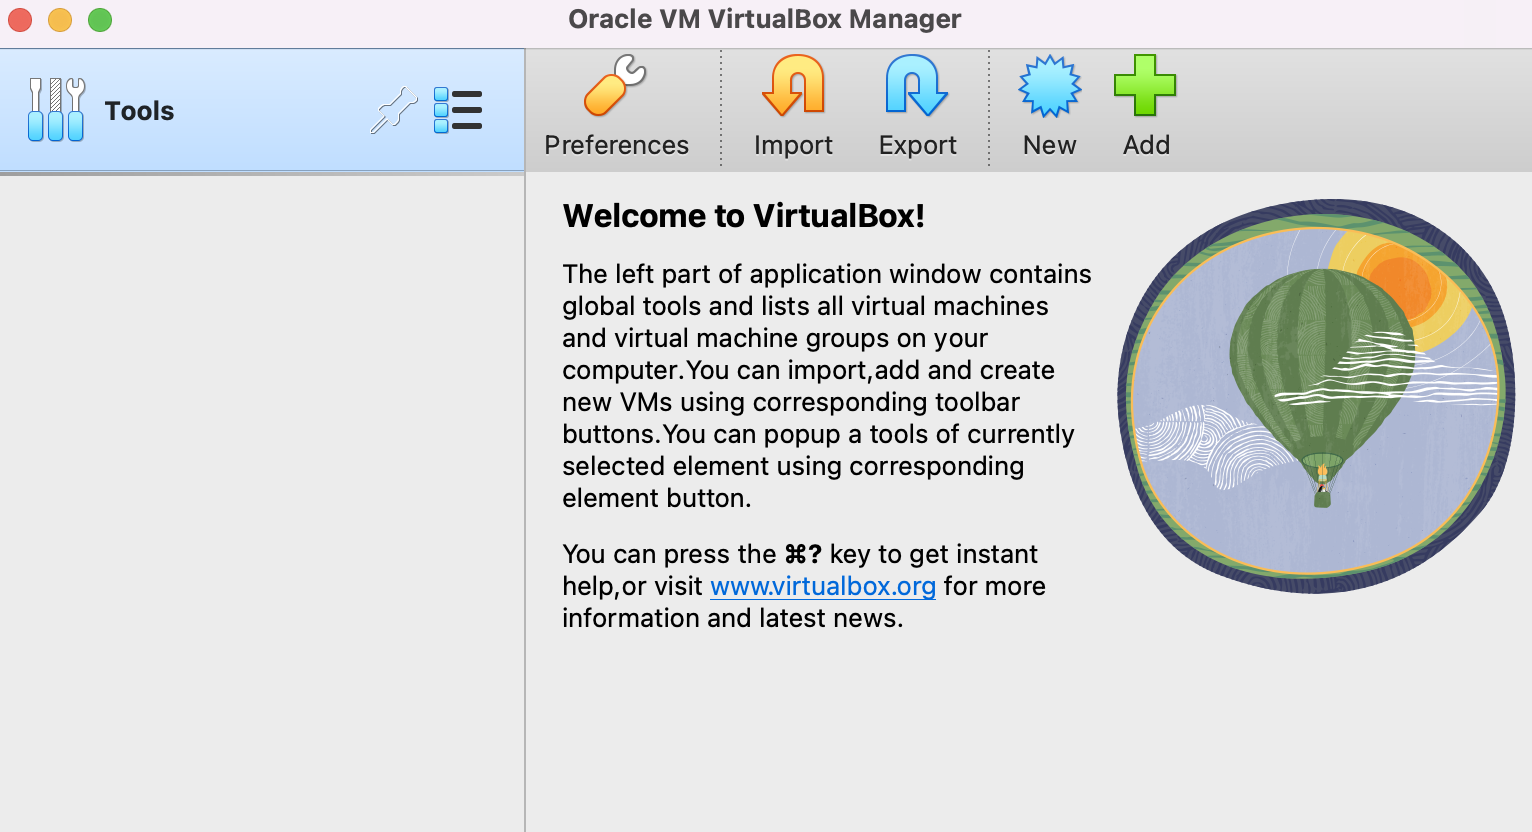
- Open VirtualBox and Click on the 'New' icon
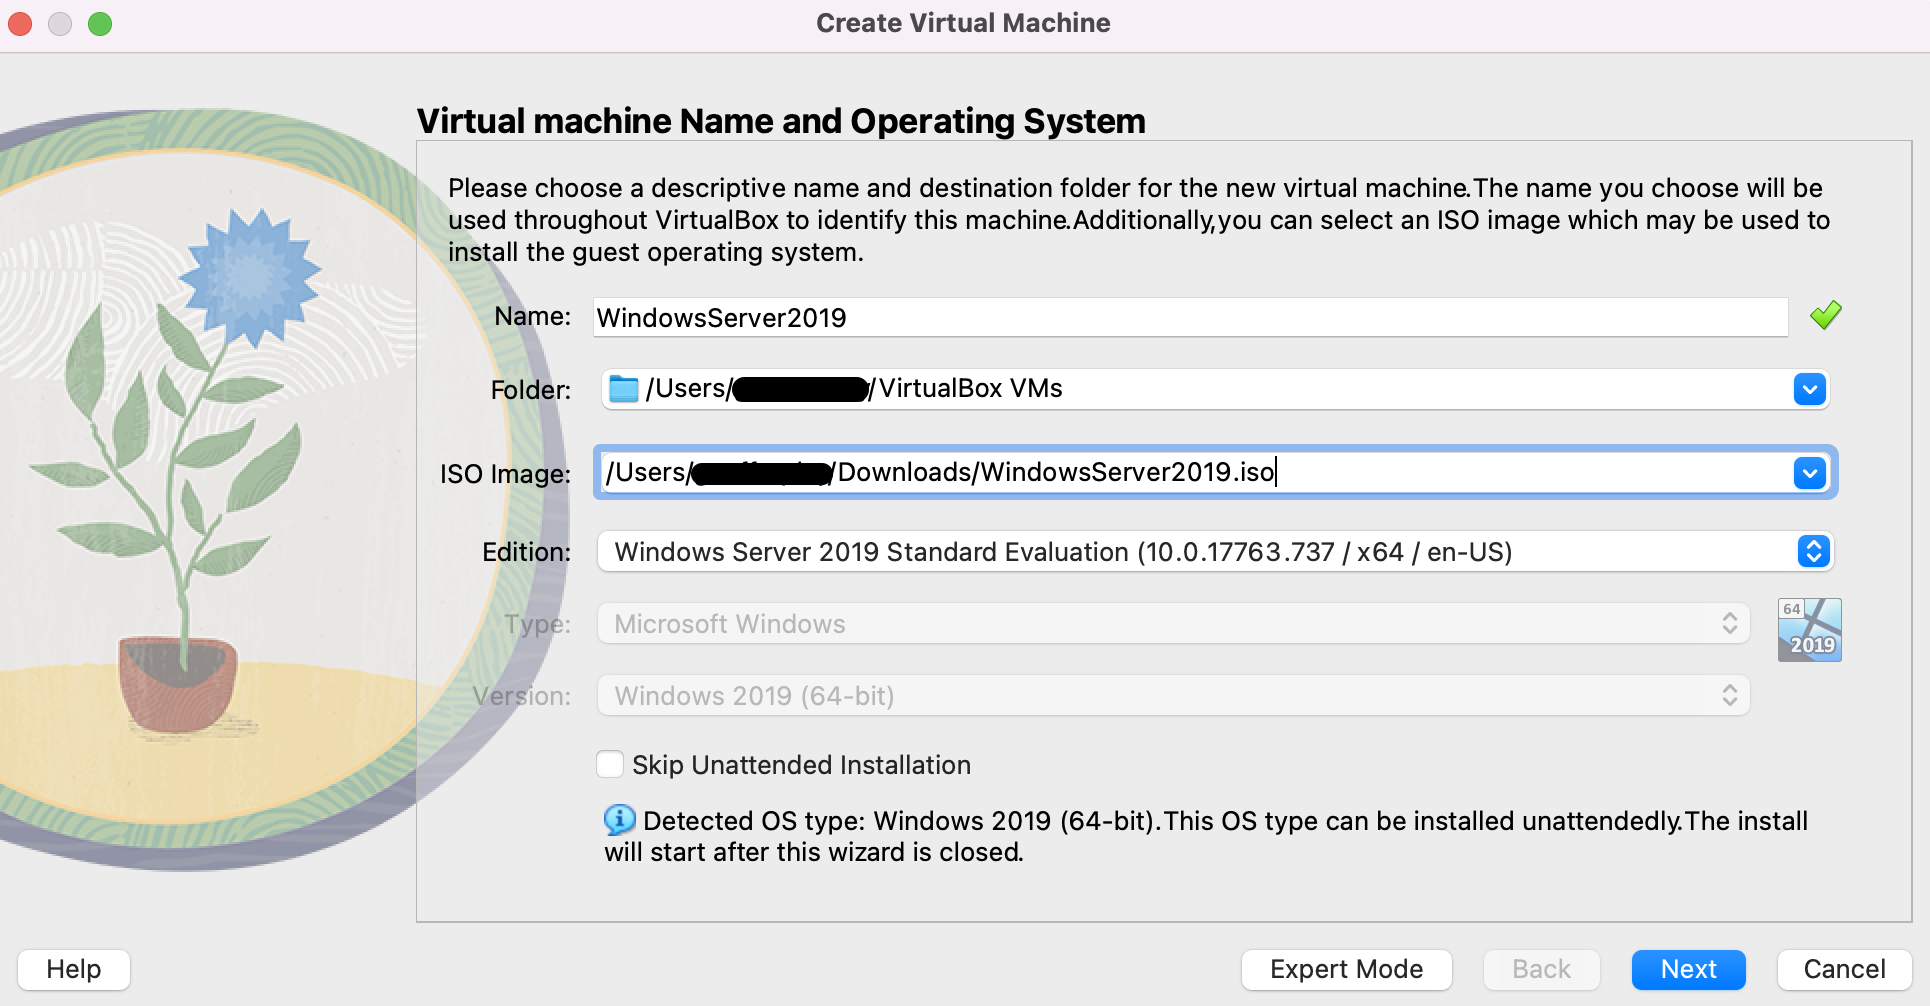
- Complete the details below by adding a Name and for ISO Image choose the downloaded .iso file (NOTE you can see I have renamed my .iso file to a readable shortened name). Click 'Next'
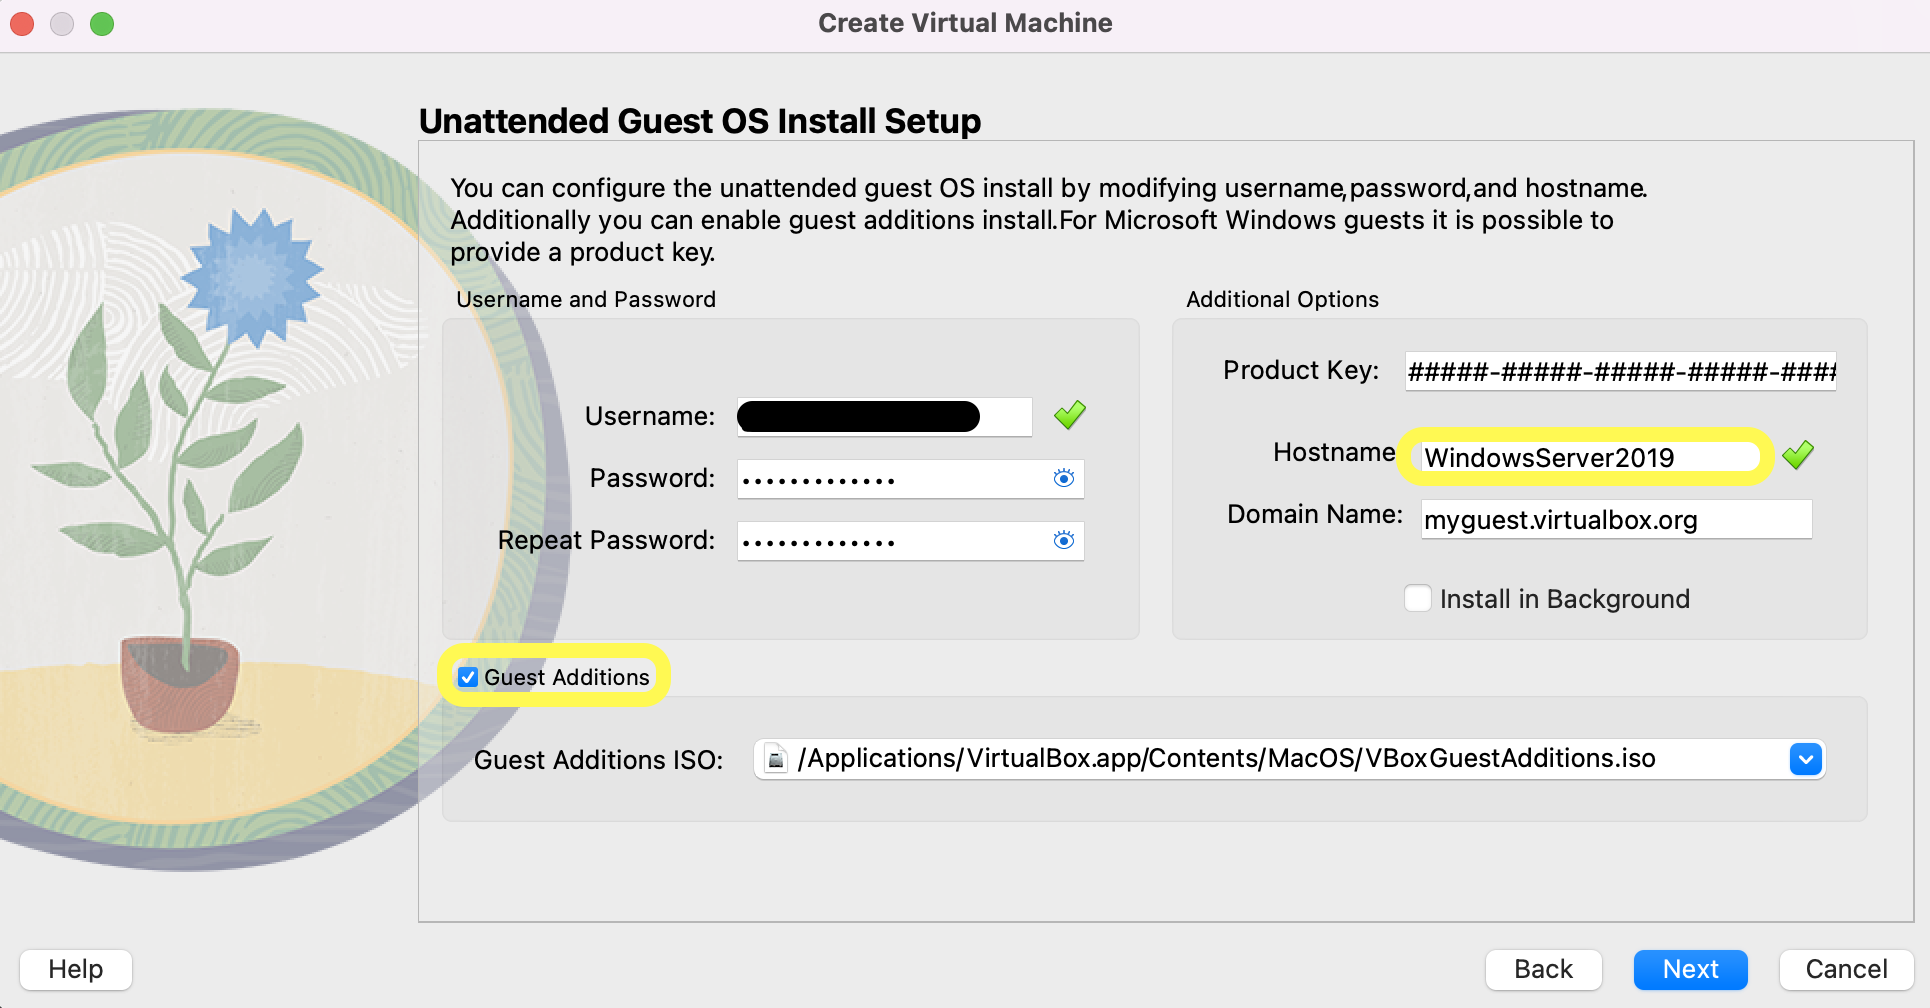
- Complete the details below, checking Guest Additions (better performance and usability). Hostname is pre-fill based on the name given in the previous step. Click 'Next'
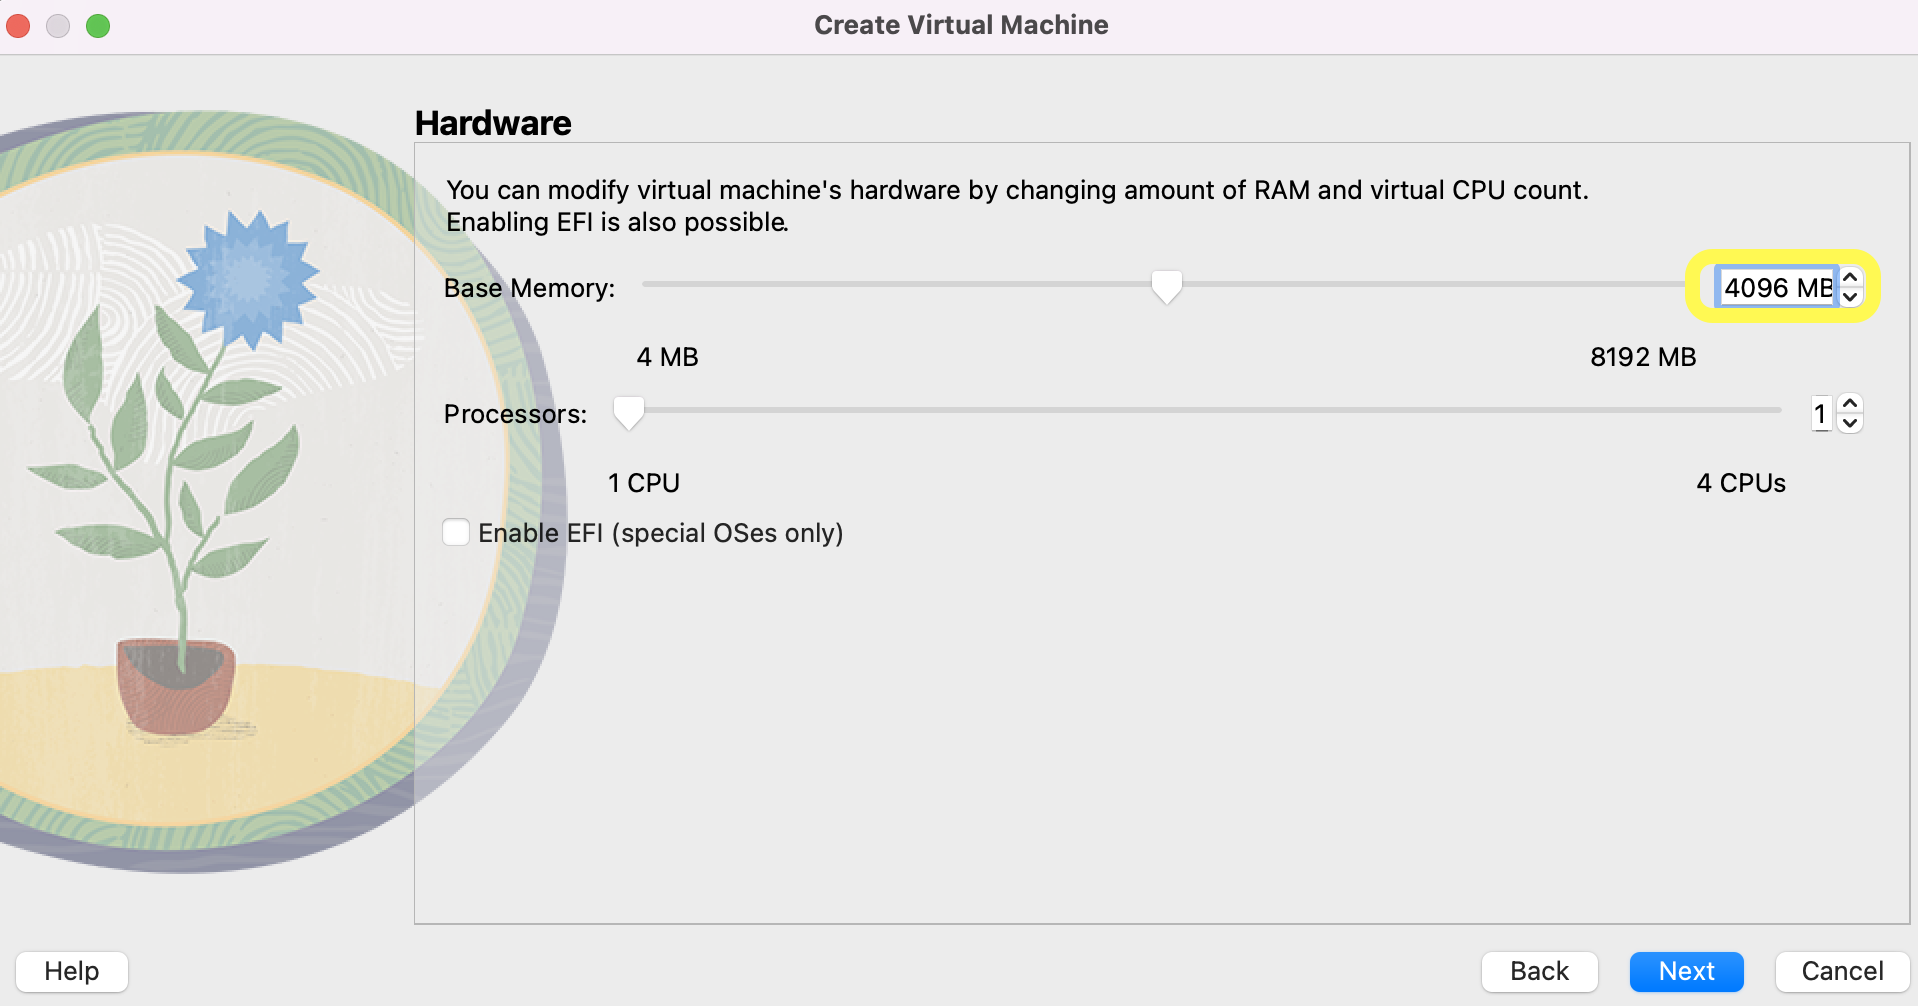
- On the next screen assign memory as required. My example illustrates 4GB of RAM. NOTE: this will depend on the memory available on your host OS. For example, if your host OS has 8GB selecting any more than 4GB will impact your host OS's performance
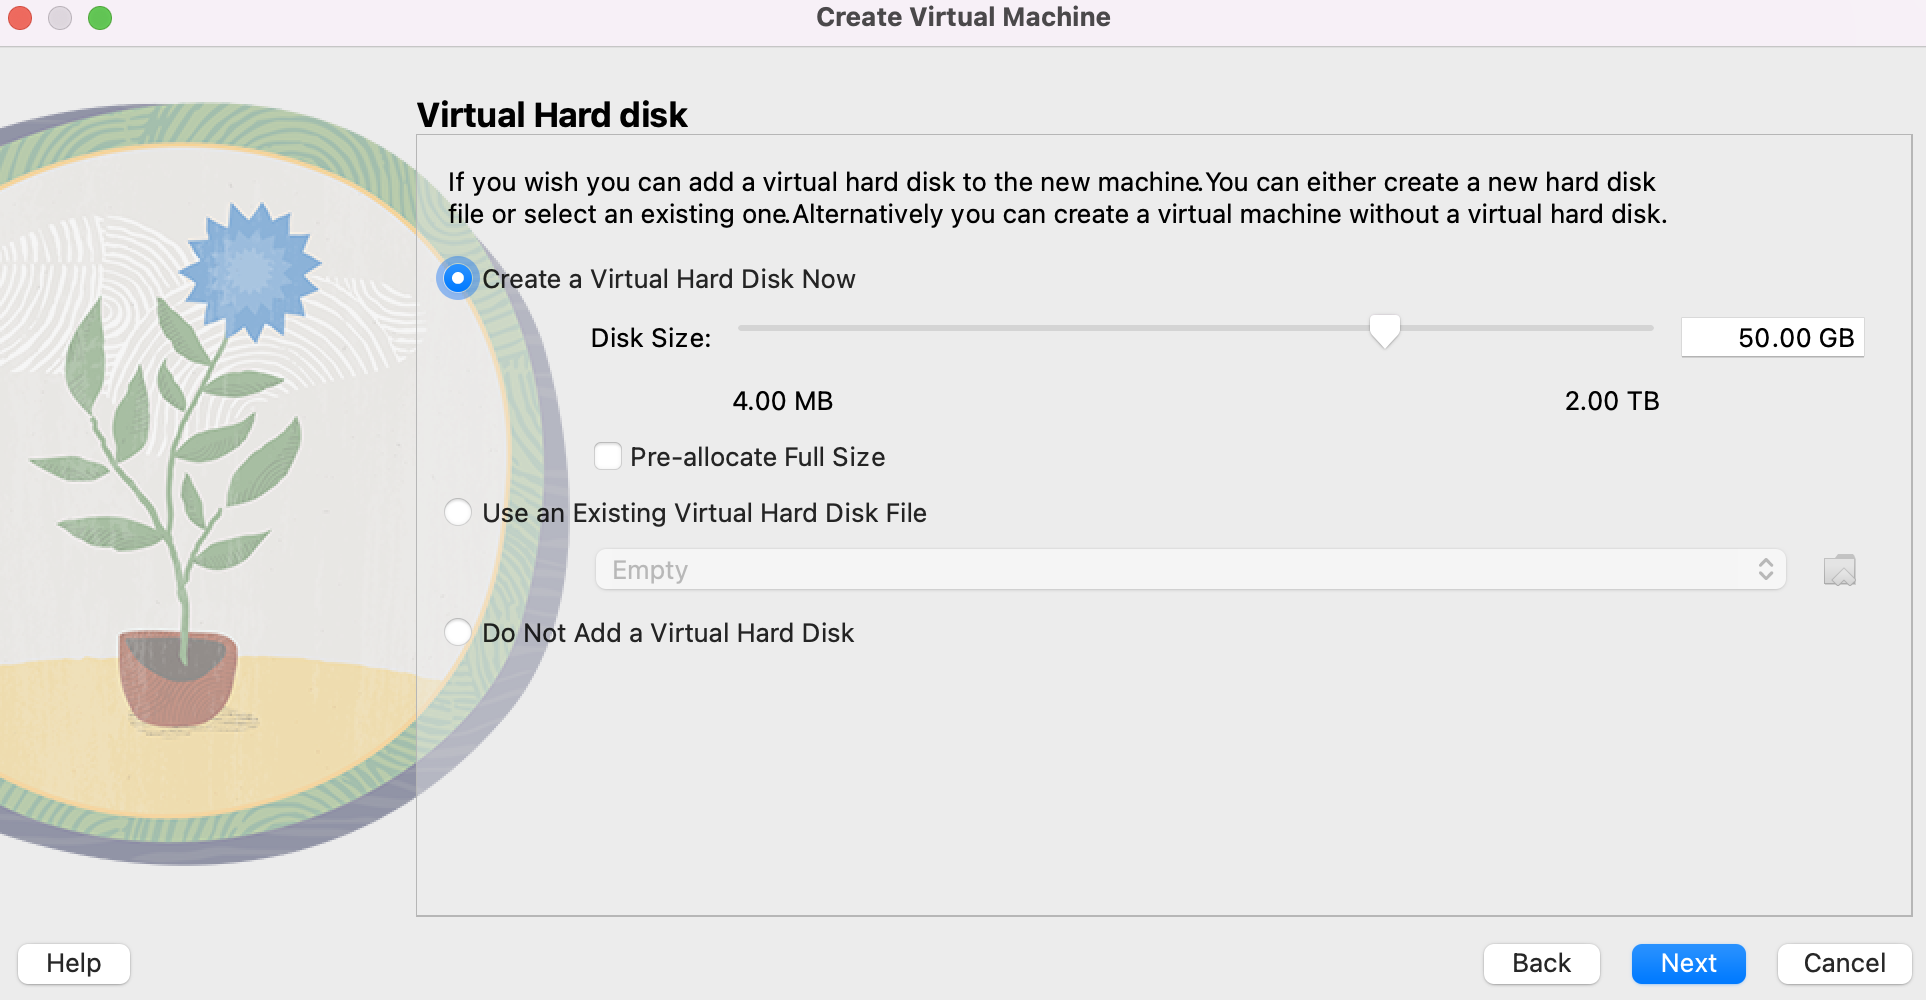
- Complete Virtual Hard disk settings. I have chosen to create a Virtual Hard disc in this example (default setting). Click 'Next'
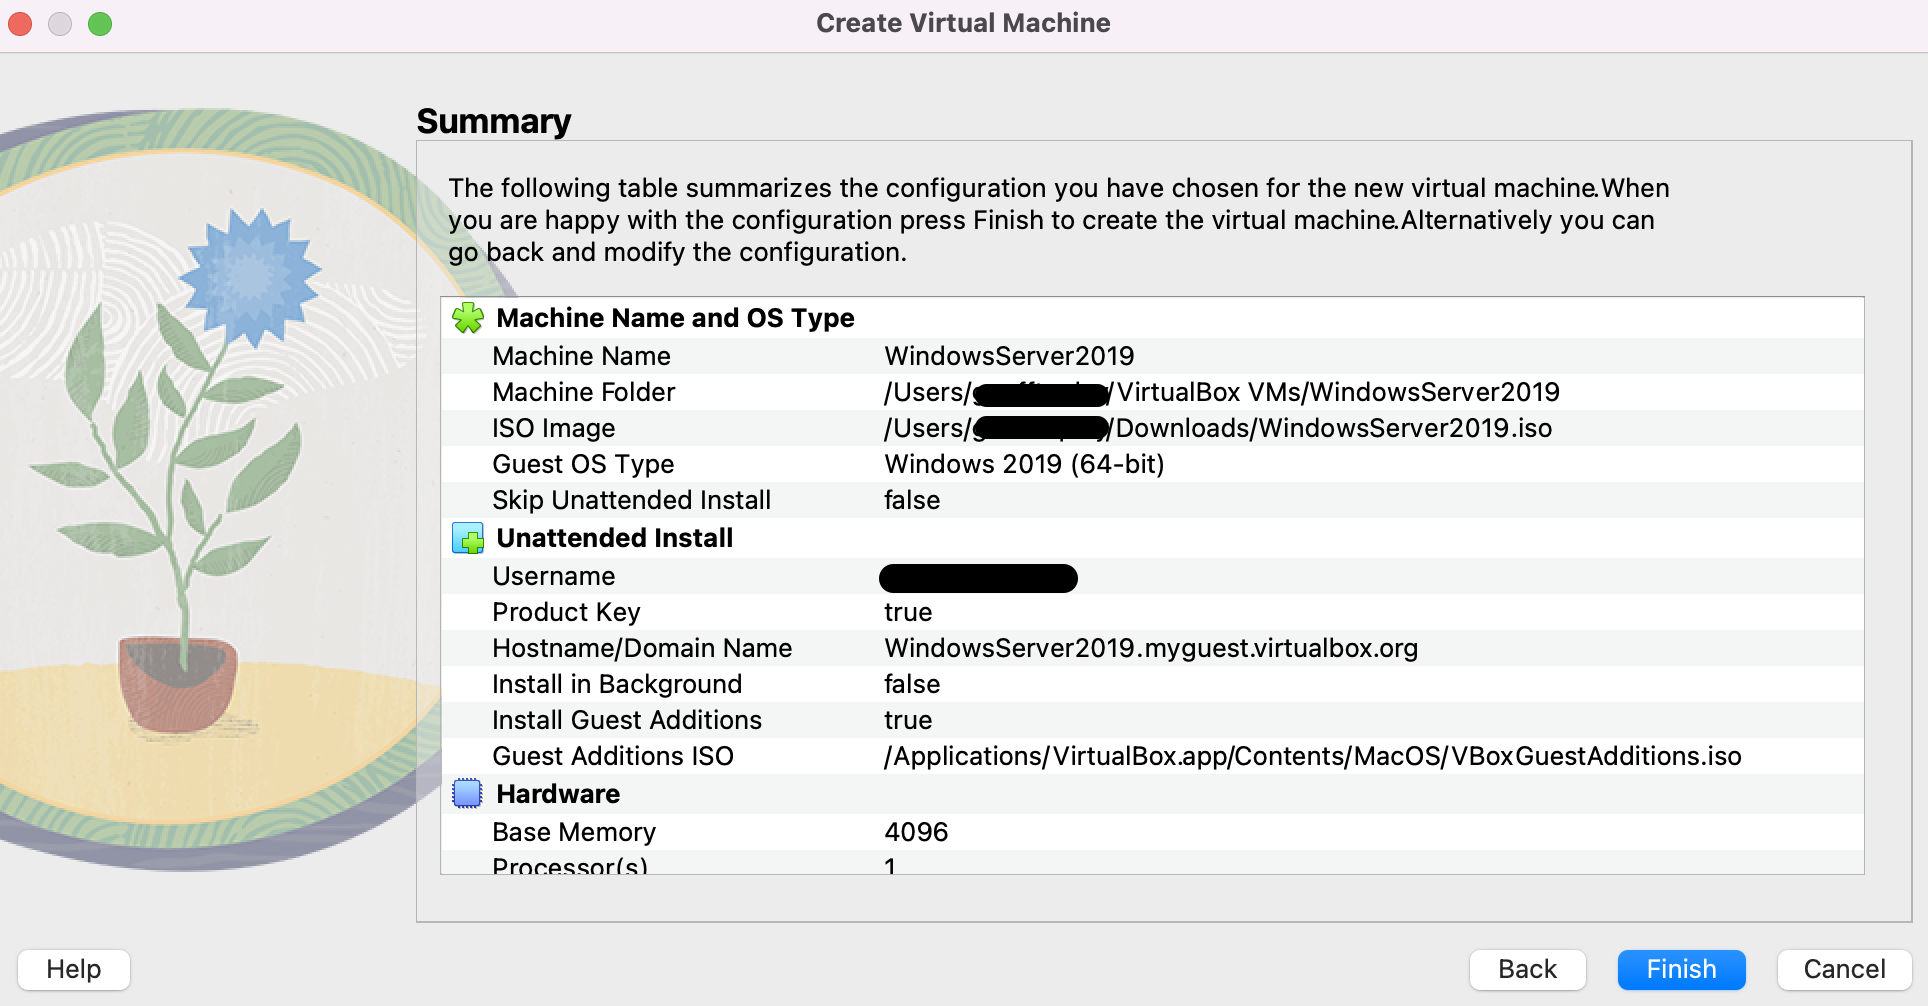
- Review the settings and click 'Finish'
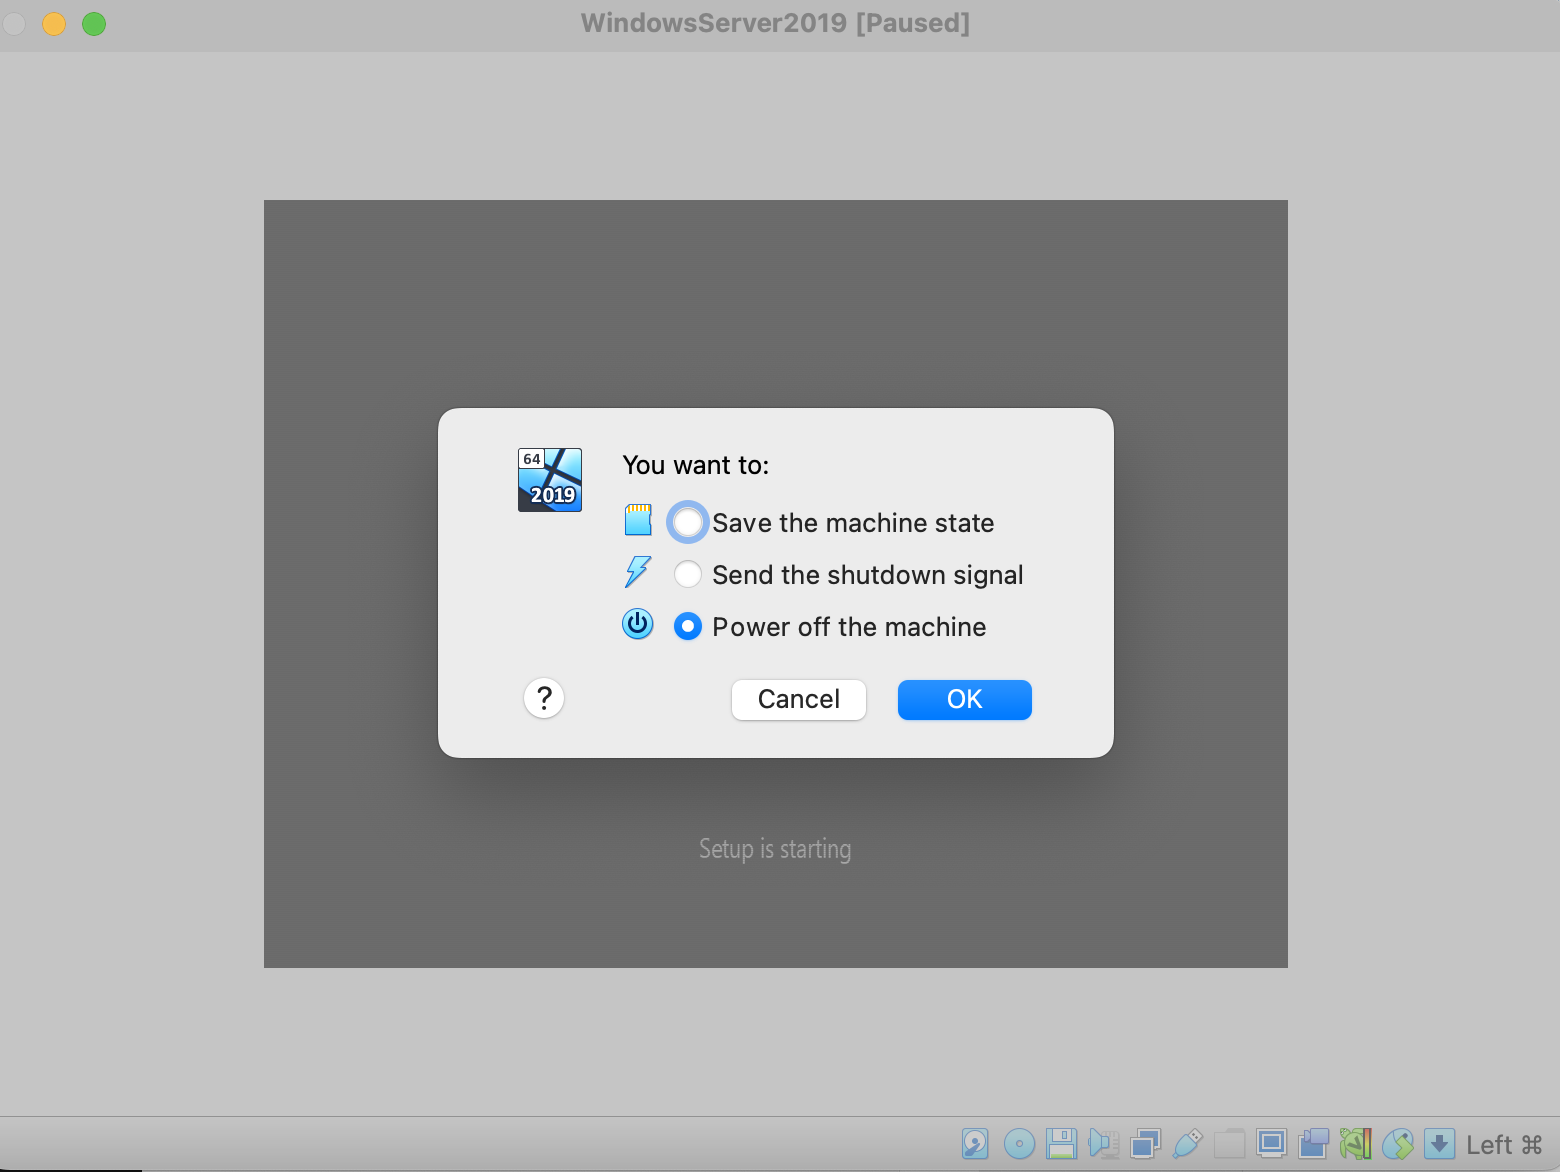
- Upon clicking 'Finish' the Windows Server 2019 machine may attempt to auto-start. Close the browser tab and select 'Power off the machine' as there are some last additional settings to configure
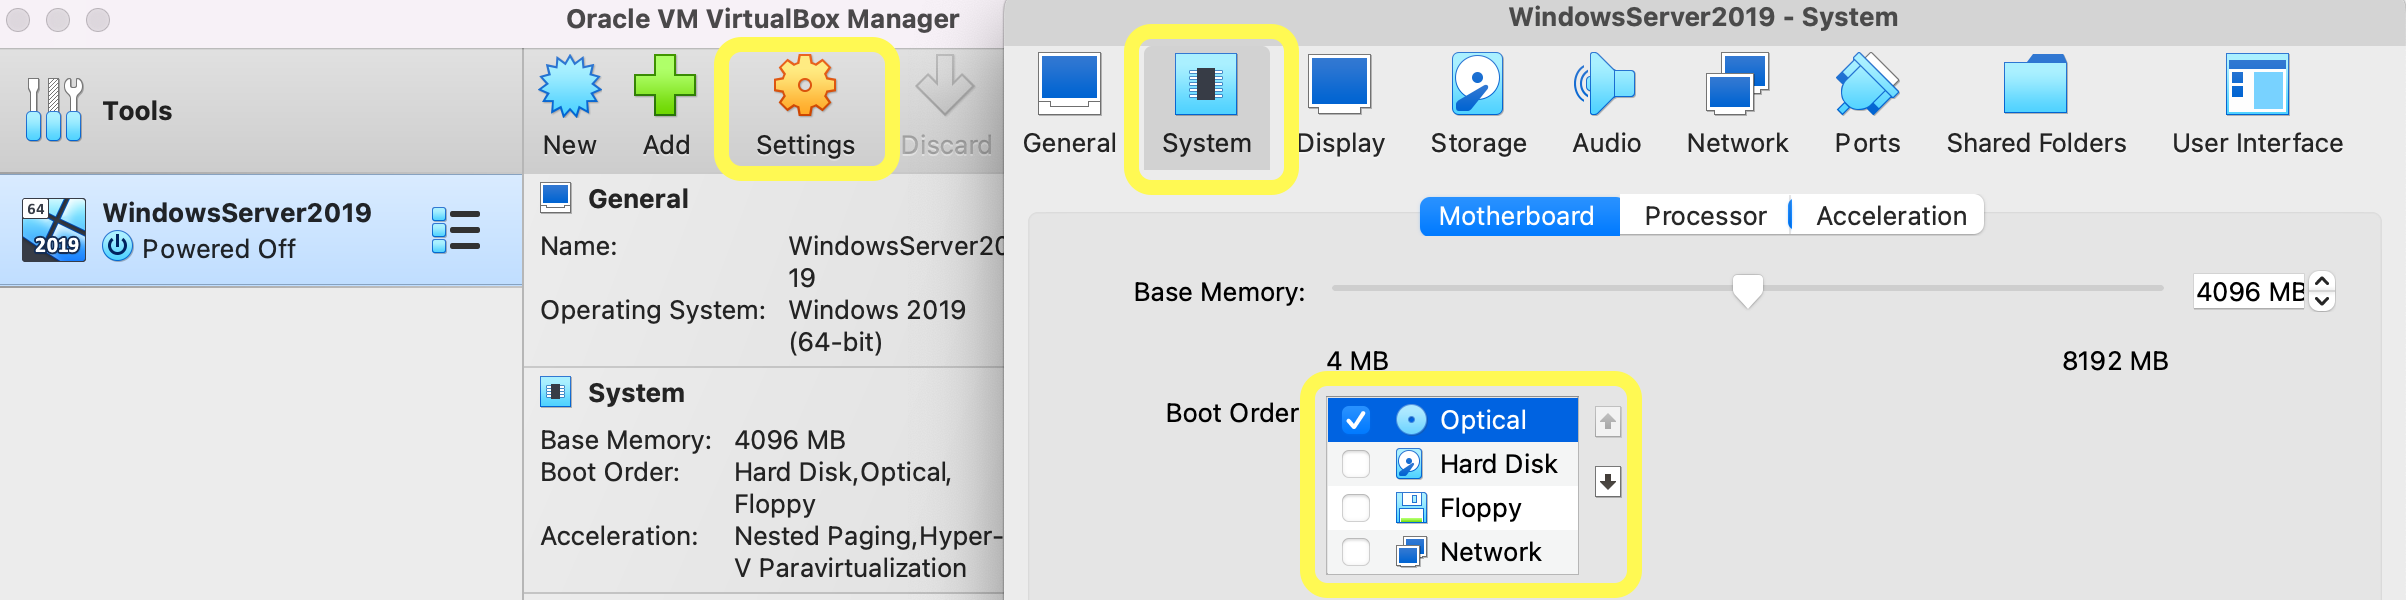
- In VirtualBox click on 'Settings'. Then click the 'System' tab and ensure 'Optical' is chosen as the top selected Boot Order
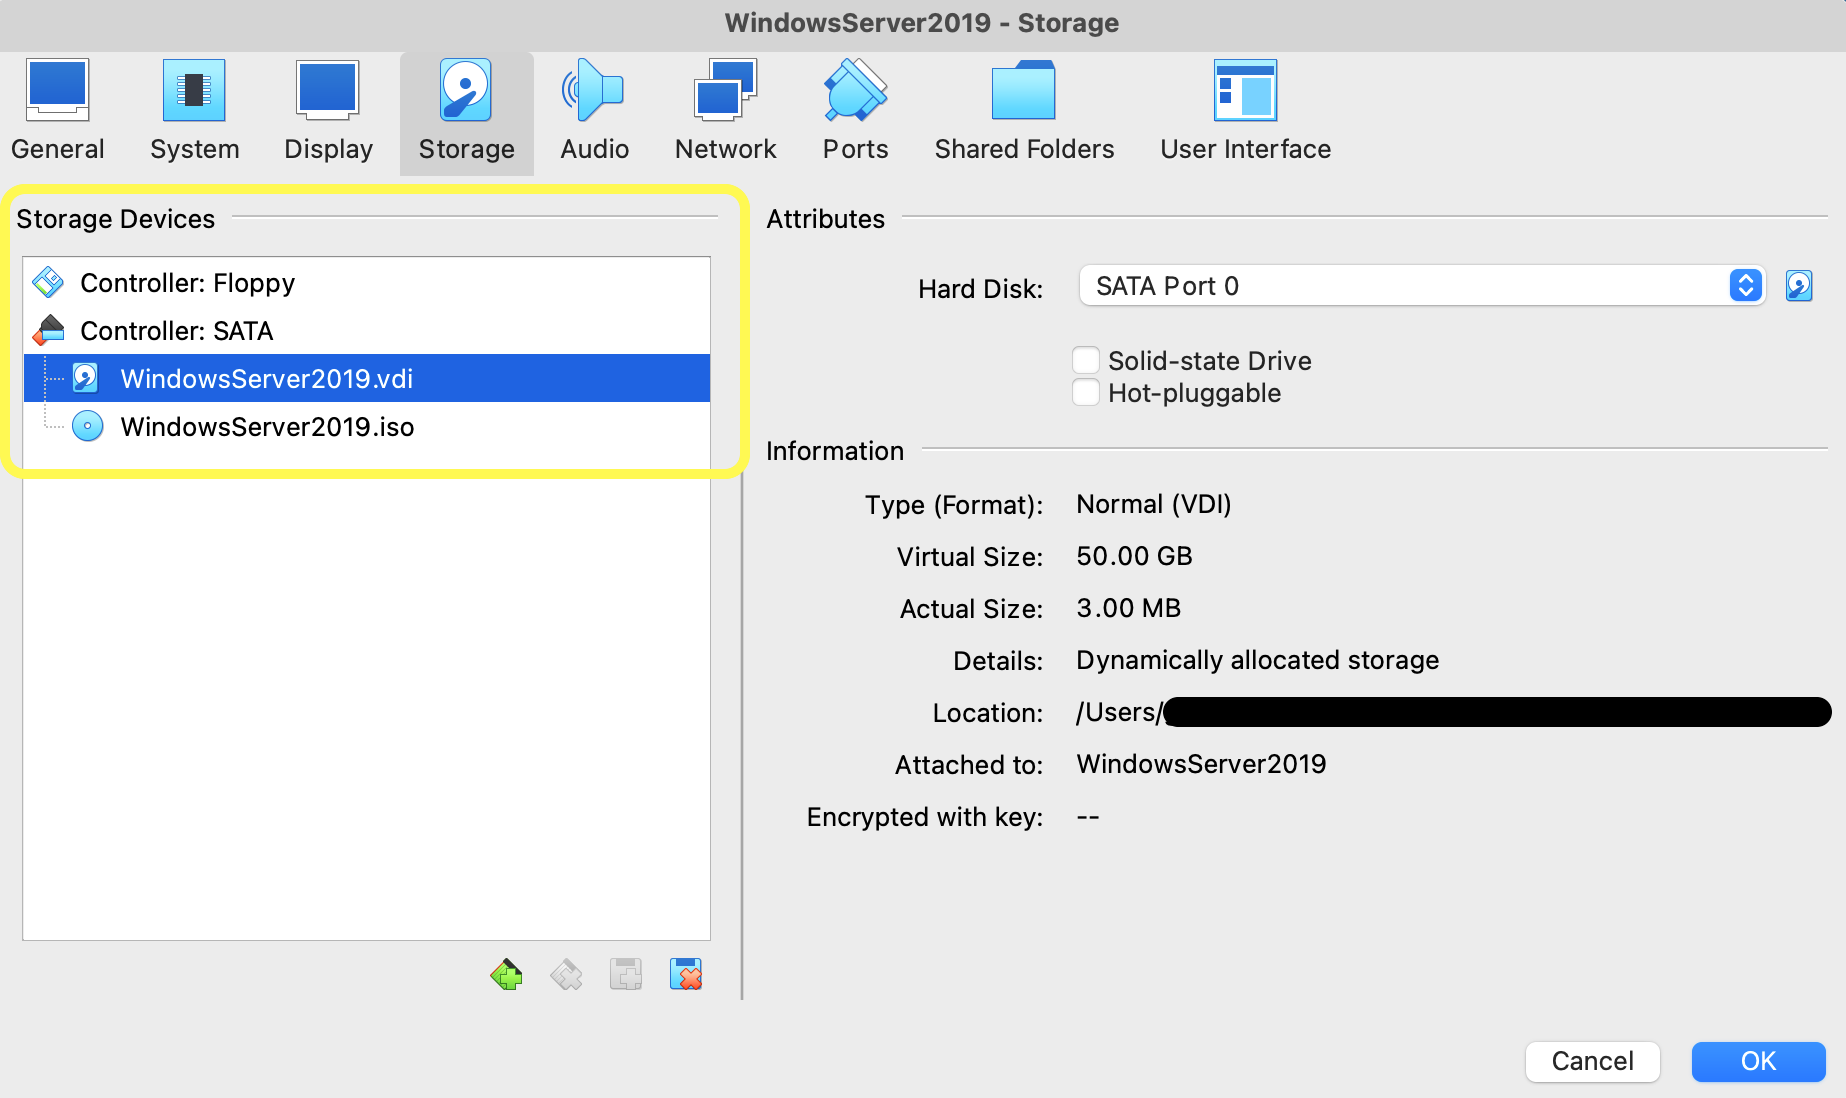
- On the 'Storage' tab configure Storage Devices leaving only the .vdi and .iso controllers
Part 4: Set up and boot Windows Server 2019
Introduction
Now that Windows Server 2019 is configured on VirtualBox it can be booted
Steps to set up and boot Windows 2019 Server
- Open VirtualBox and Click on the 'Start' icon A successful start-up will lead to the below screen. Choose your applicable settings, click 'Next' and then the 'Install Now' button when it appears
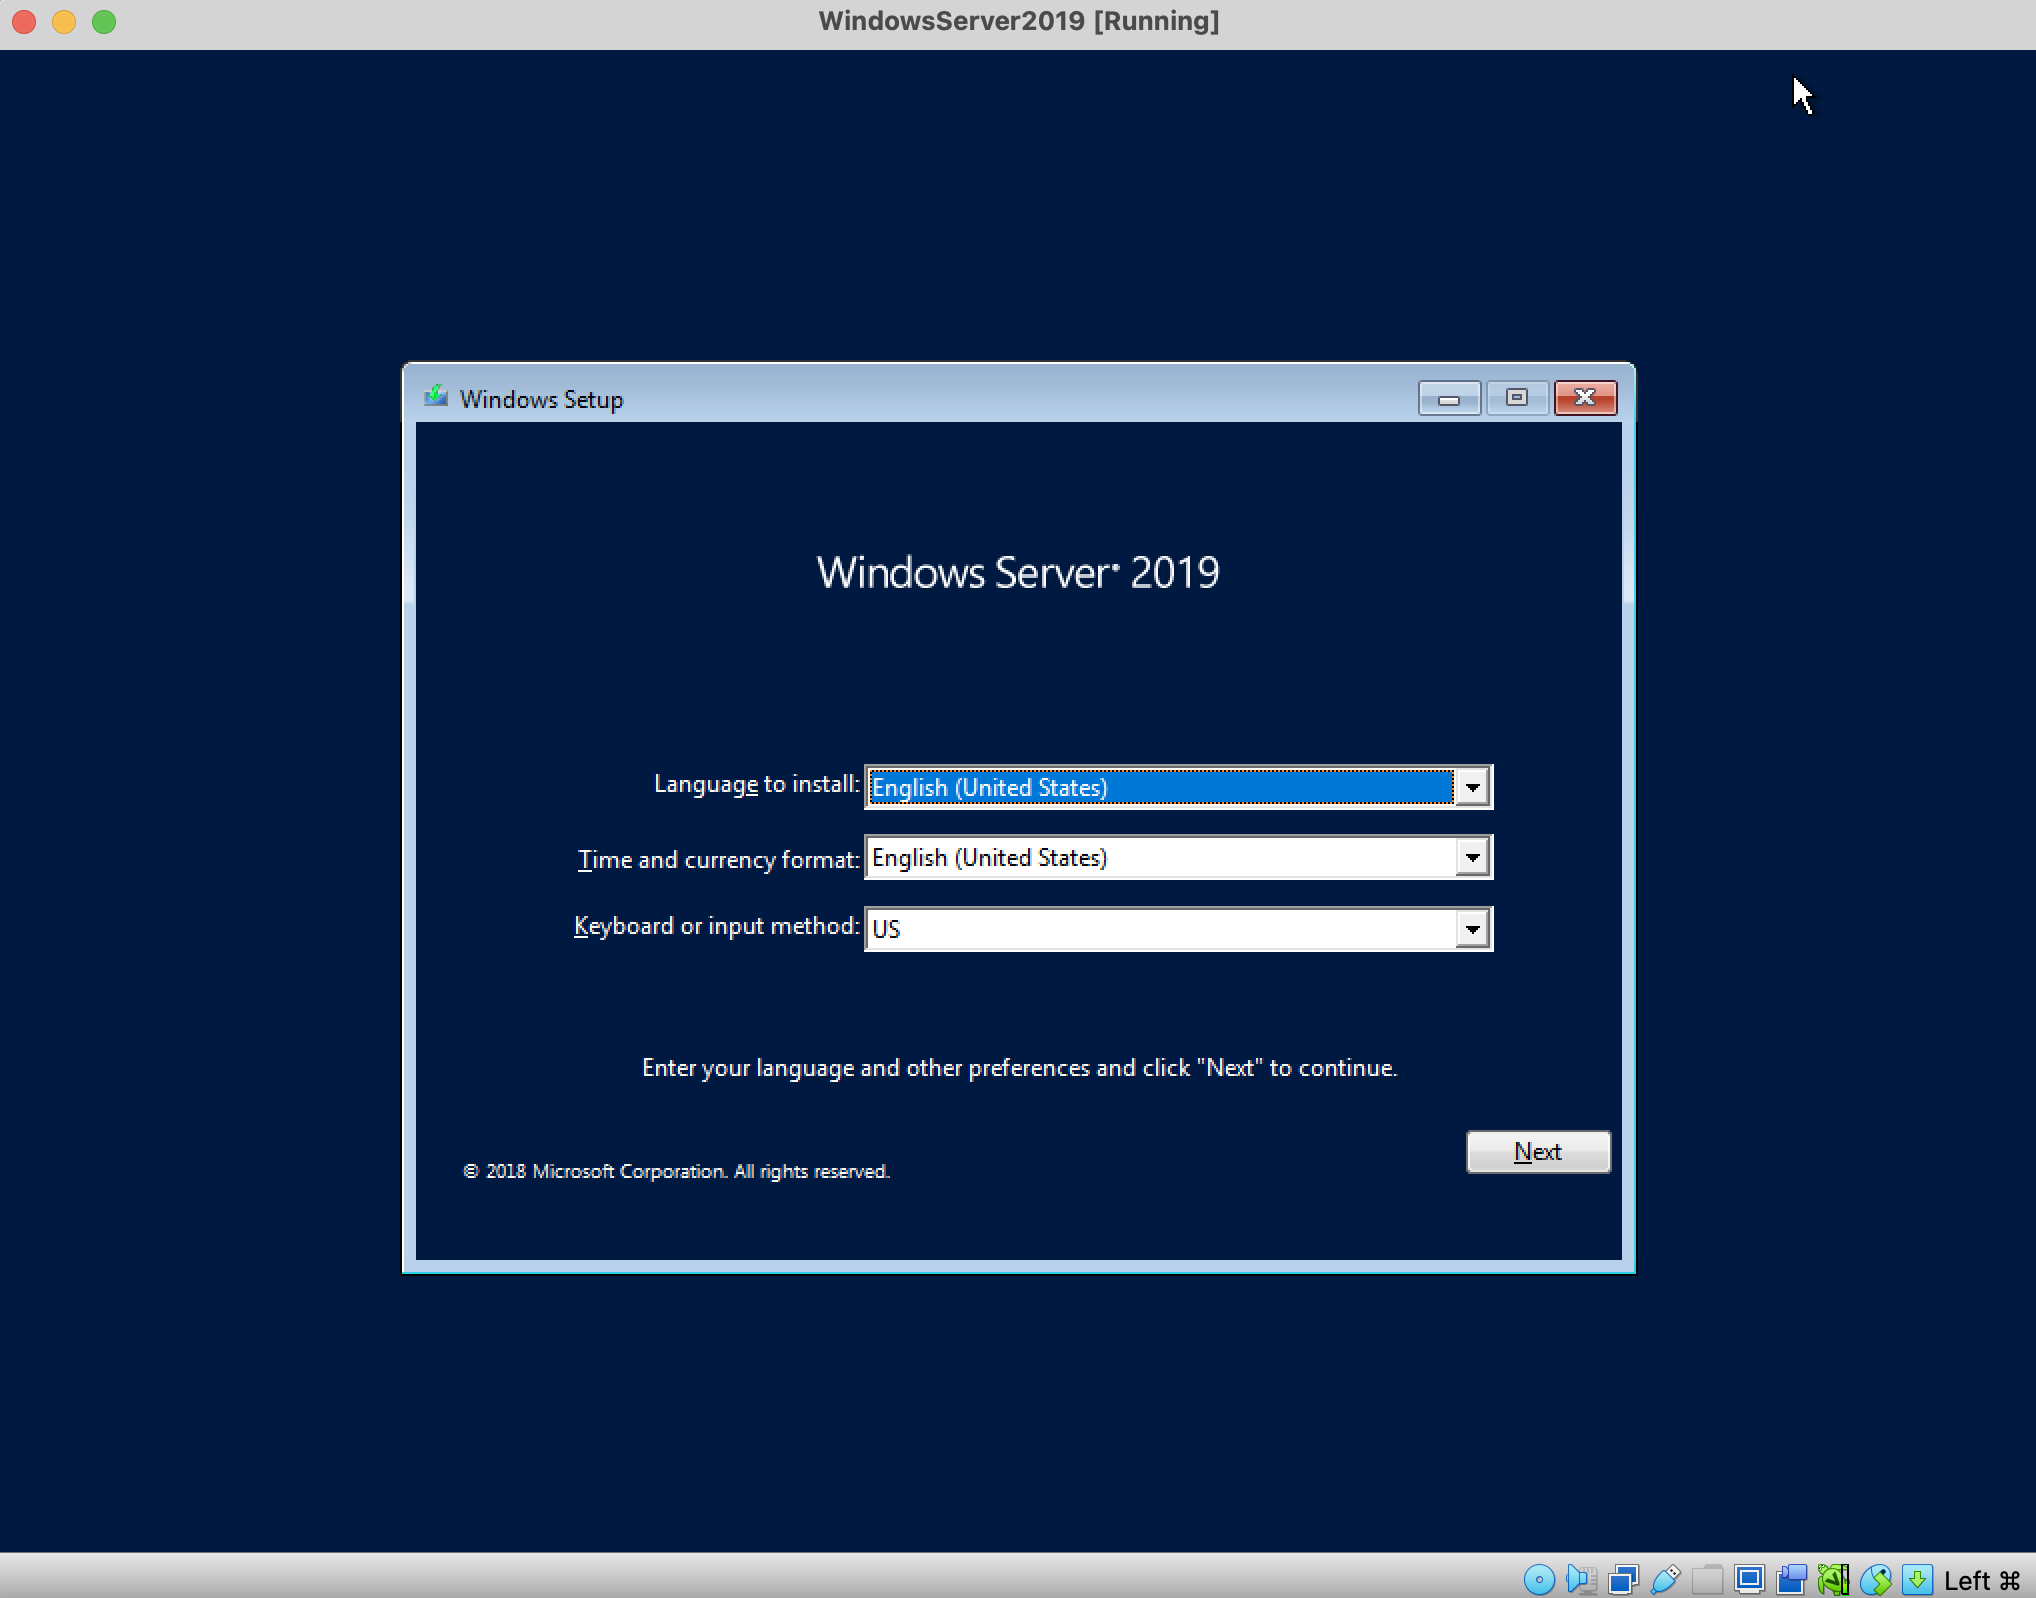
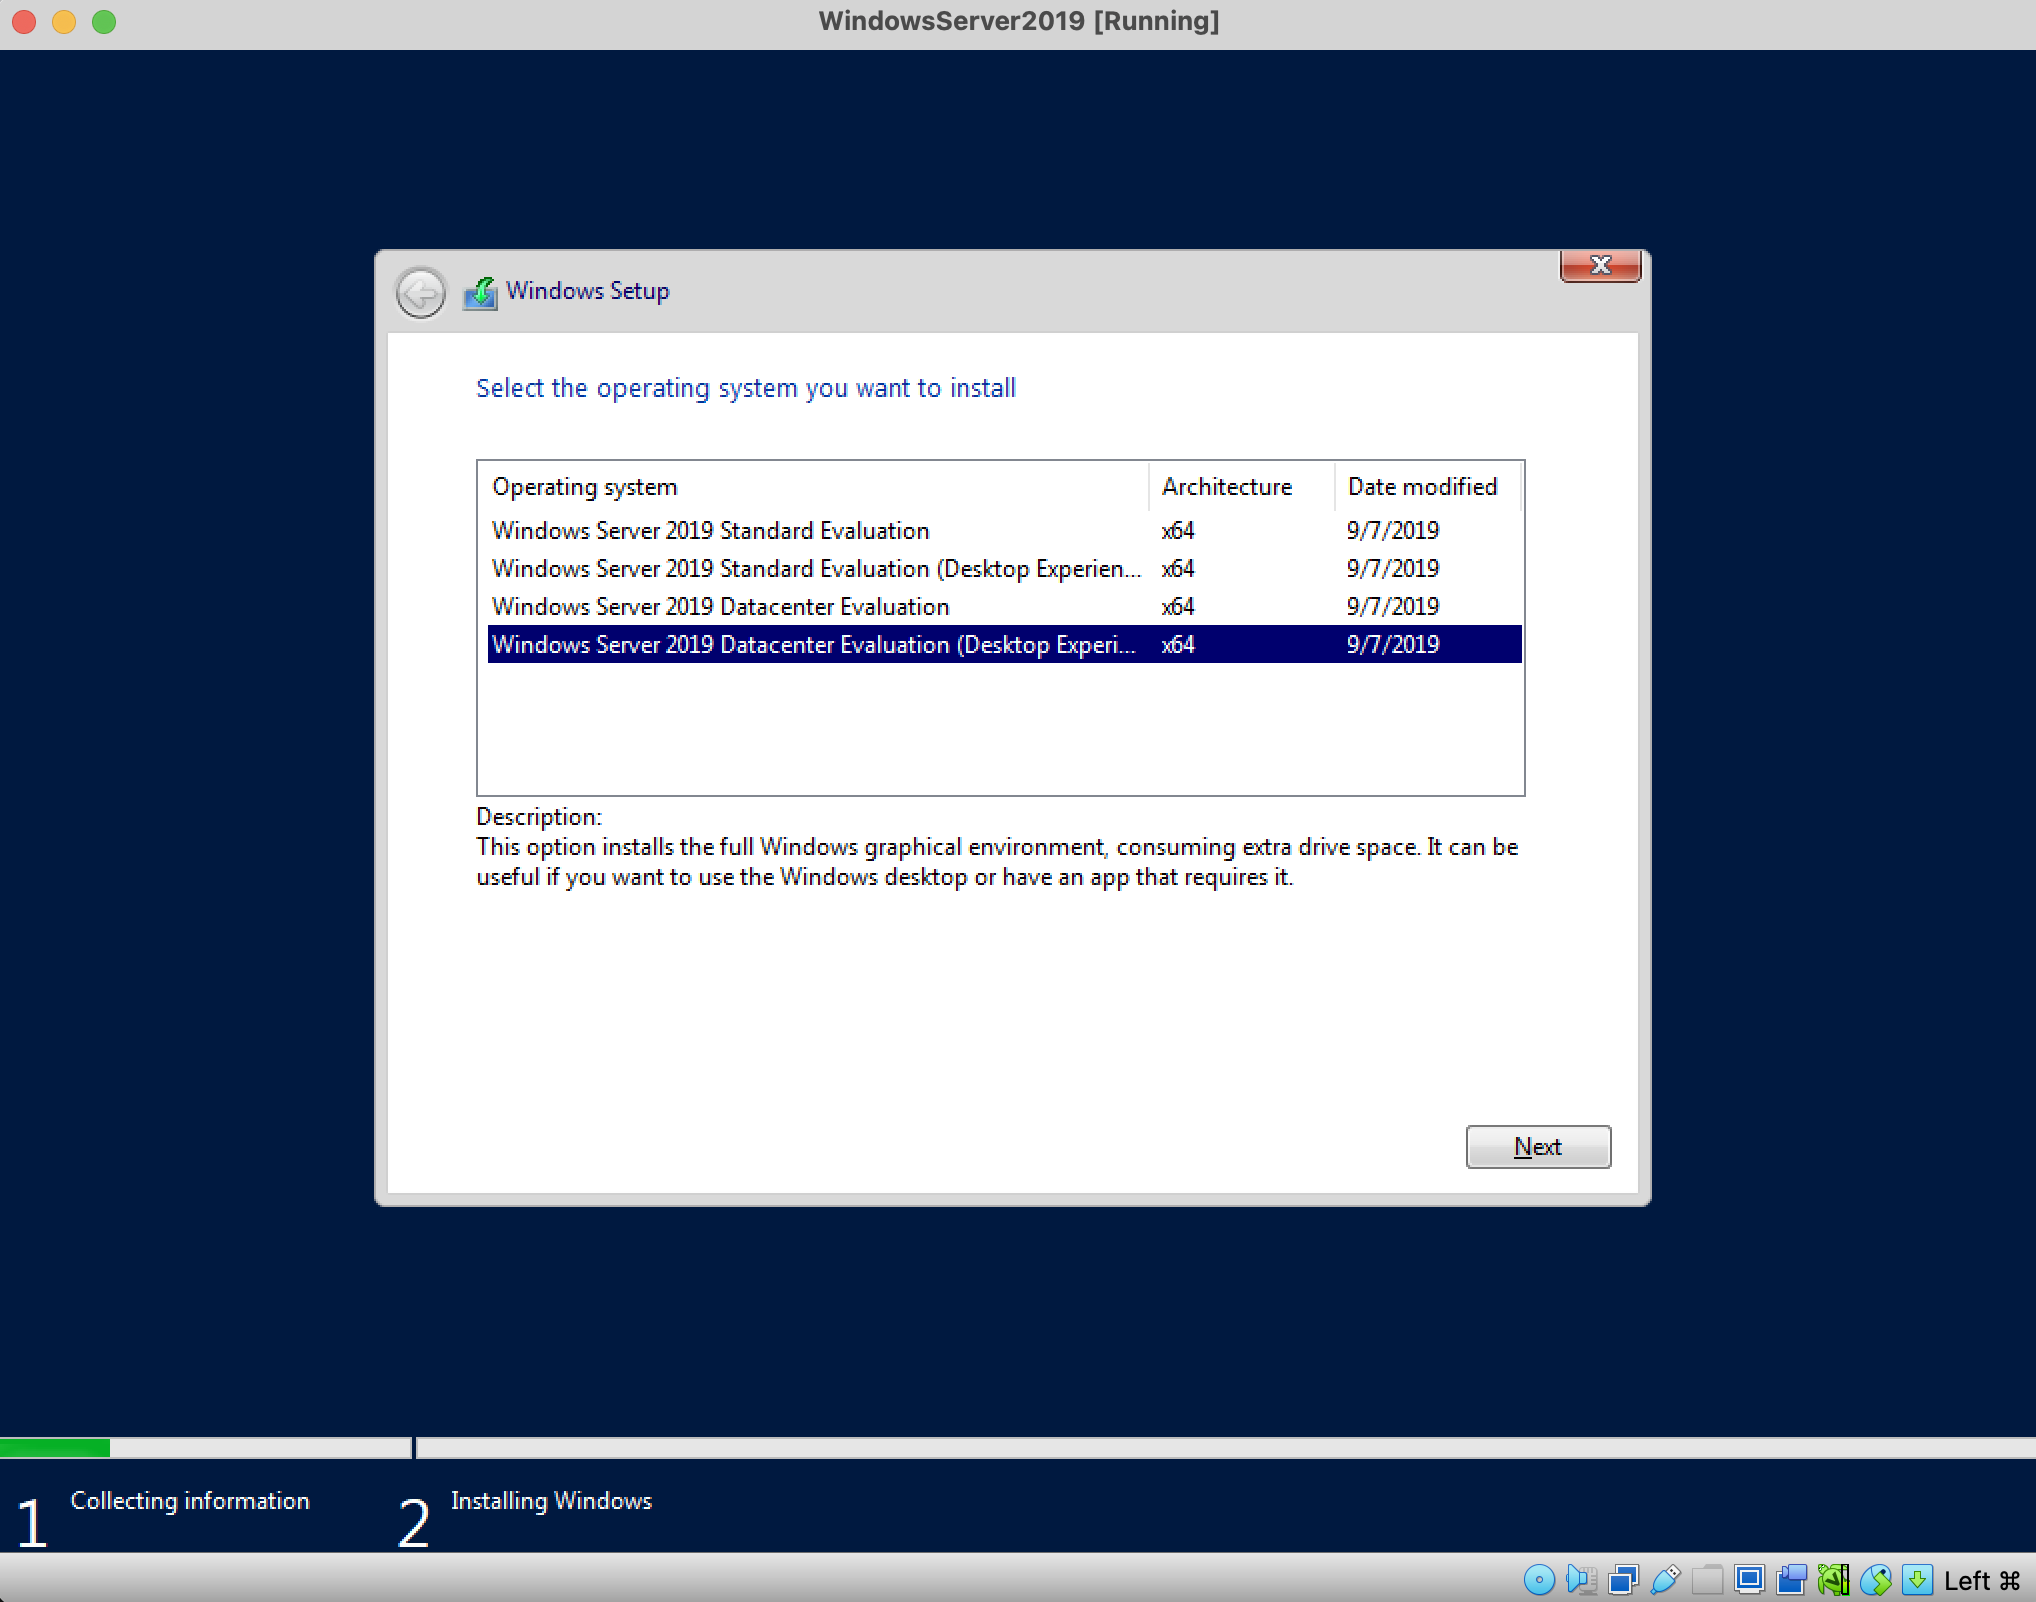
- Choose the operating system you want to install. This article demonstrates the Data Center Evaluation (Desktop Experience). Then on the following screen accept the applicable notices and license terms
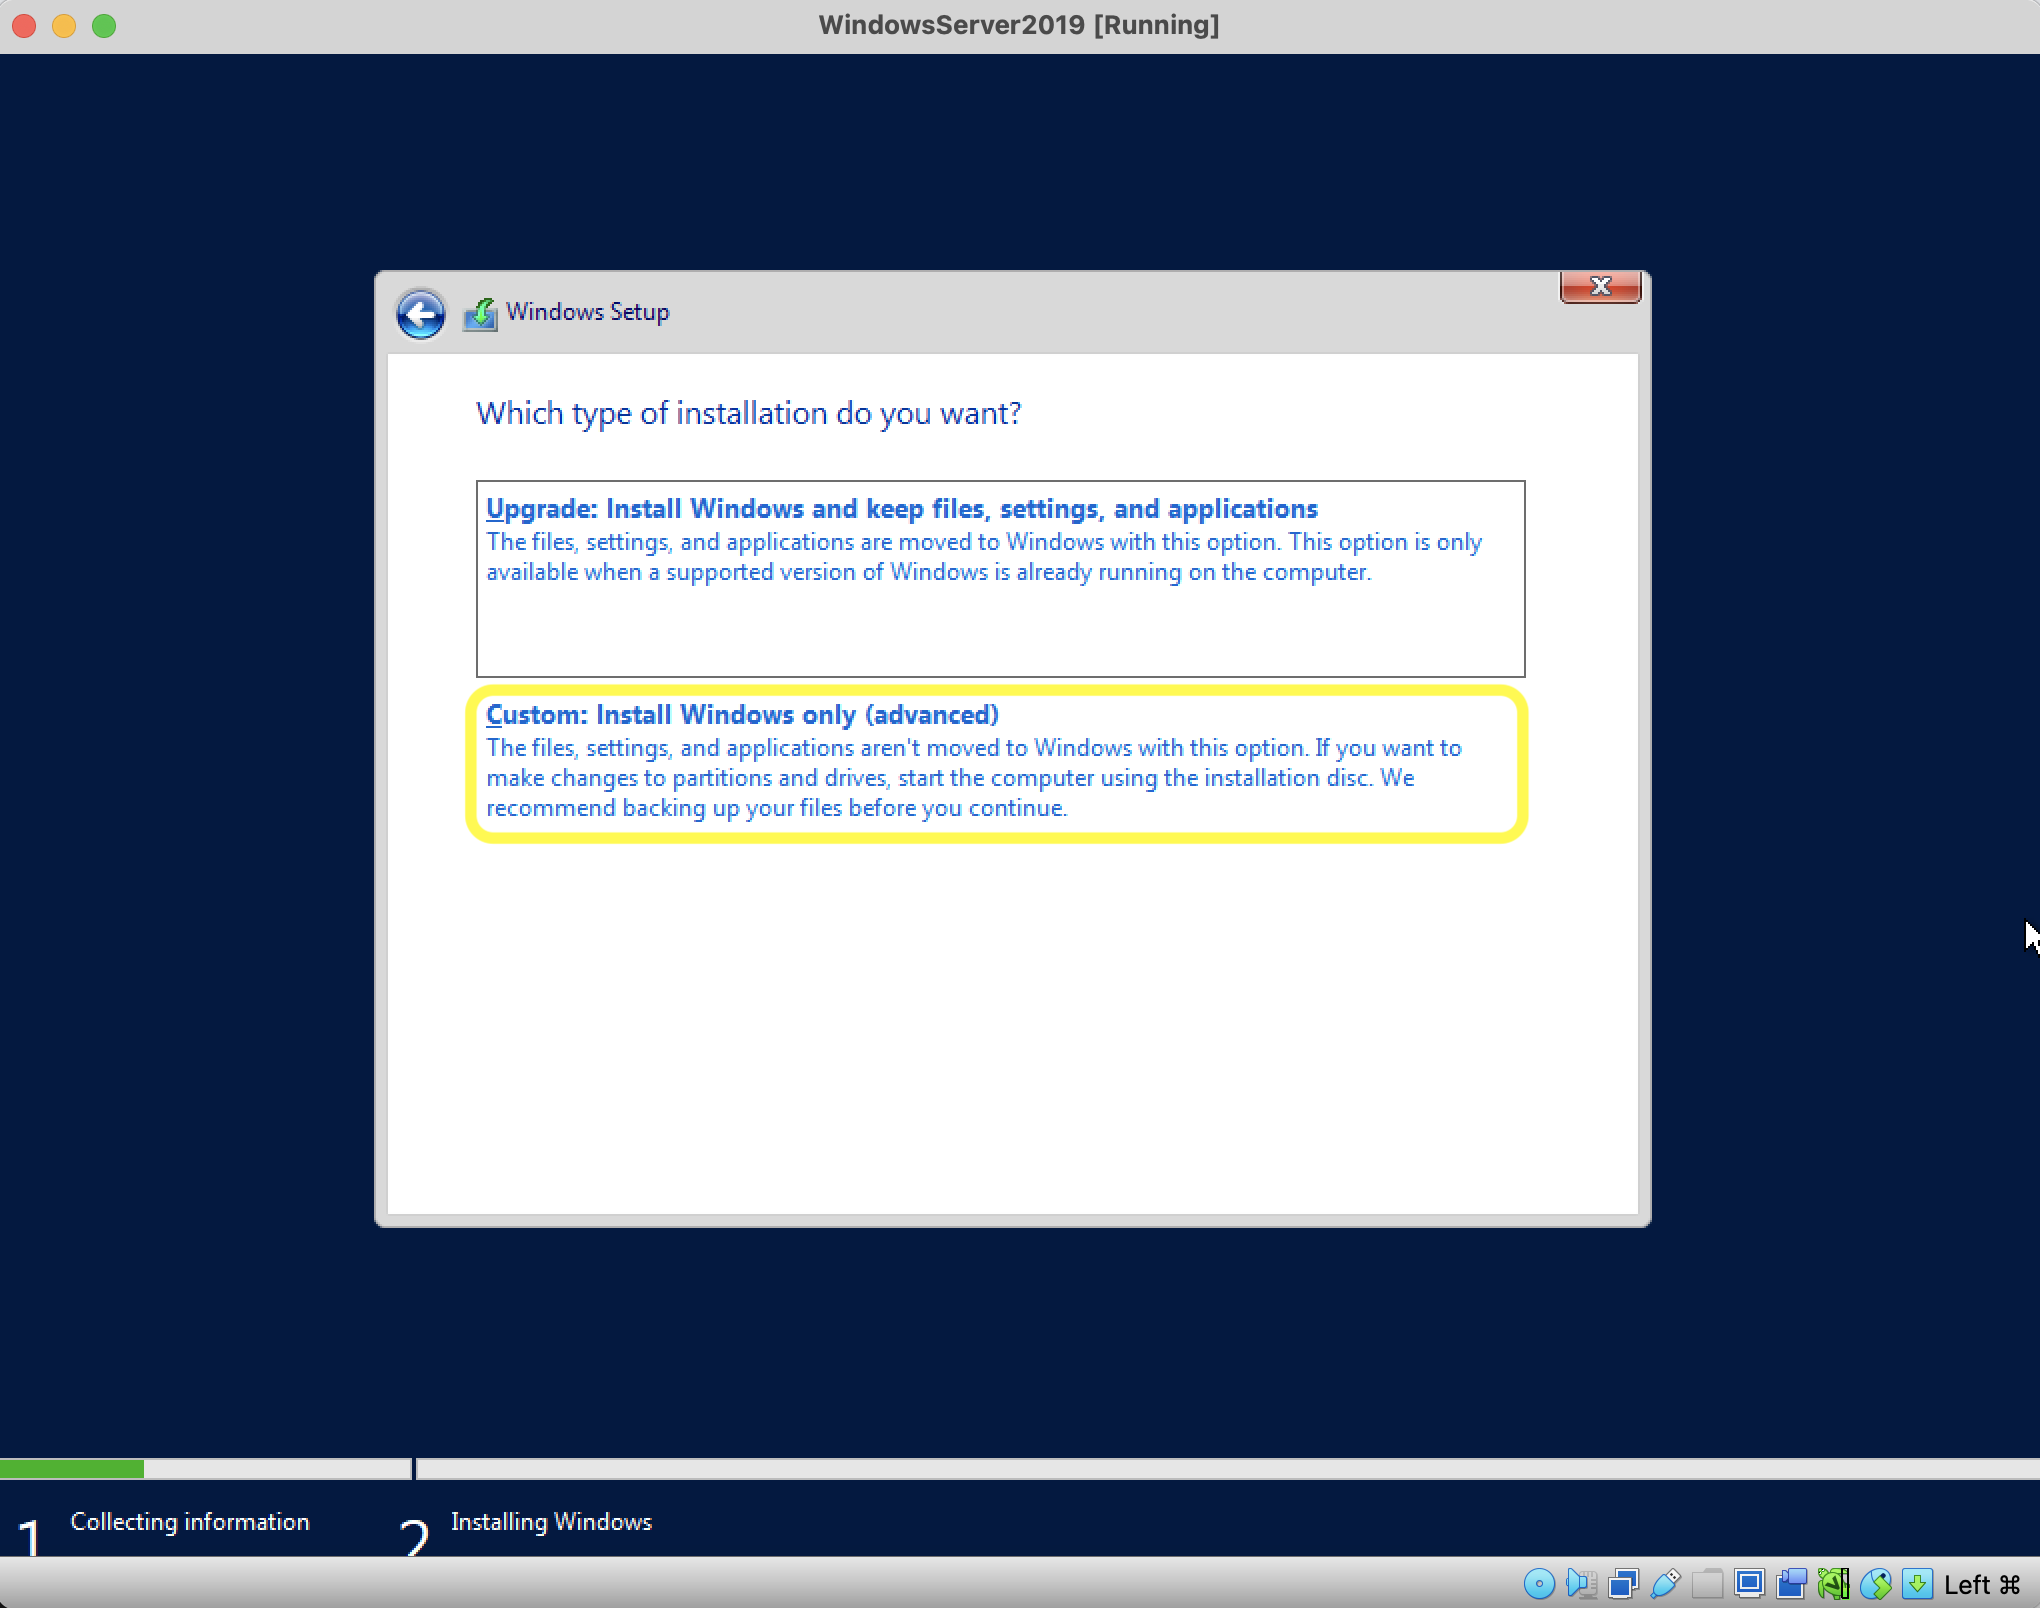
- Choose the type of installation. This article demonstrates the Custom option
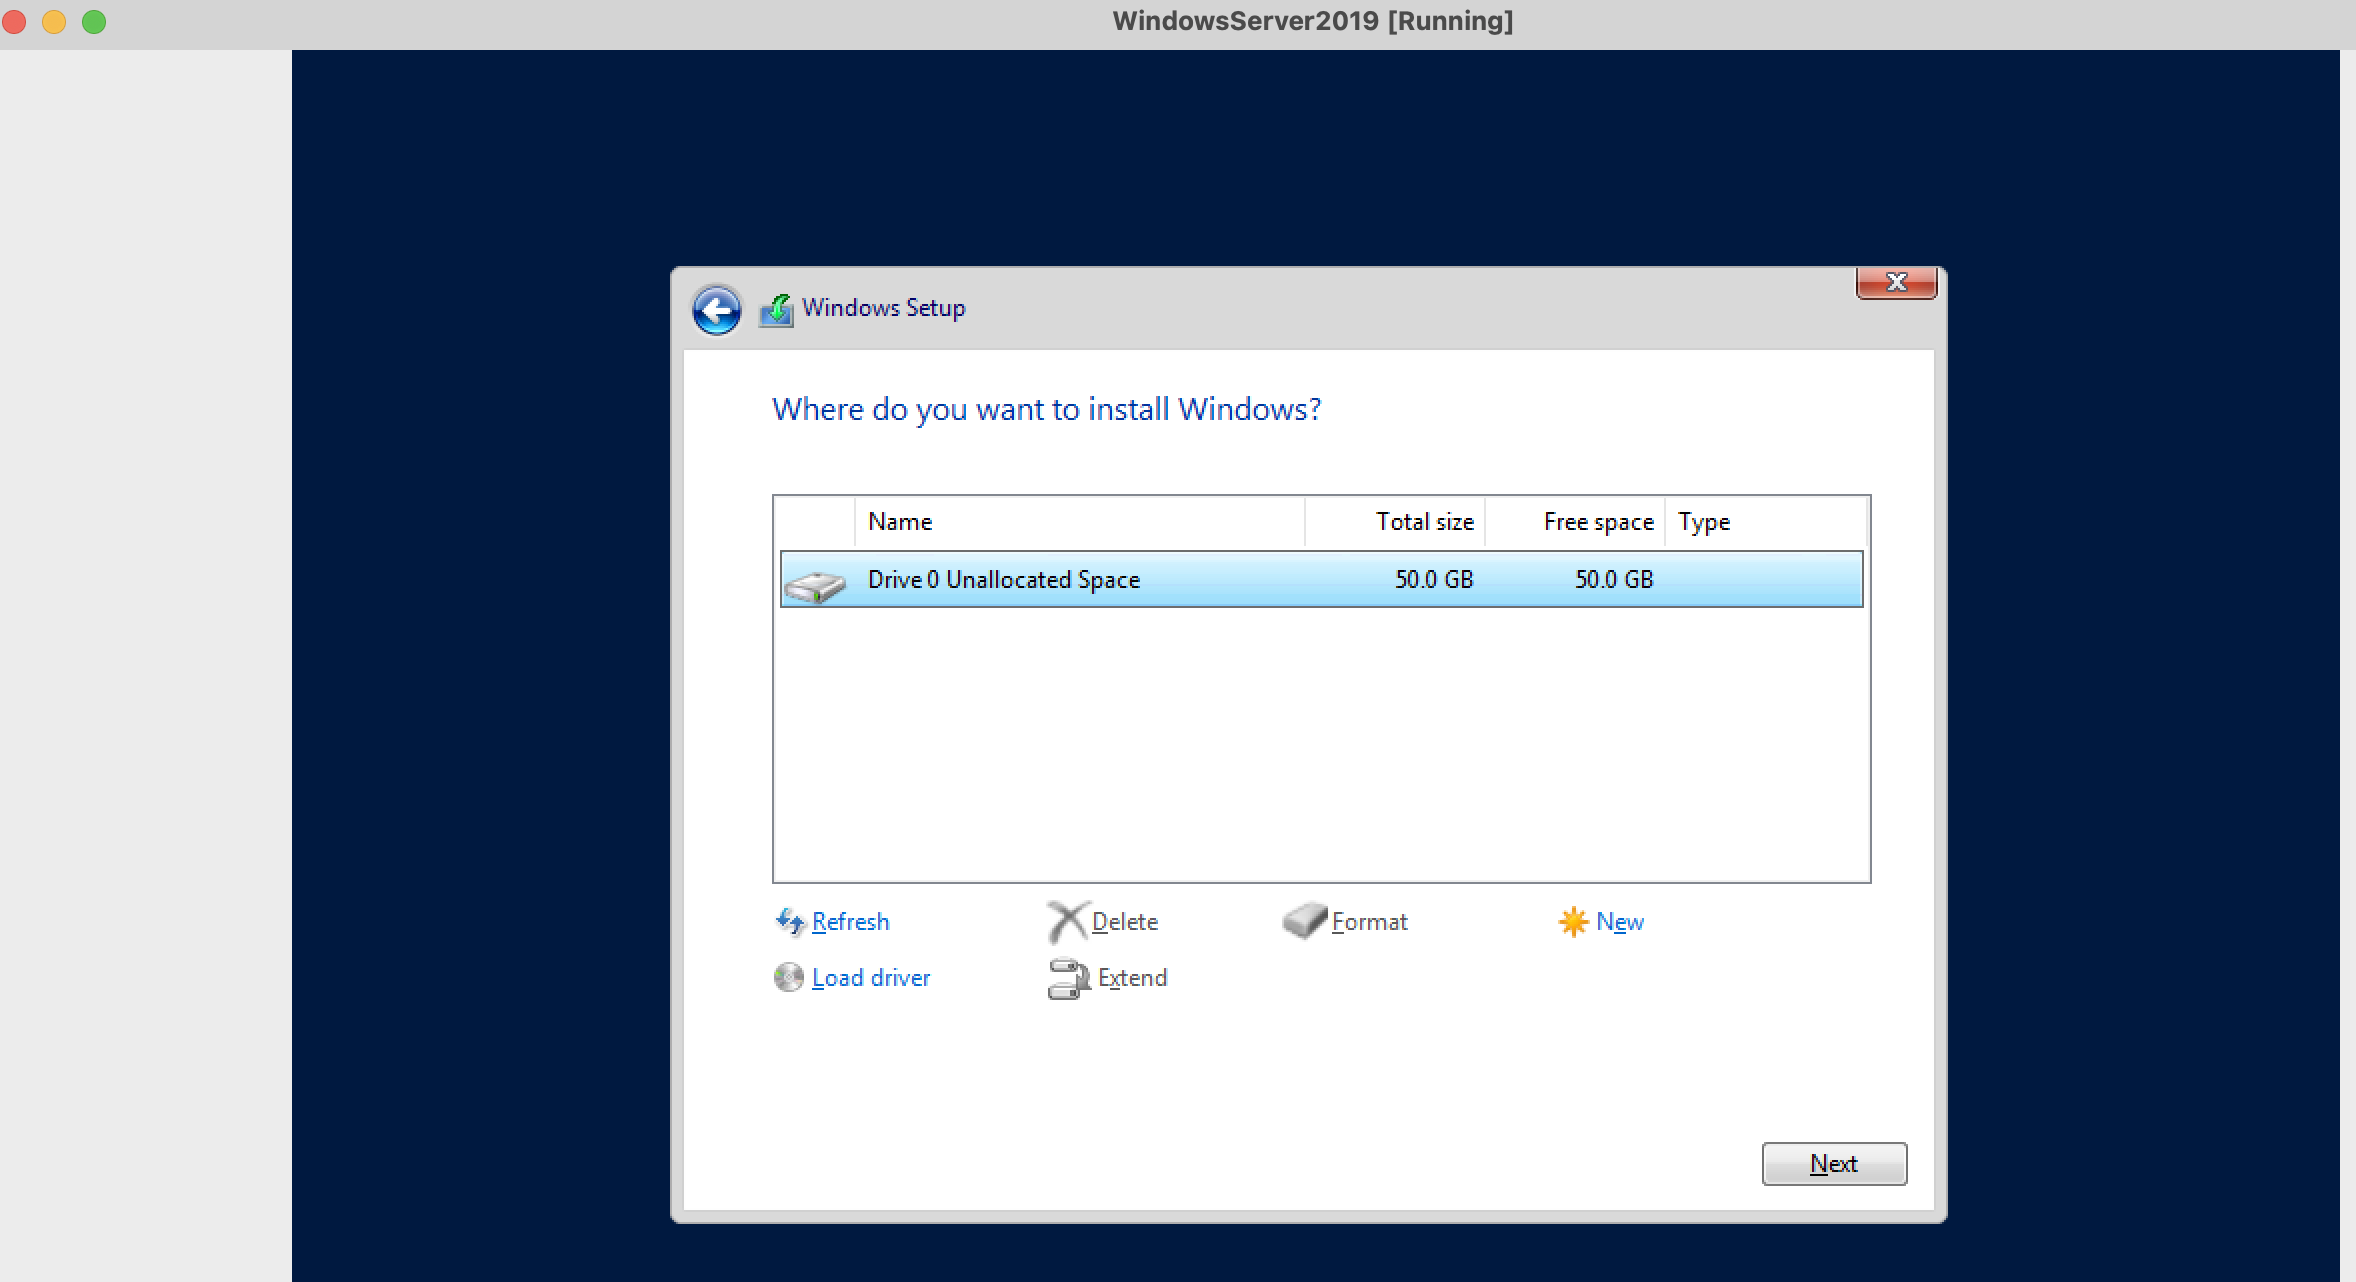
- Click 'Next' on the following screen to install Windows on the Virtual Hard disk previously configured (Part 3). This kicks off the installation process and a restart of the Windows OS
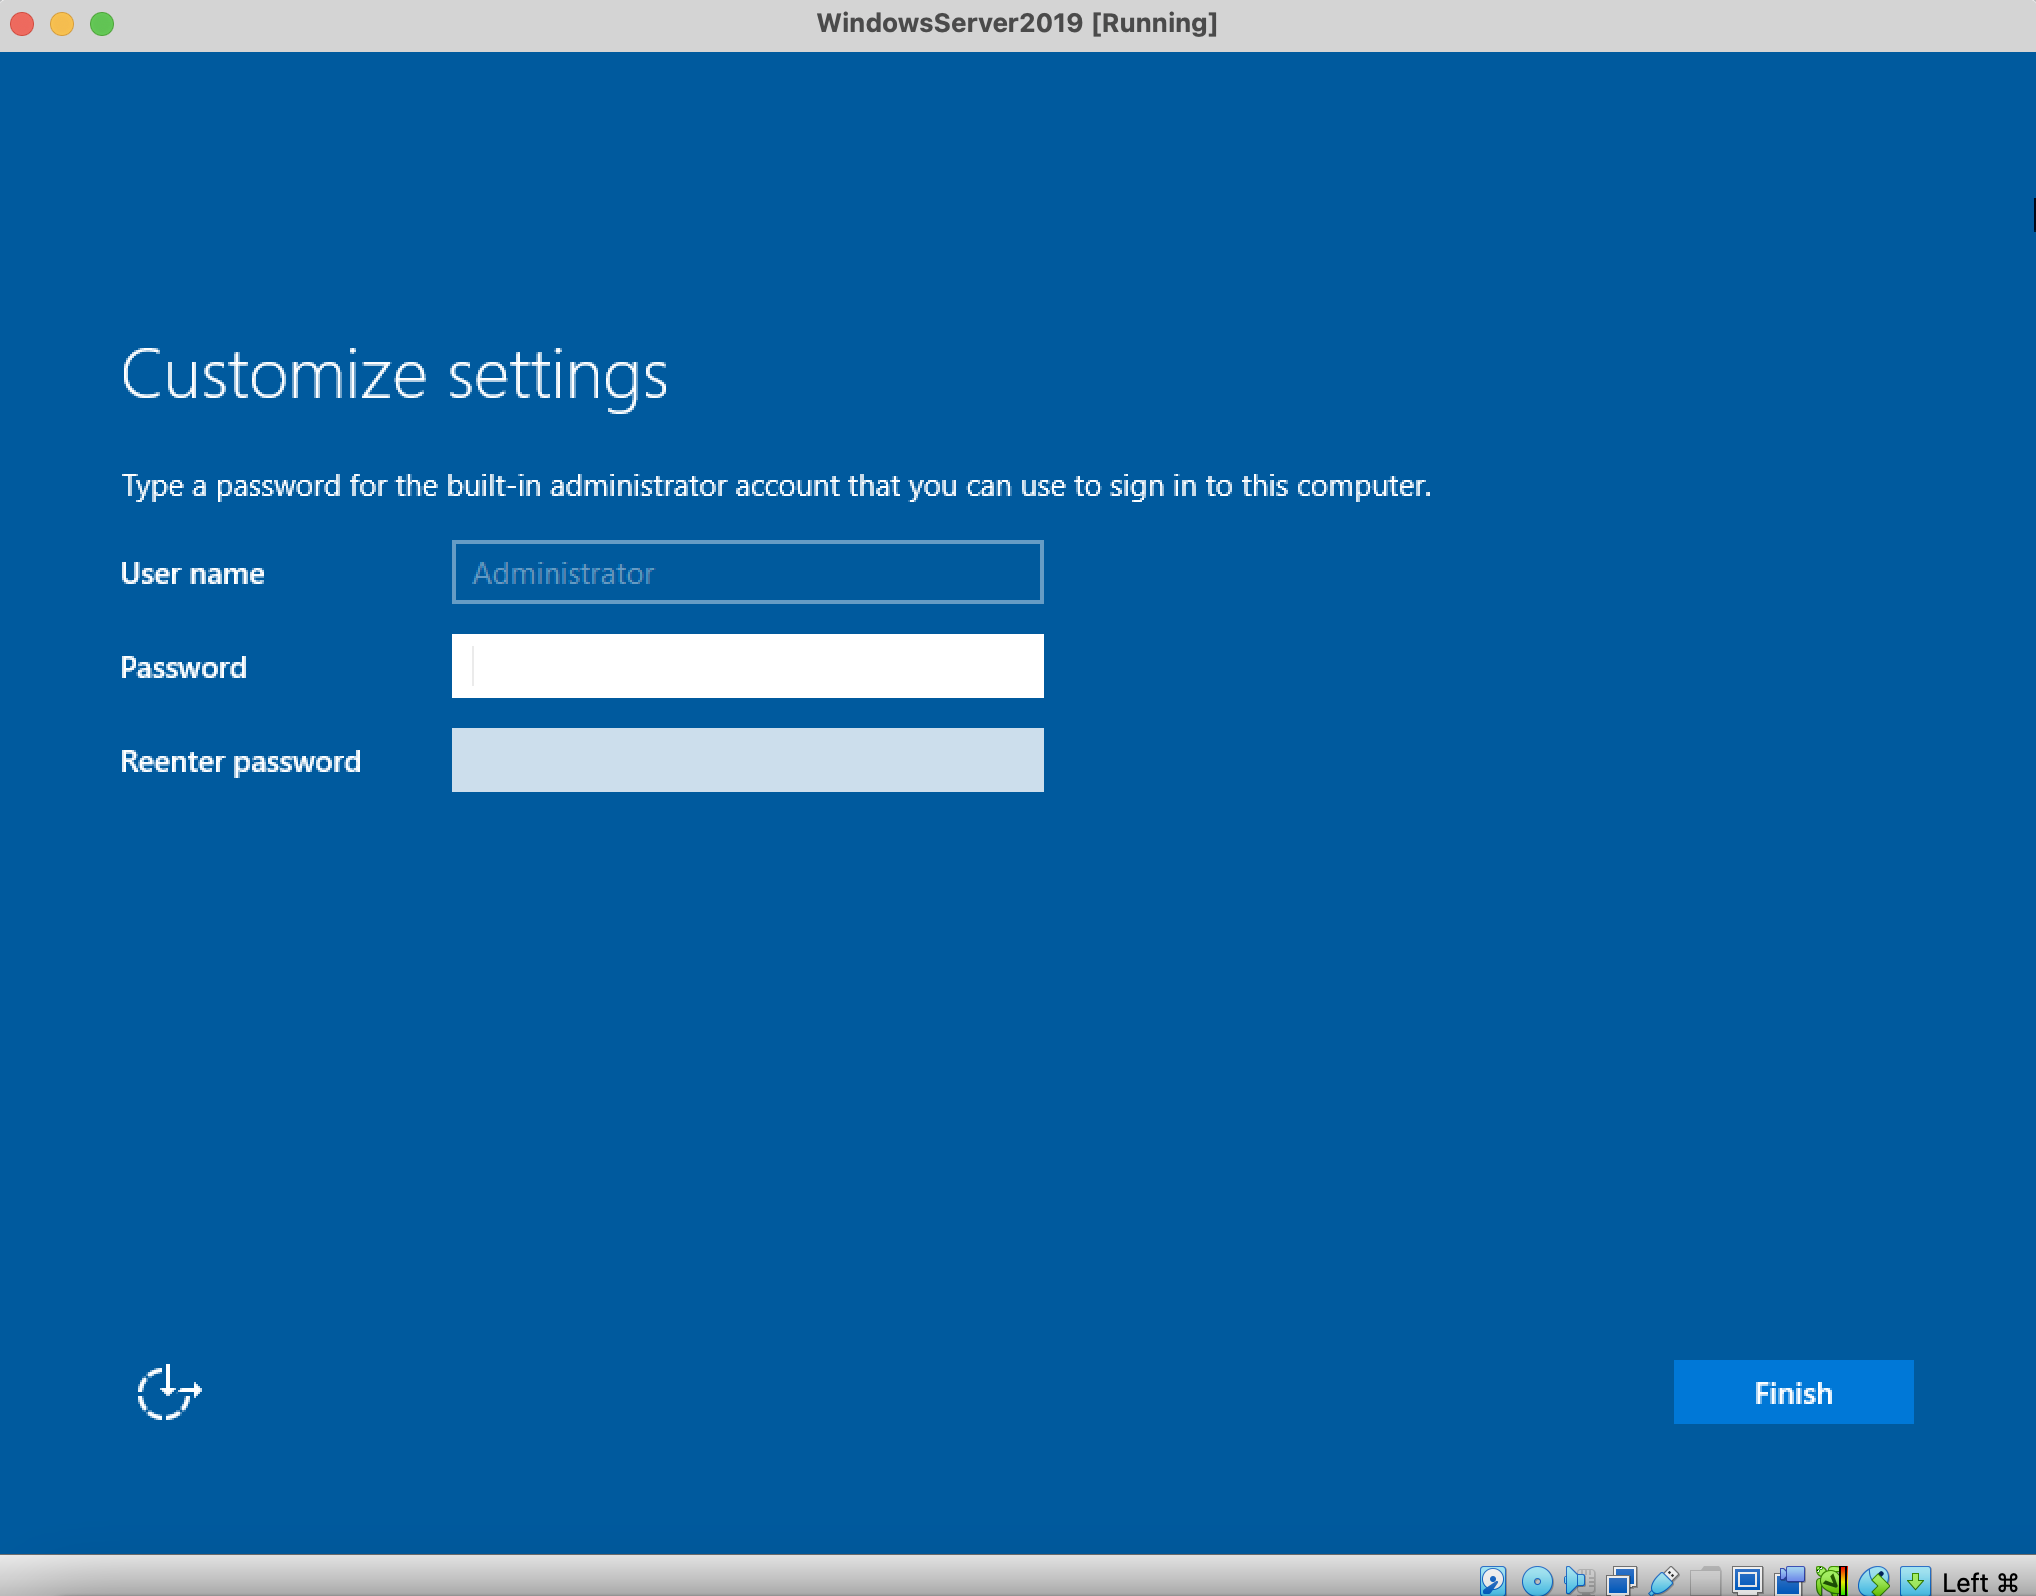
- After a couple of minutes, you will be prompted to complete a password for the System Administrator user. Then click 'Finish'
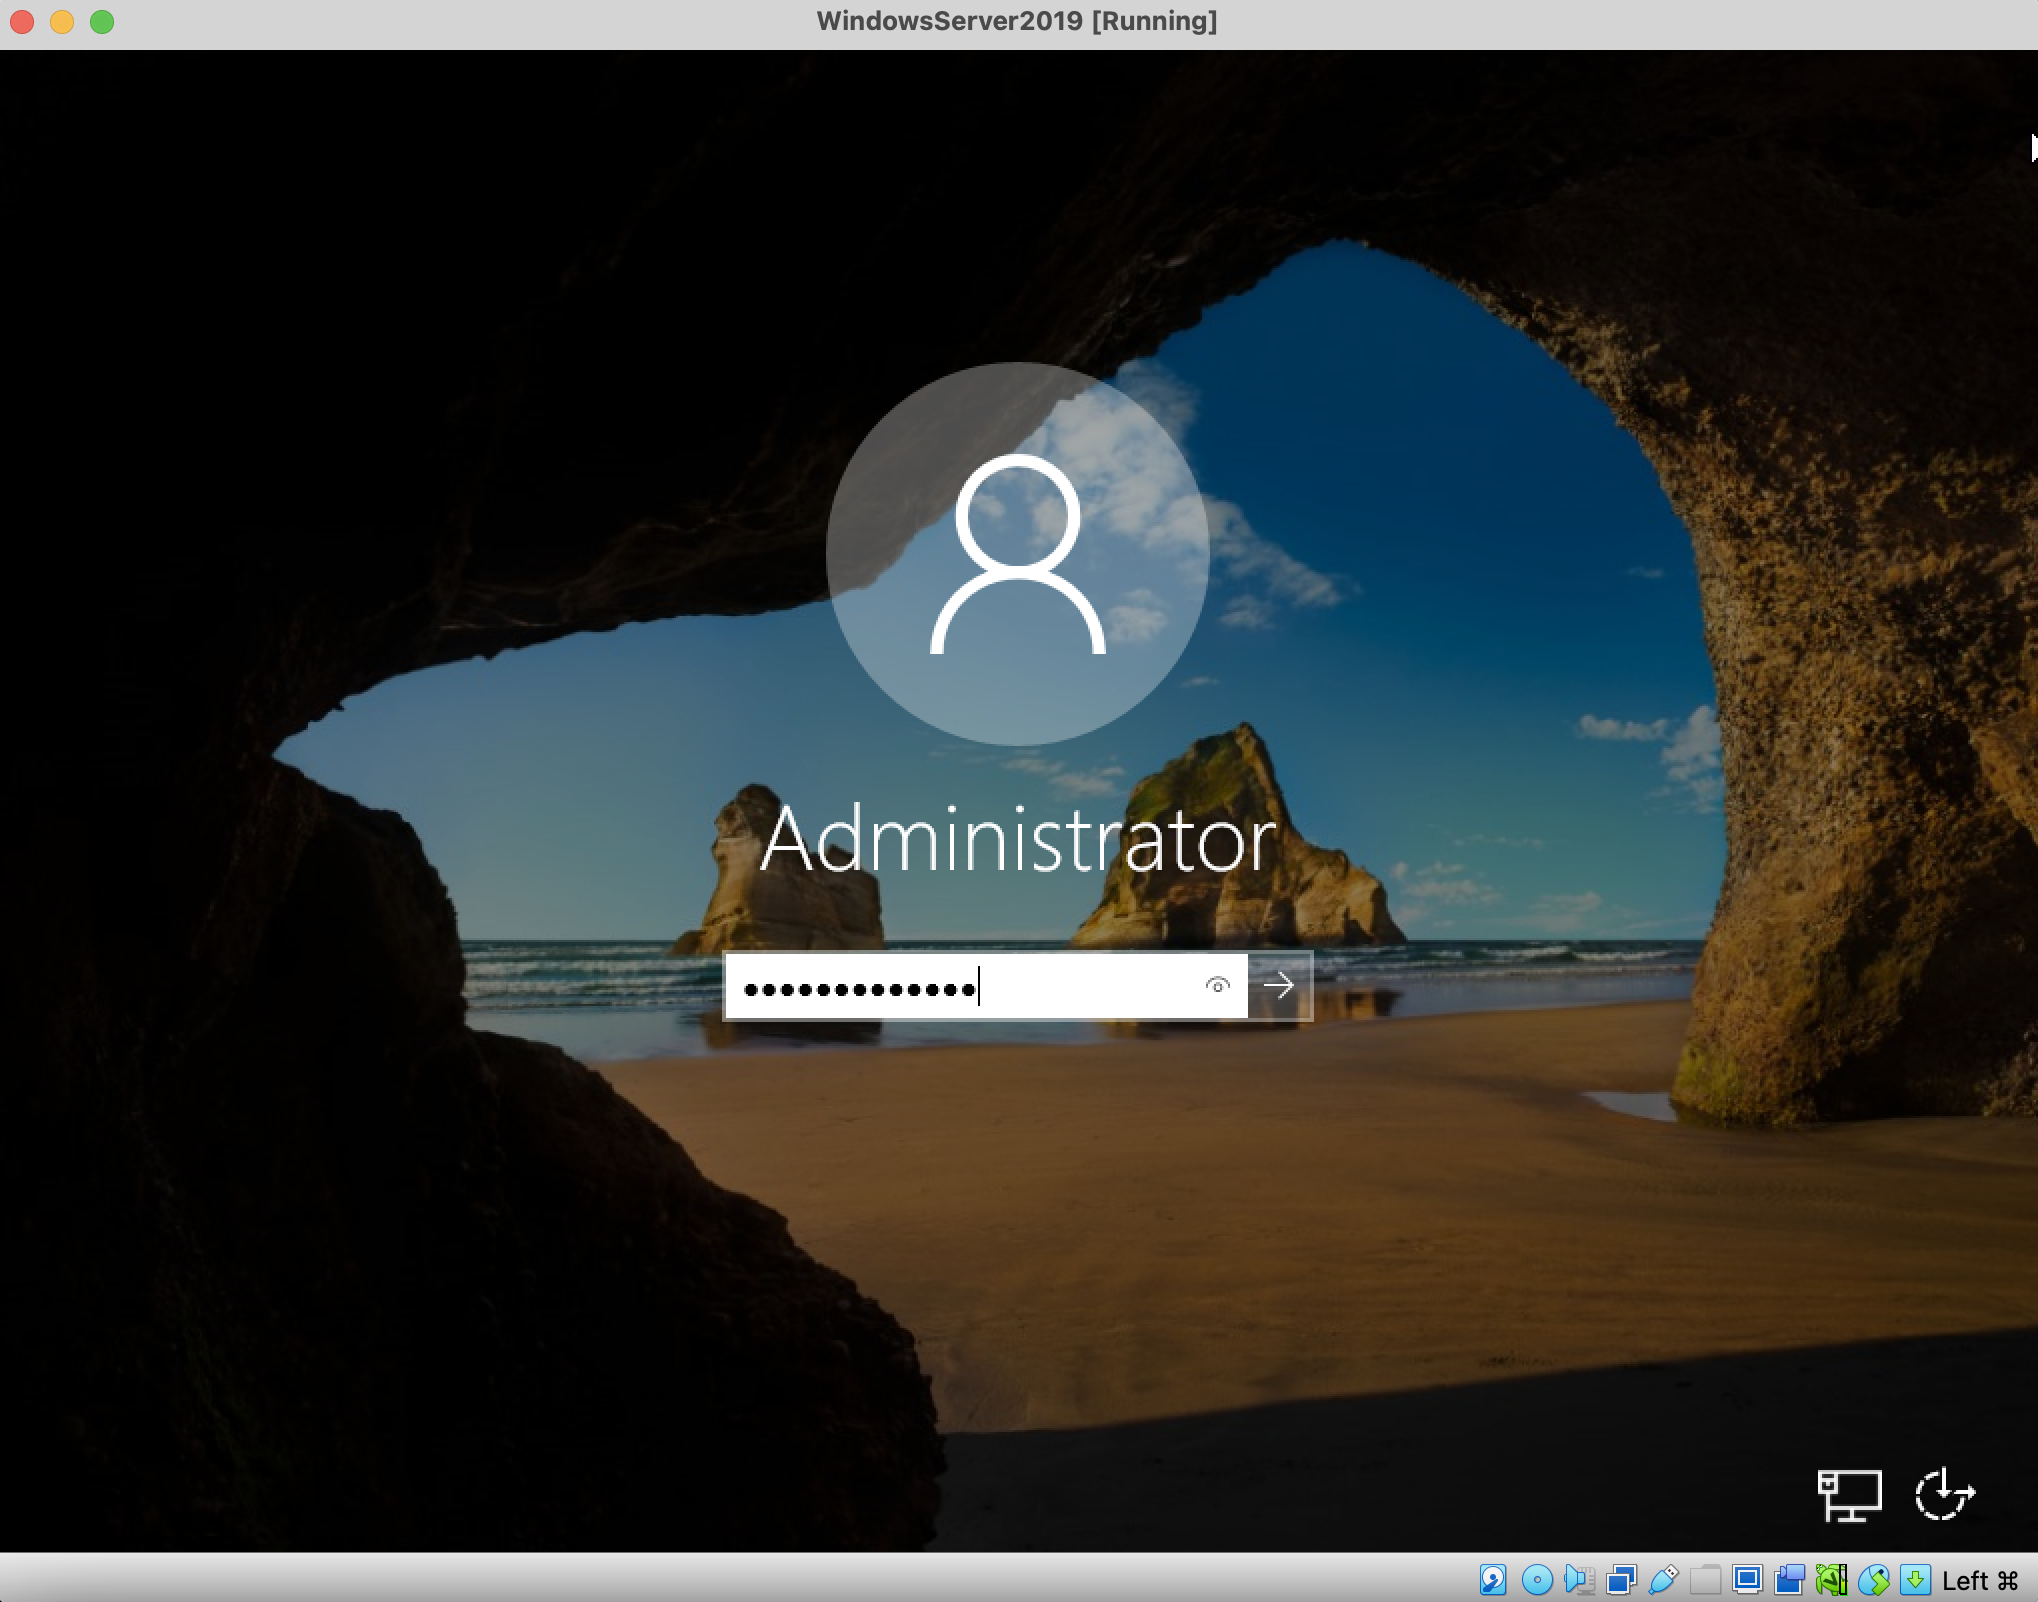
- Log on with the password created from the previous step
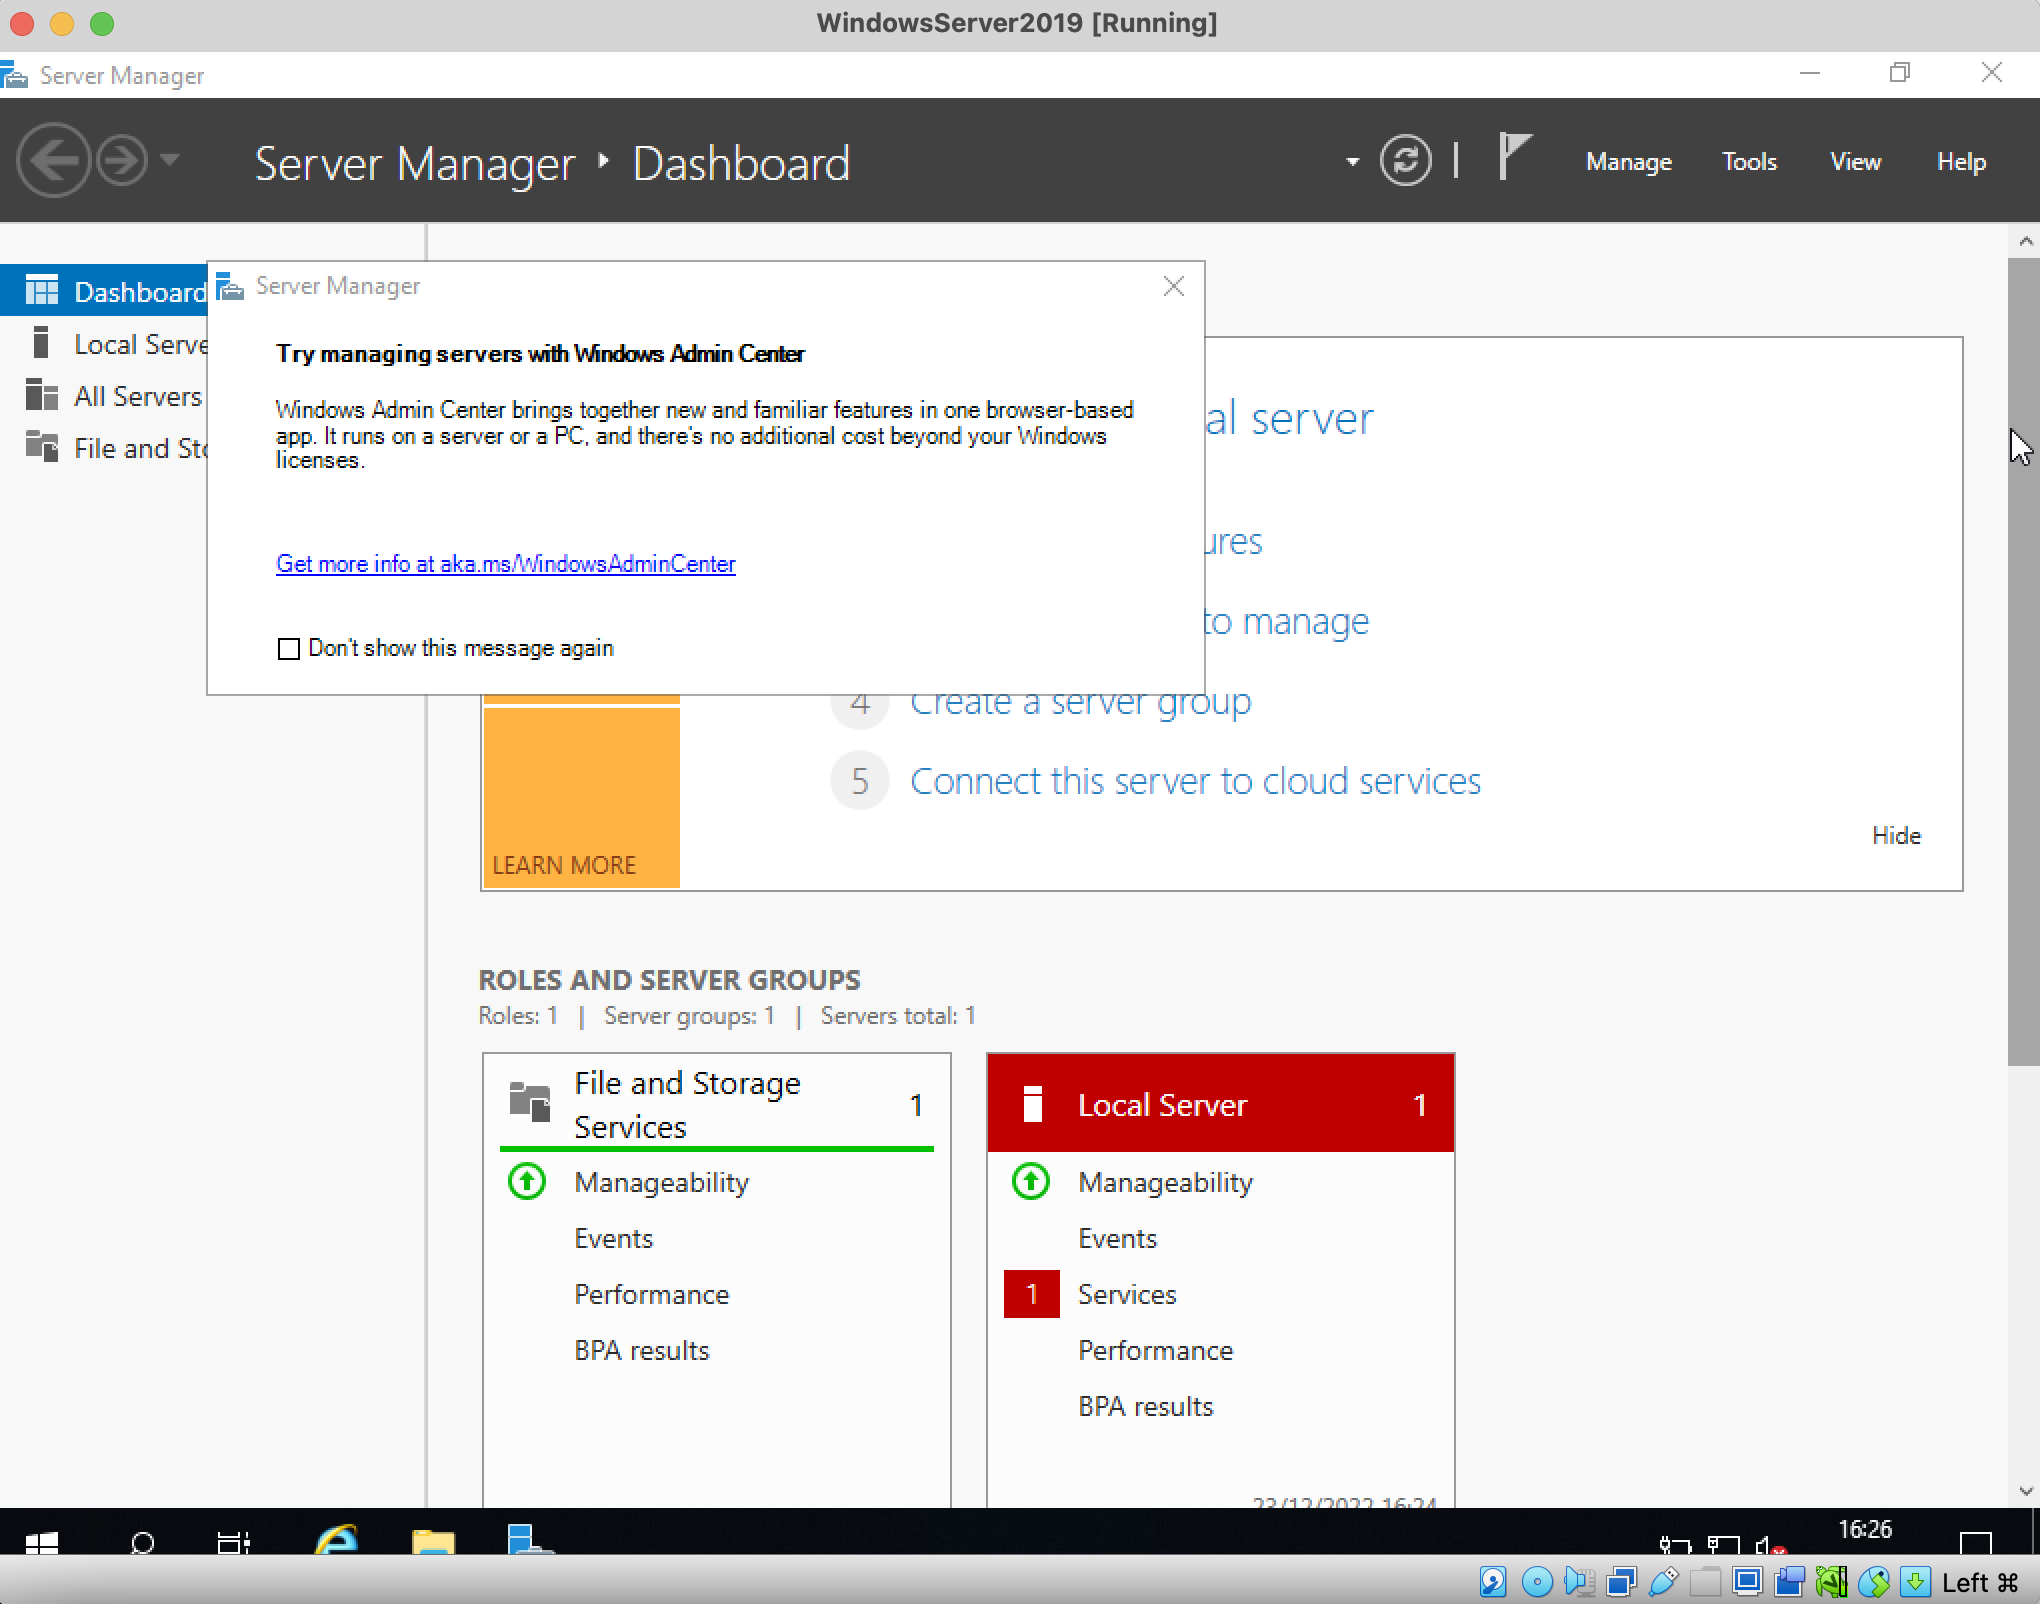
- The Server Manager Dashboard is displayed and the OS is booted
Part 5: Create a MID Server user and download the MID Server installer file
Introduction
Now that the set-up of Windows Server 2019 is complete, create the required MID Server user on the PDI and download the required MID Server installer file.
NOTE: Detailed steps can be found in the official ServiceNow documentation
Steps to create MID Server user and download installer file
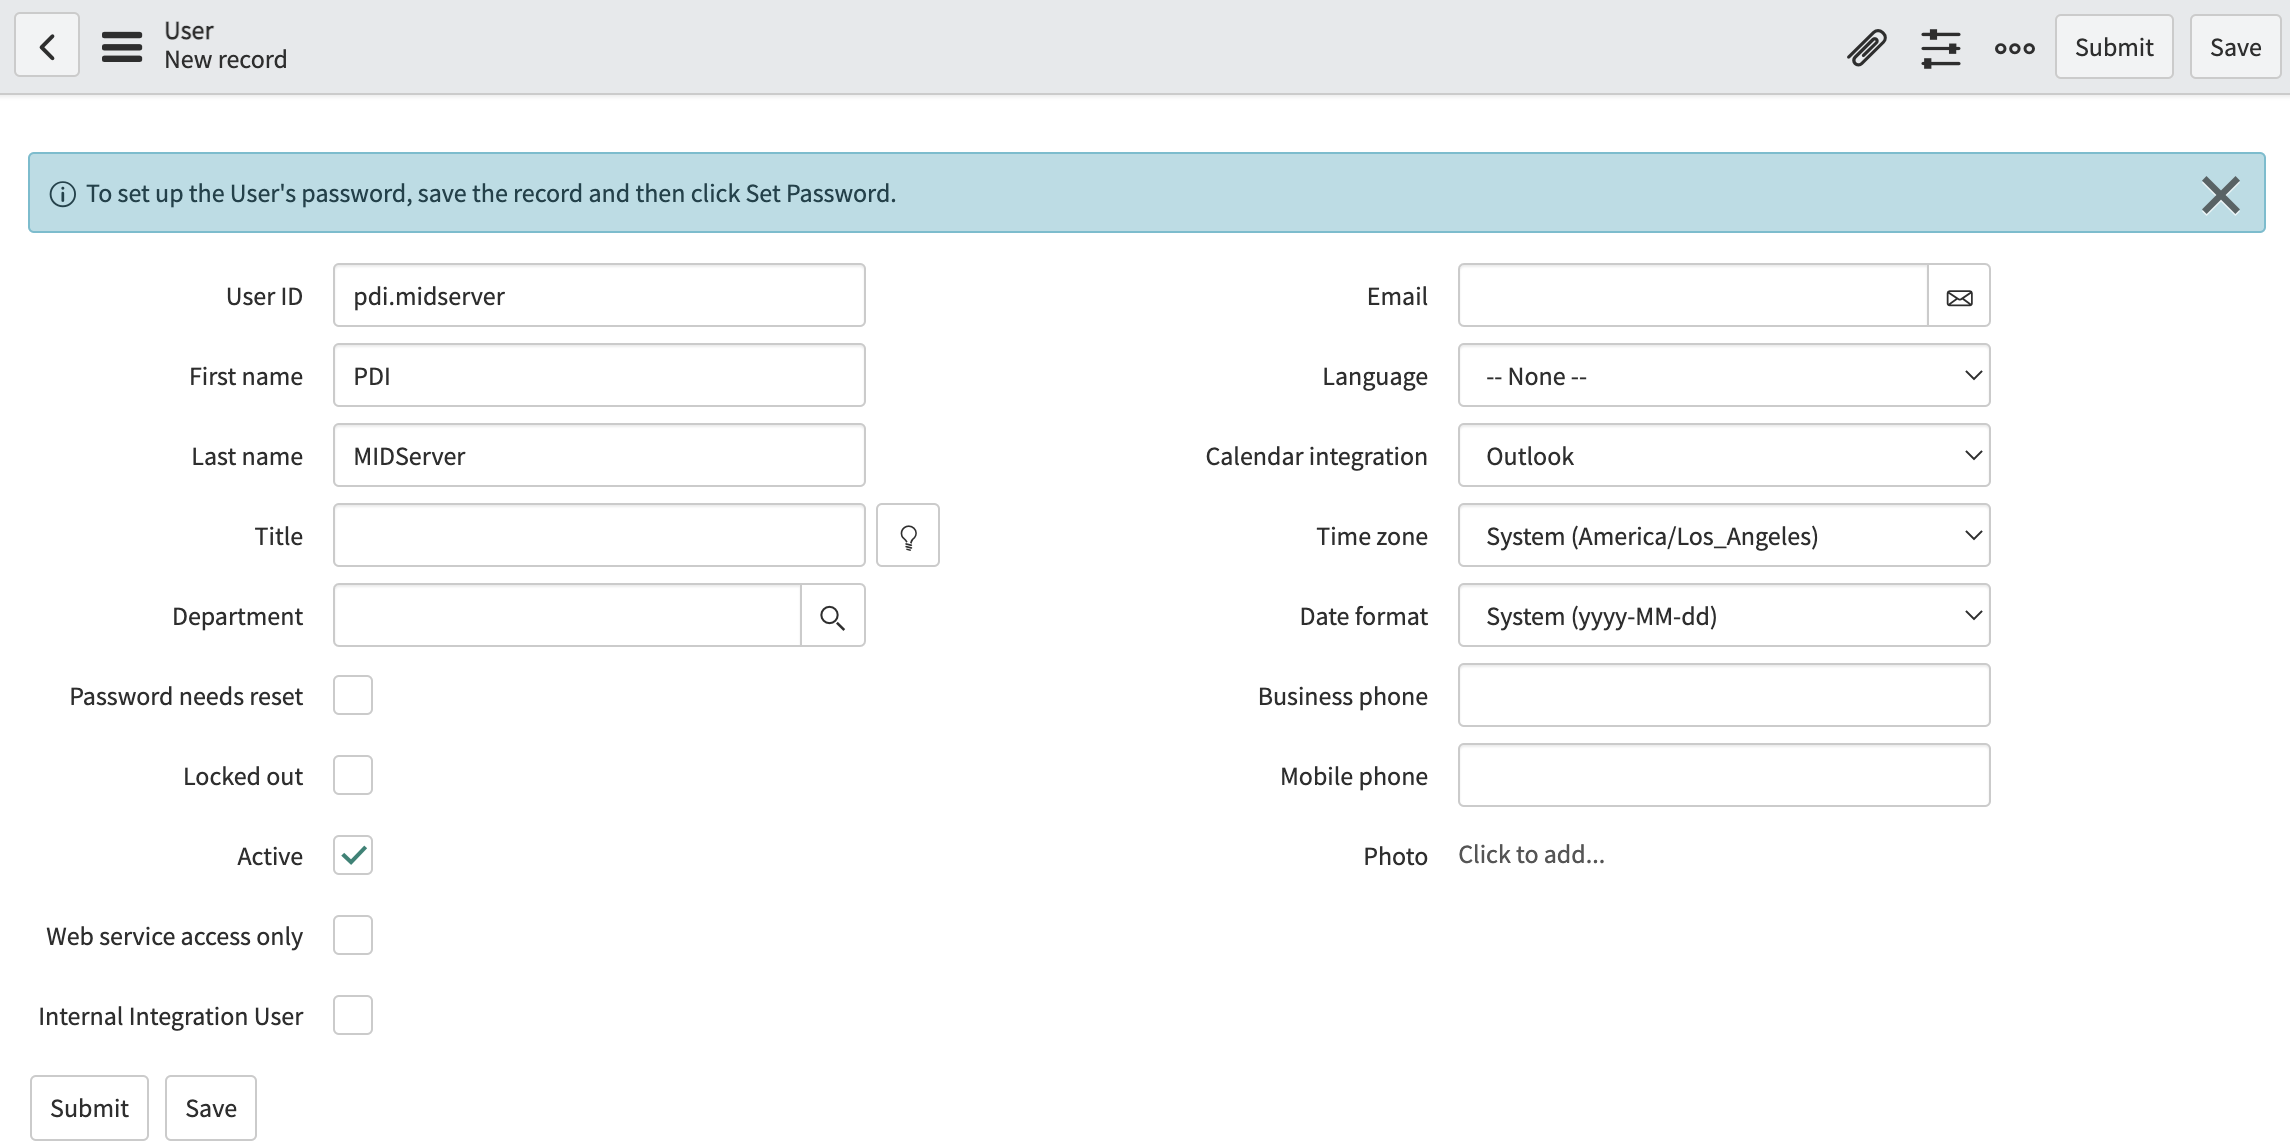
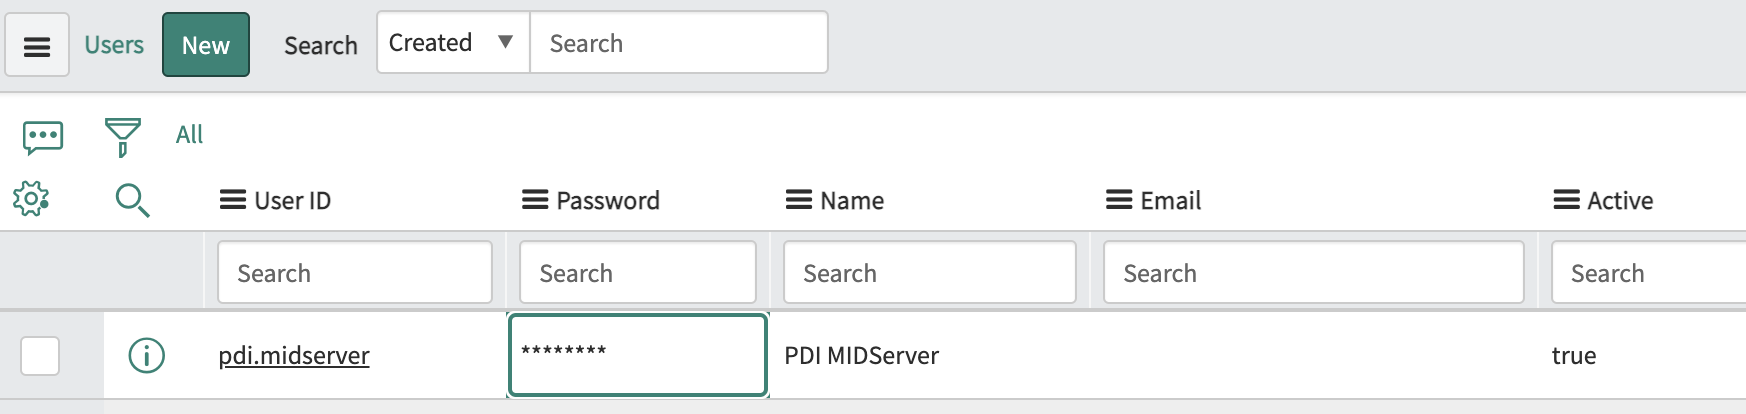
- On your PDI navigate to User Administration => Users and click 'New'. Complete the form detail for User ID, First name, and Last Name. Save the record and update the password on the list view of the record
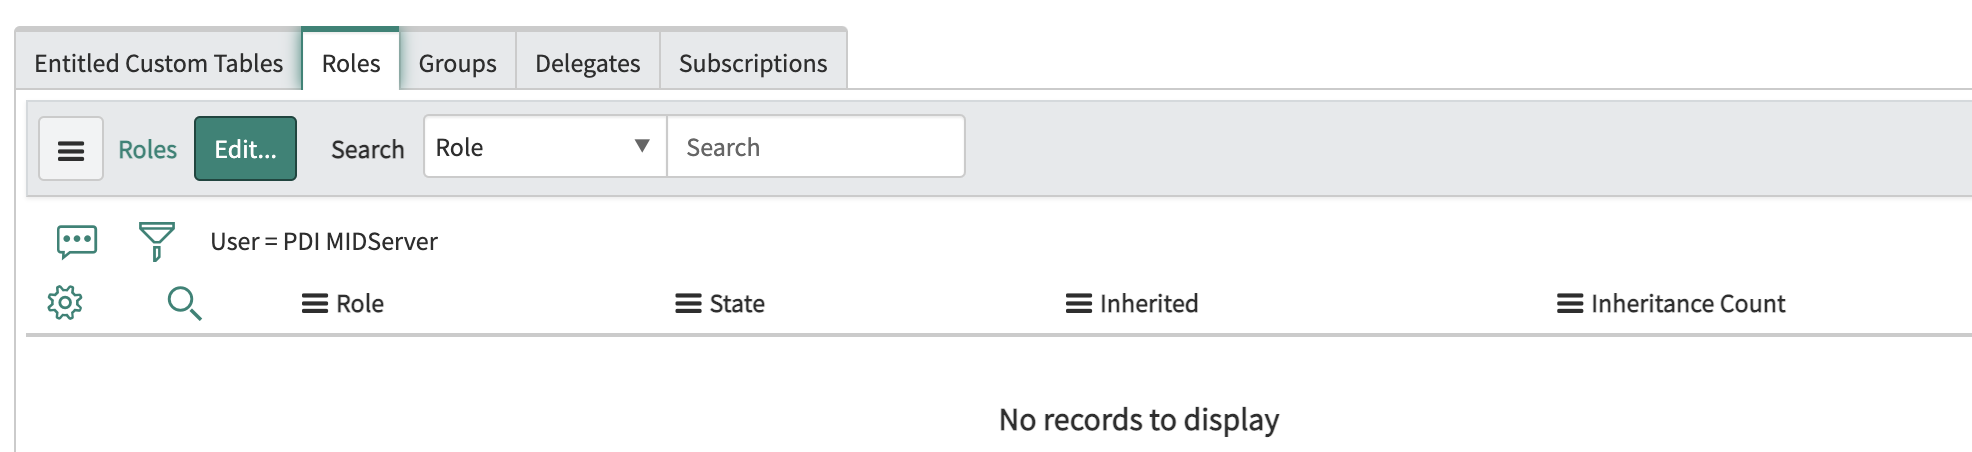
- Back in the User record click on the 'Roles' related list and then Edit
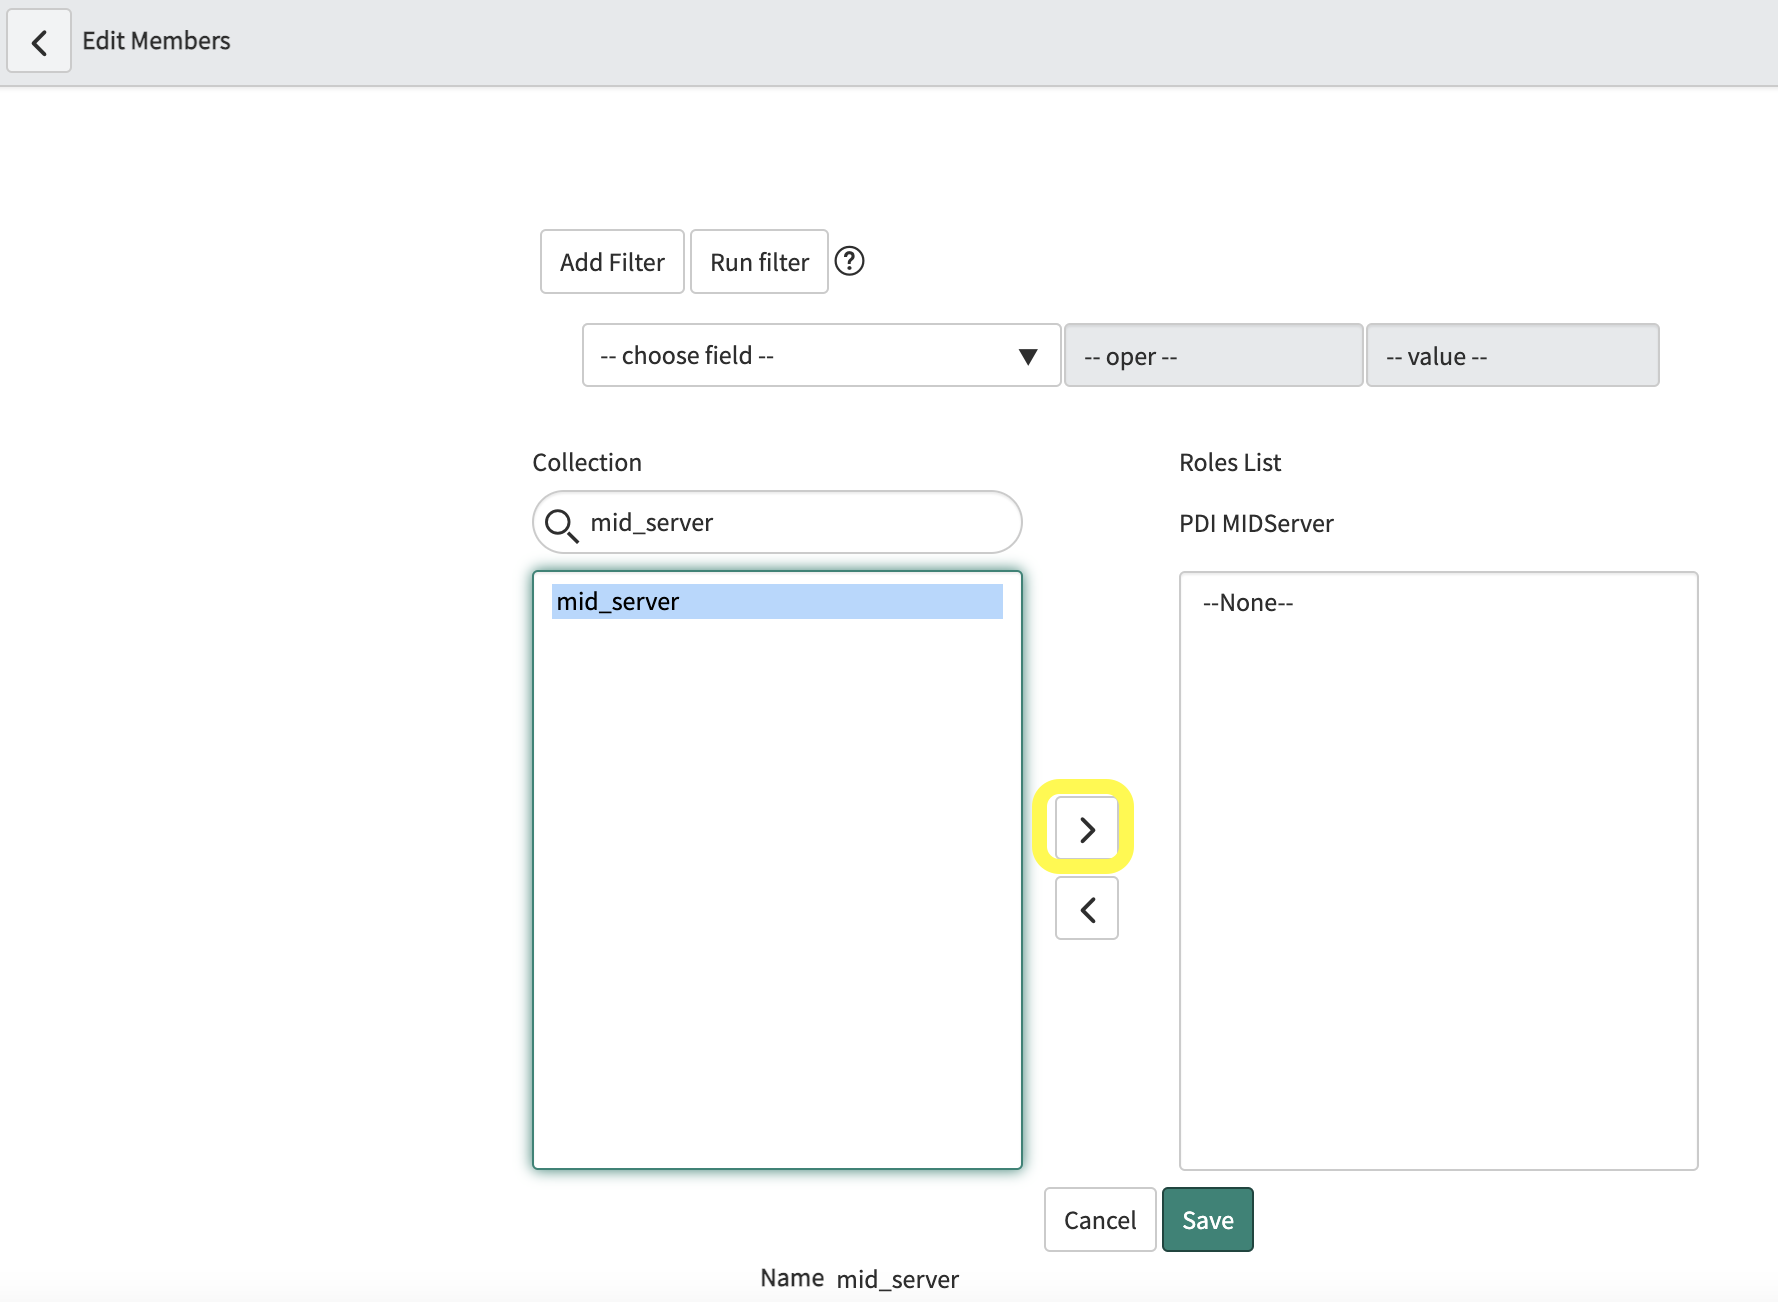
- Assign the 'mid_server' role to the 'pdi.midserver' user. Search for the role and add it via the slush bucket. Save the record
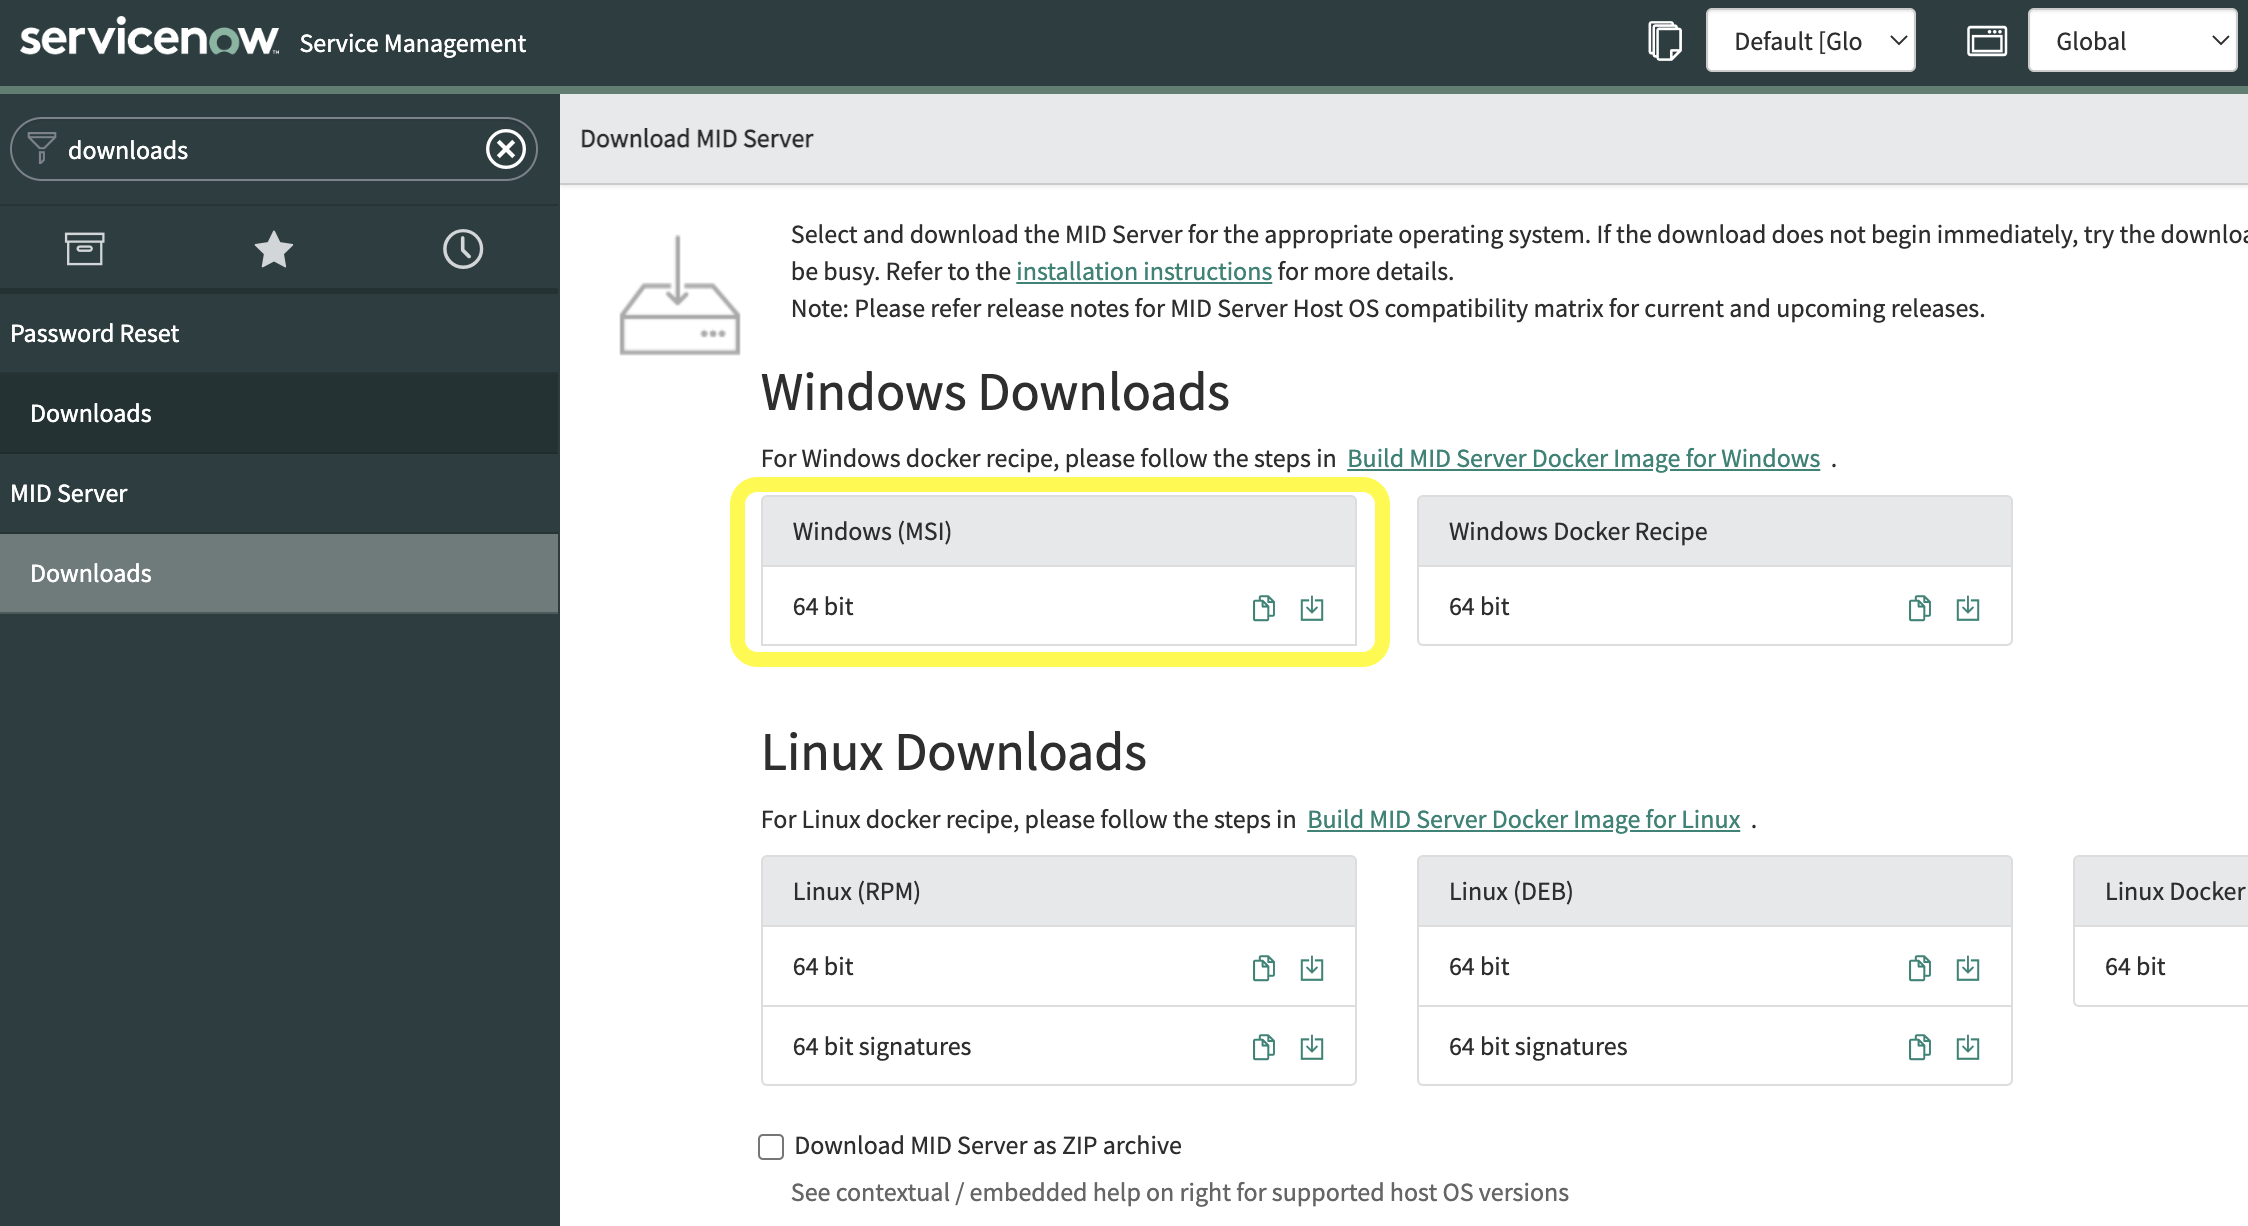
- Download the MID Server file at Mid Server => Downloads, choosing the Windows (MSI) 64 bit
Part 6: Installation, configuration and execution of MID Server installer file on Windows Server 2019
Introduction
The final steps are to install the MID Server installer file and get the MID Server running on Windows Server 2019
Steps to install the MID Server
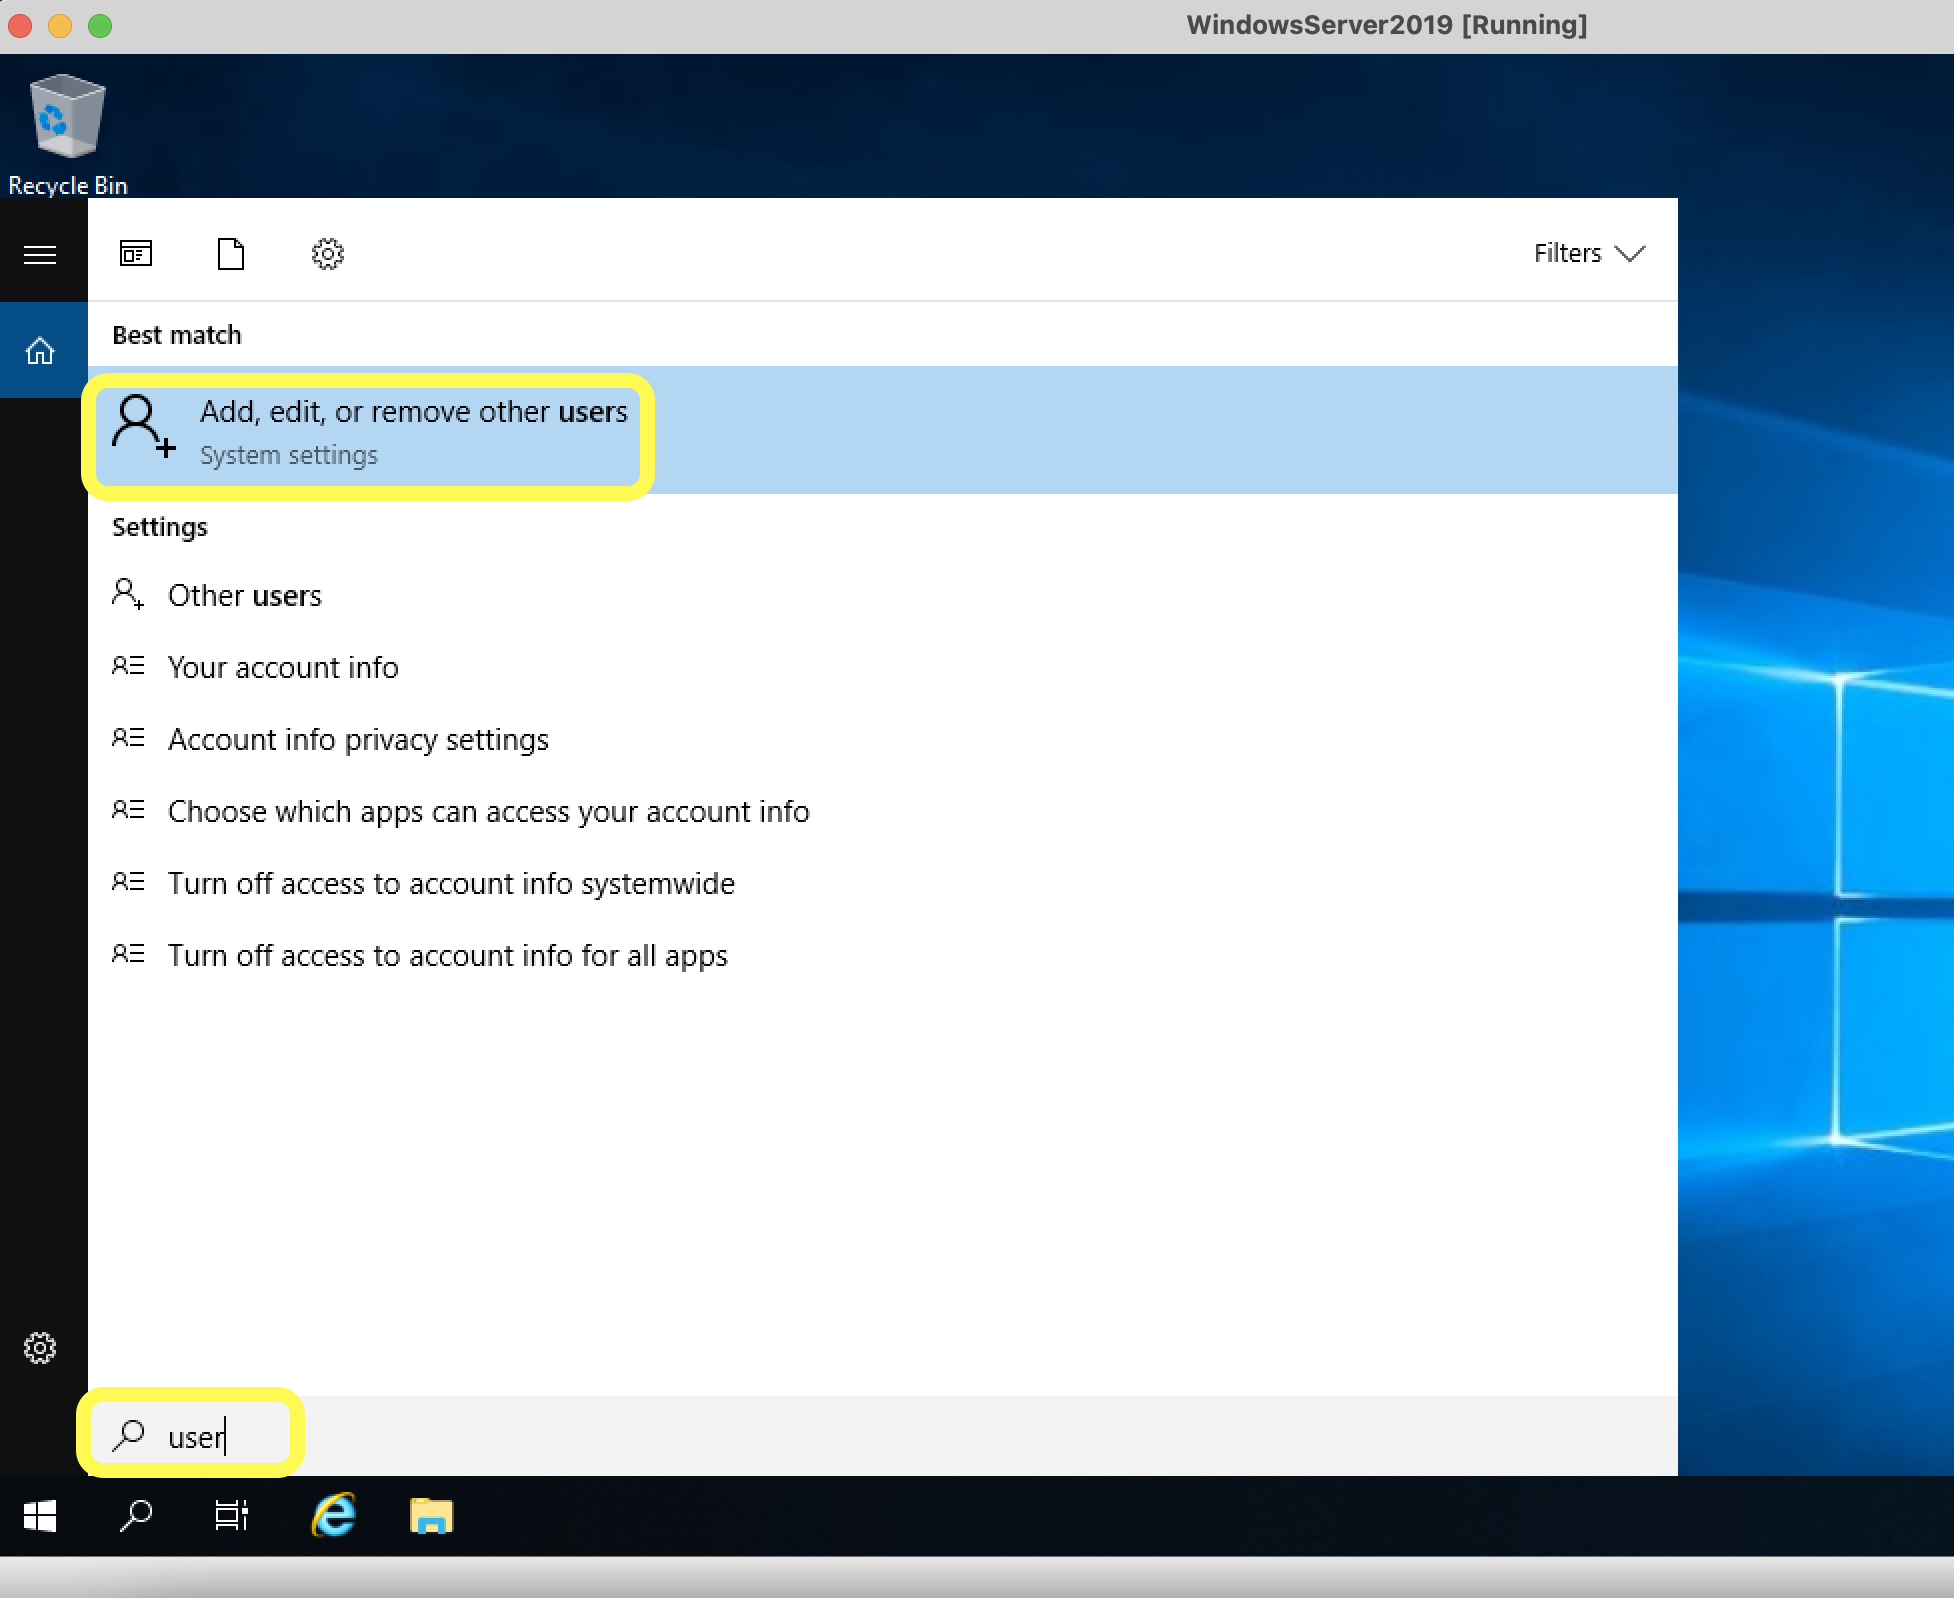
- Create a new Windows User that will be used to 'Log on as a service' of the MID Server service. NOTE: This needs to be a non-admin user. Search for 'user' and select 'Add, edit, or remove other users'
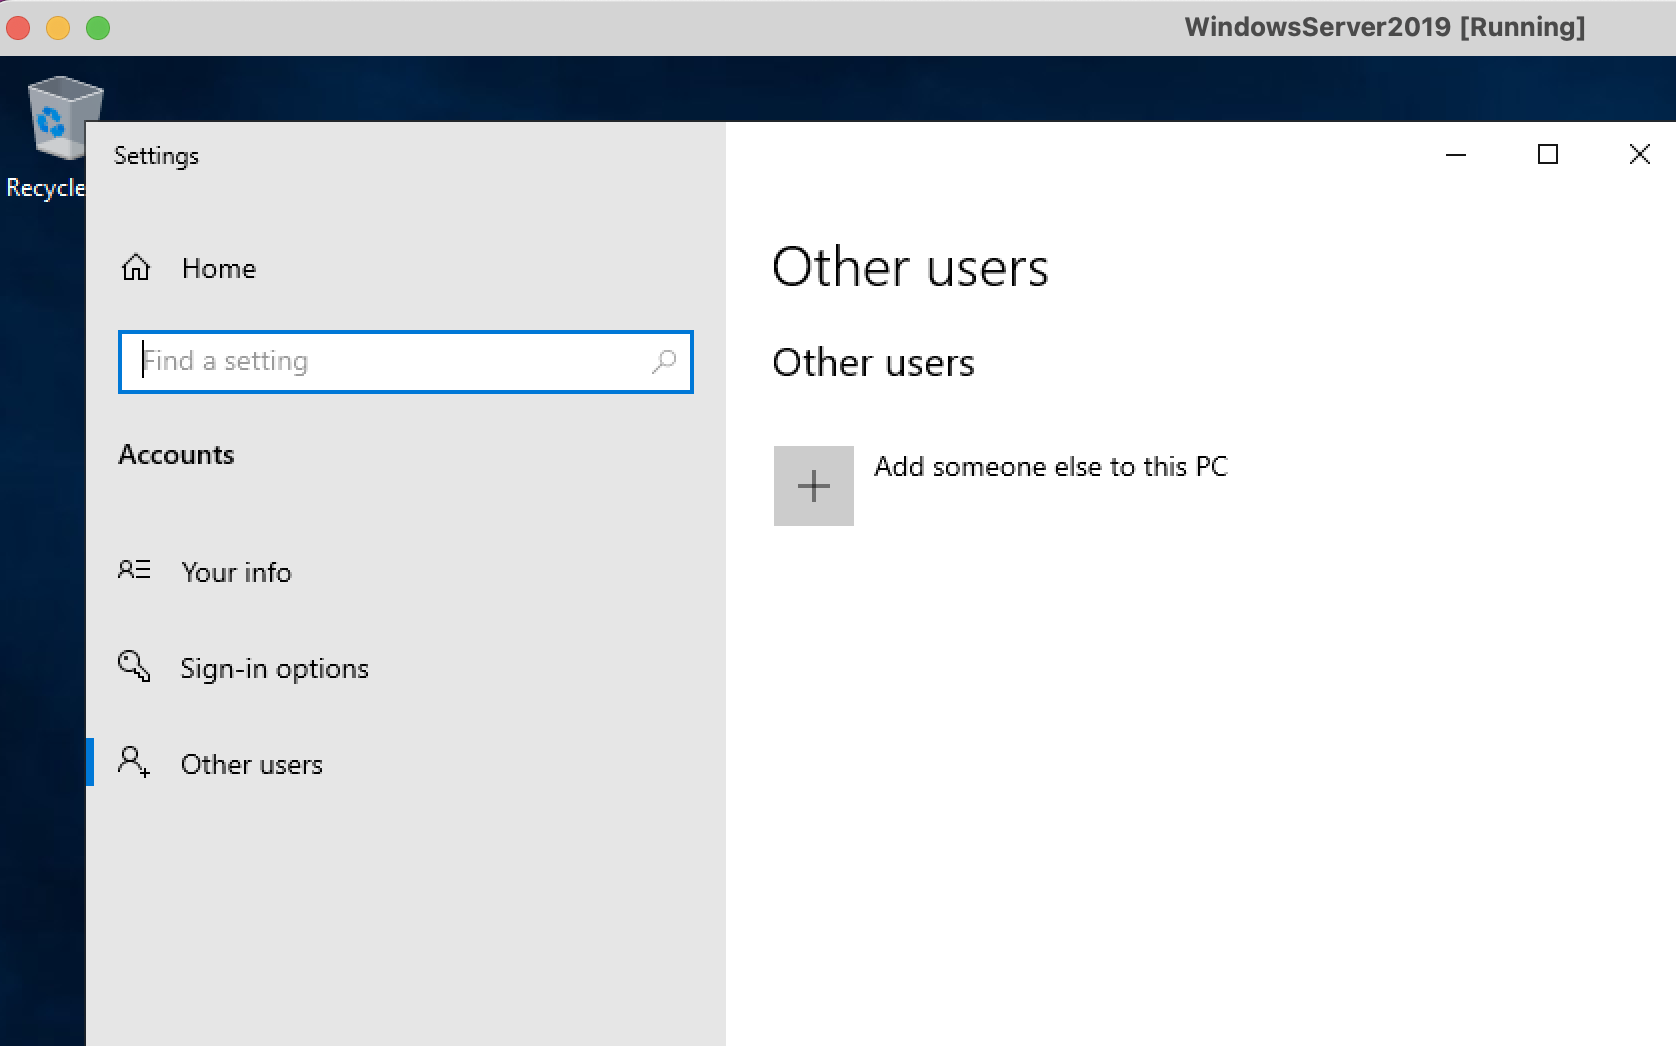
- On the next screen select 'Add someone else to this PC'
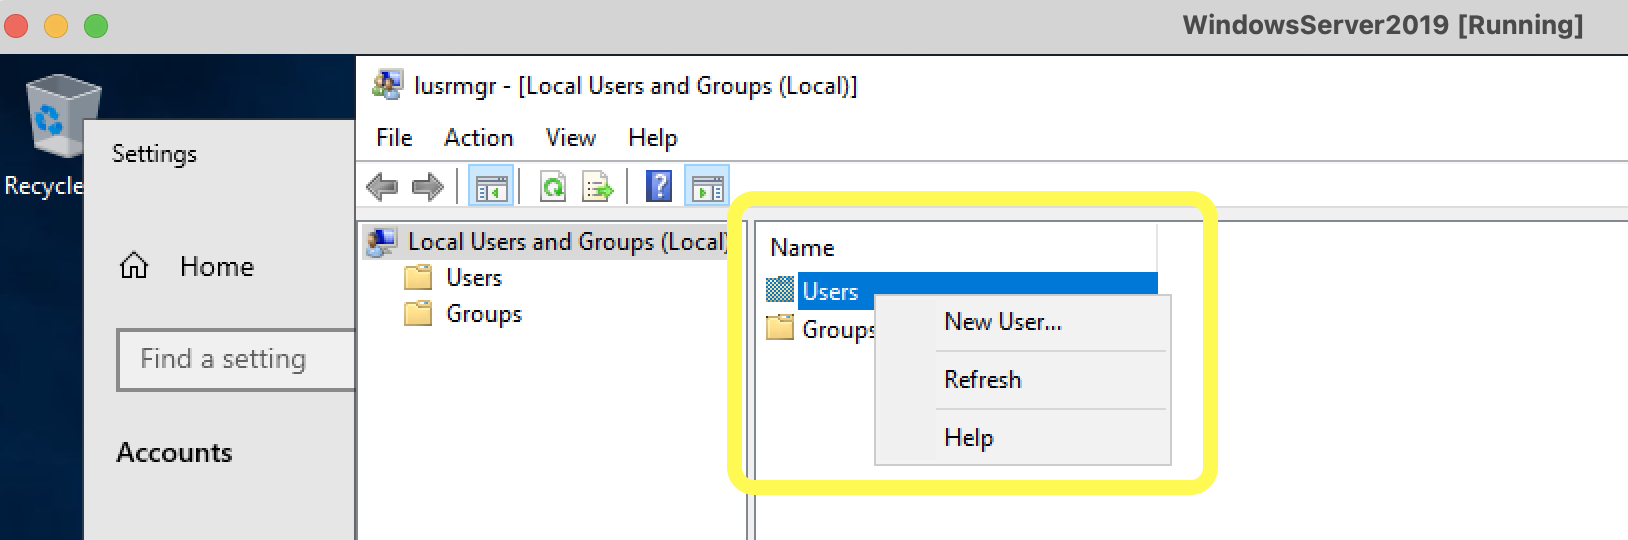
- Right-click on Users and select 'New User..'
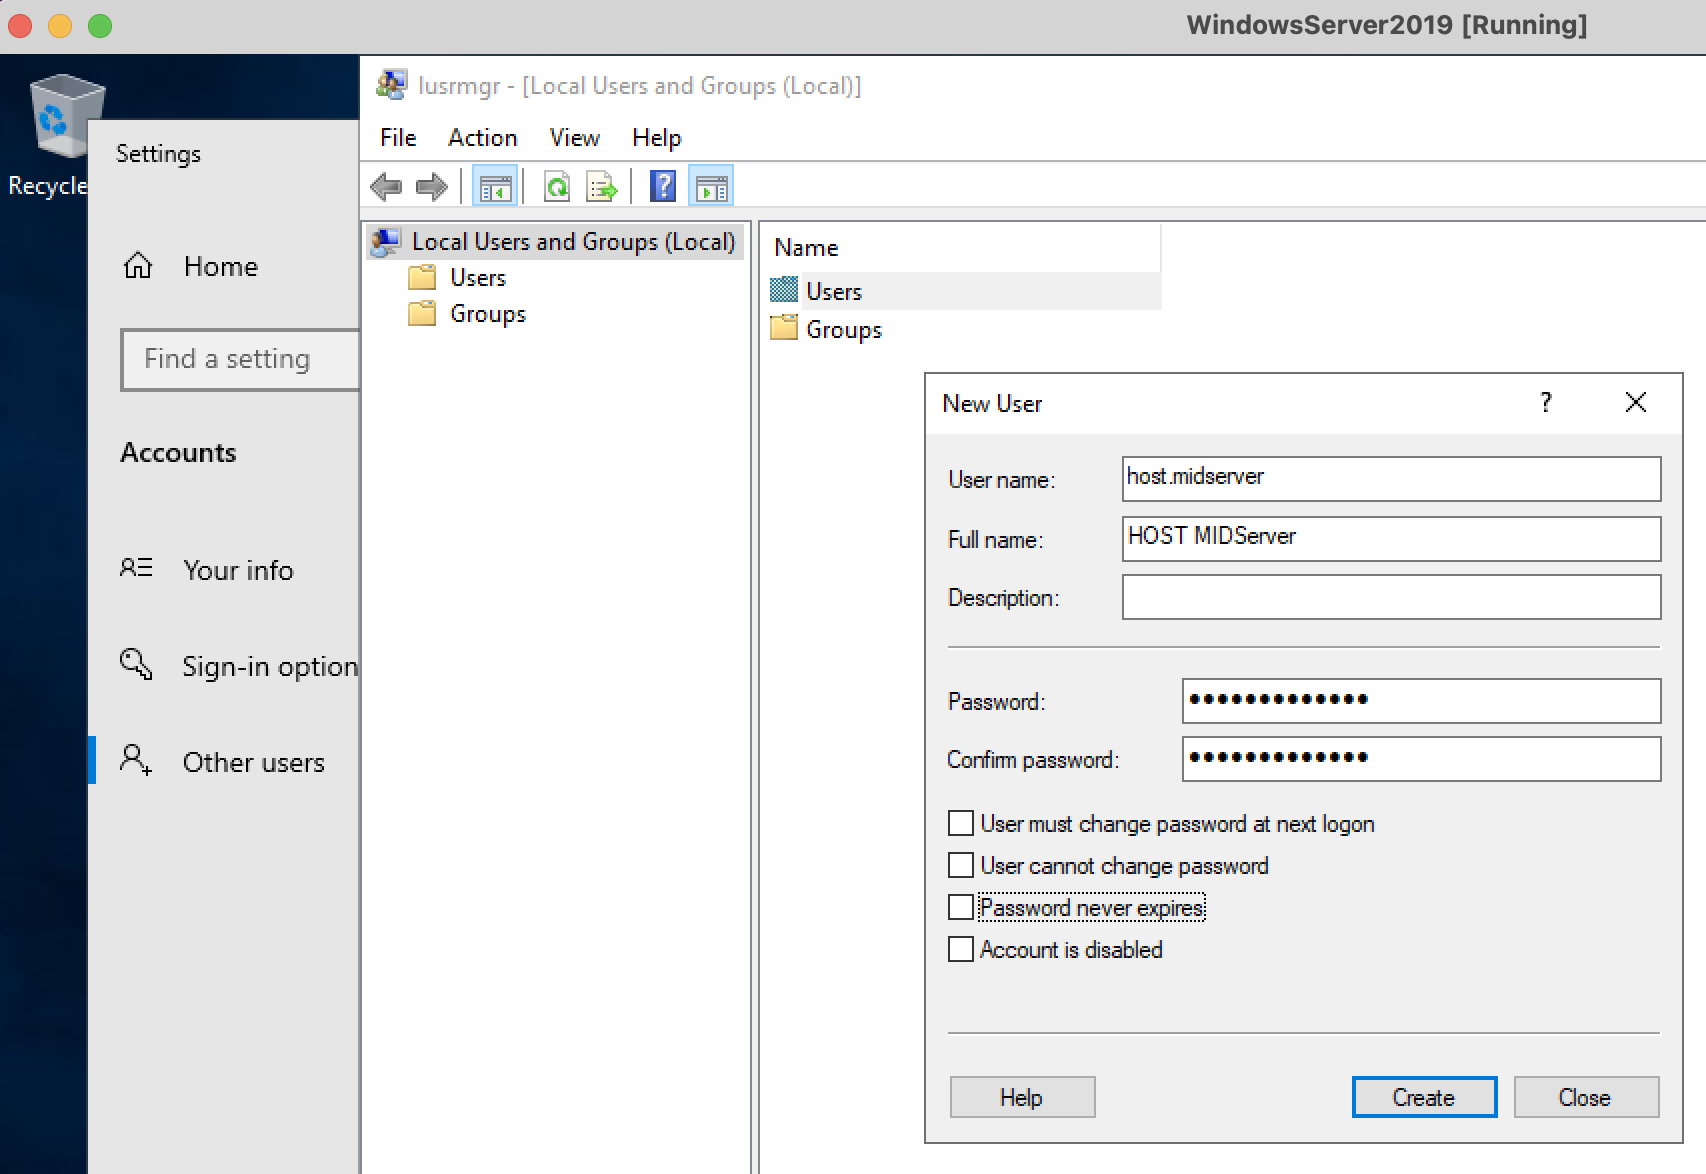
- Create a new User with a password
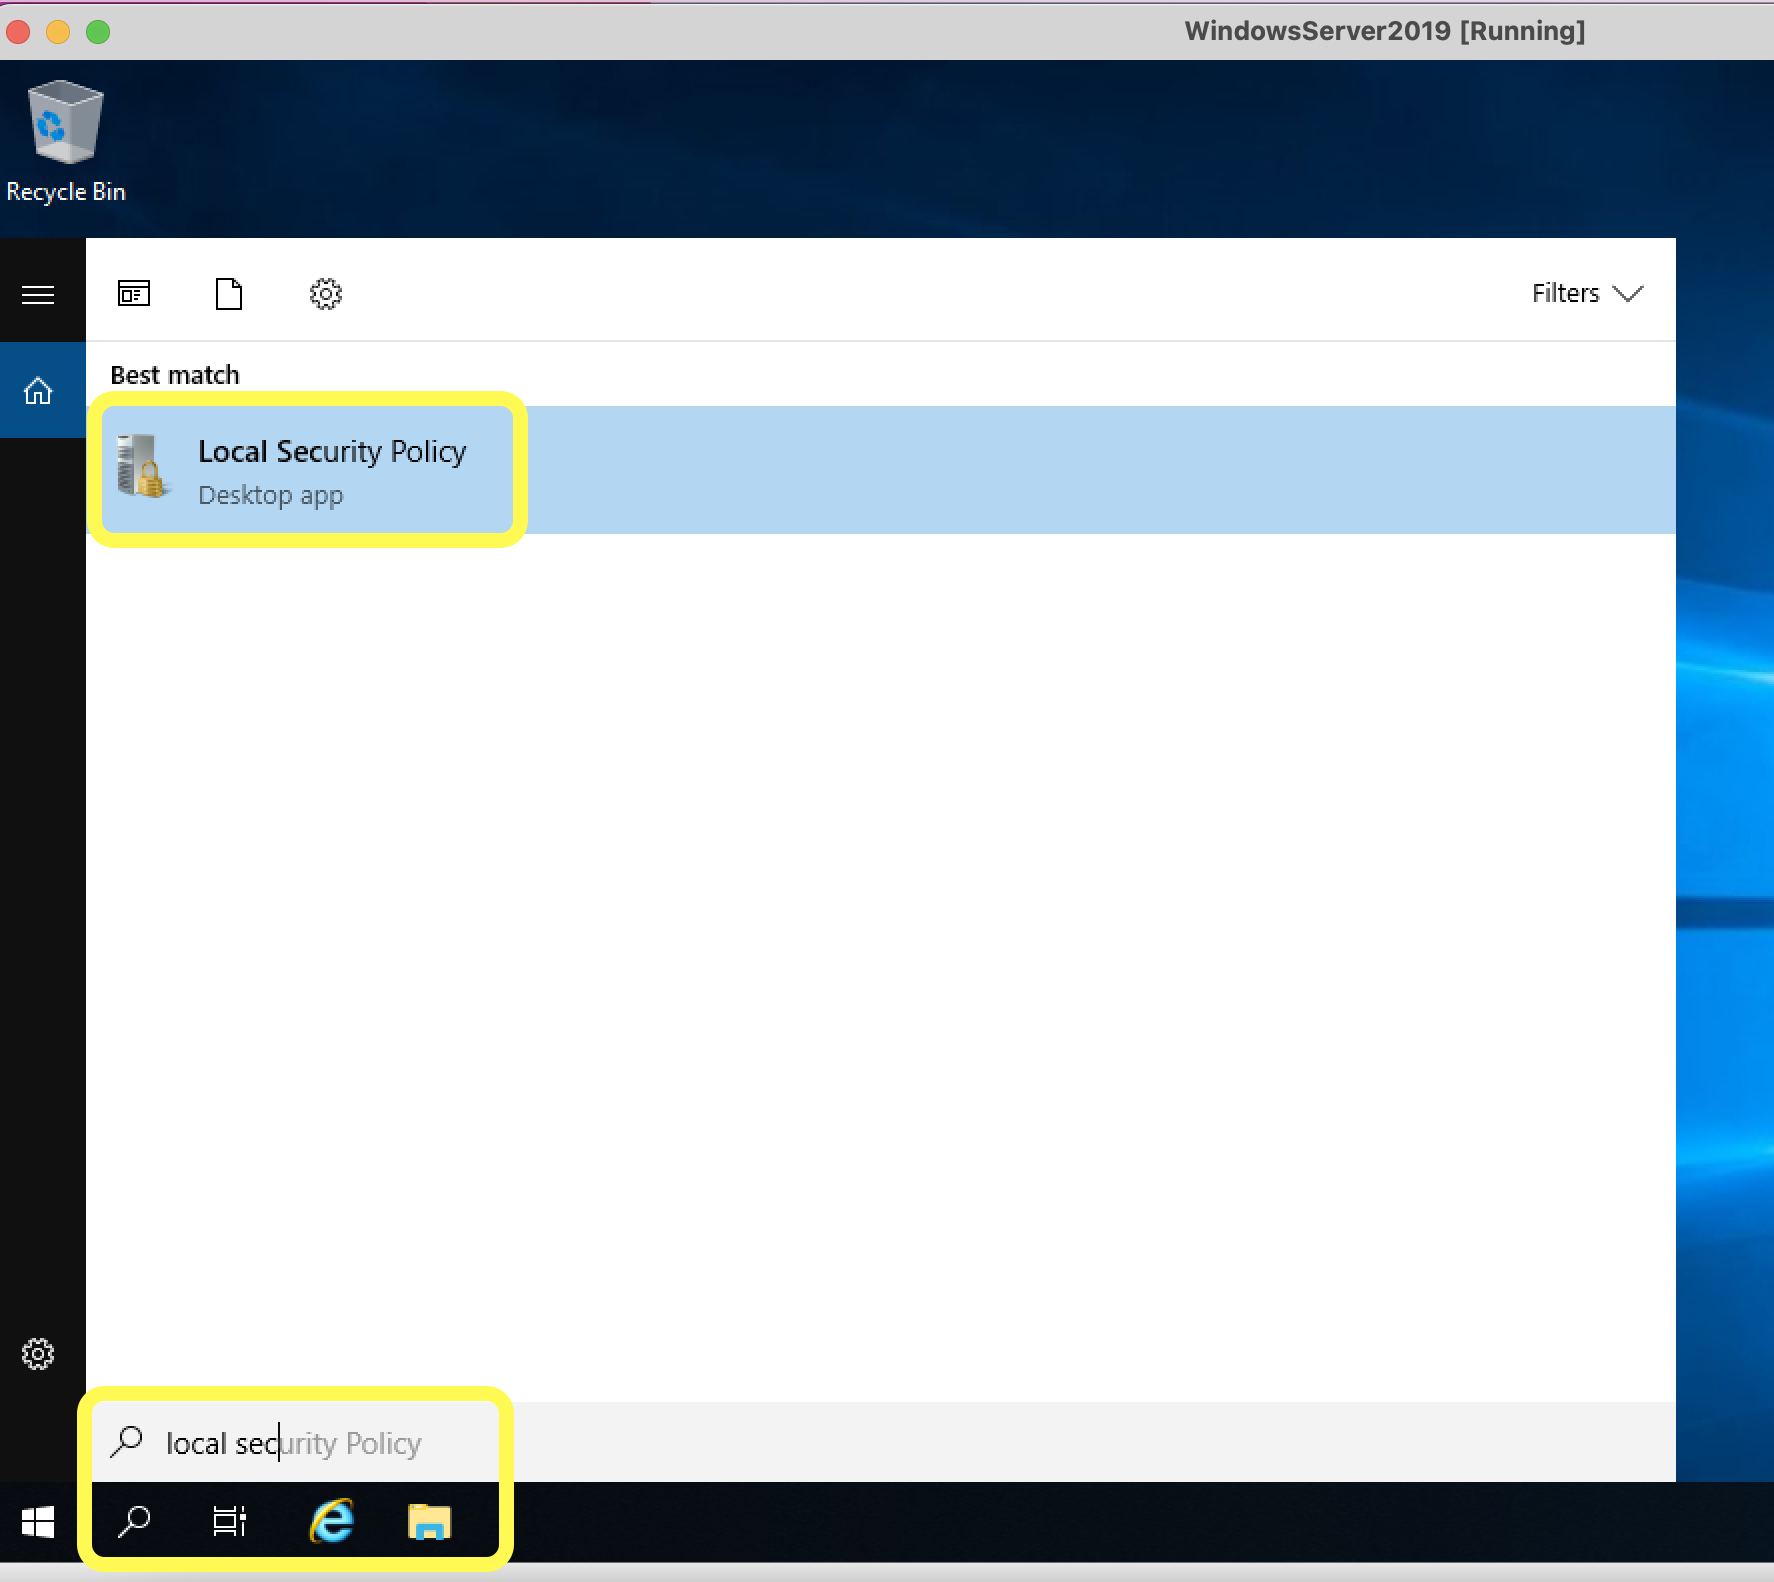
- Search for and select 'Local Security Policy'
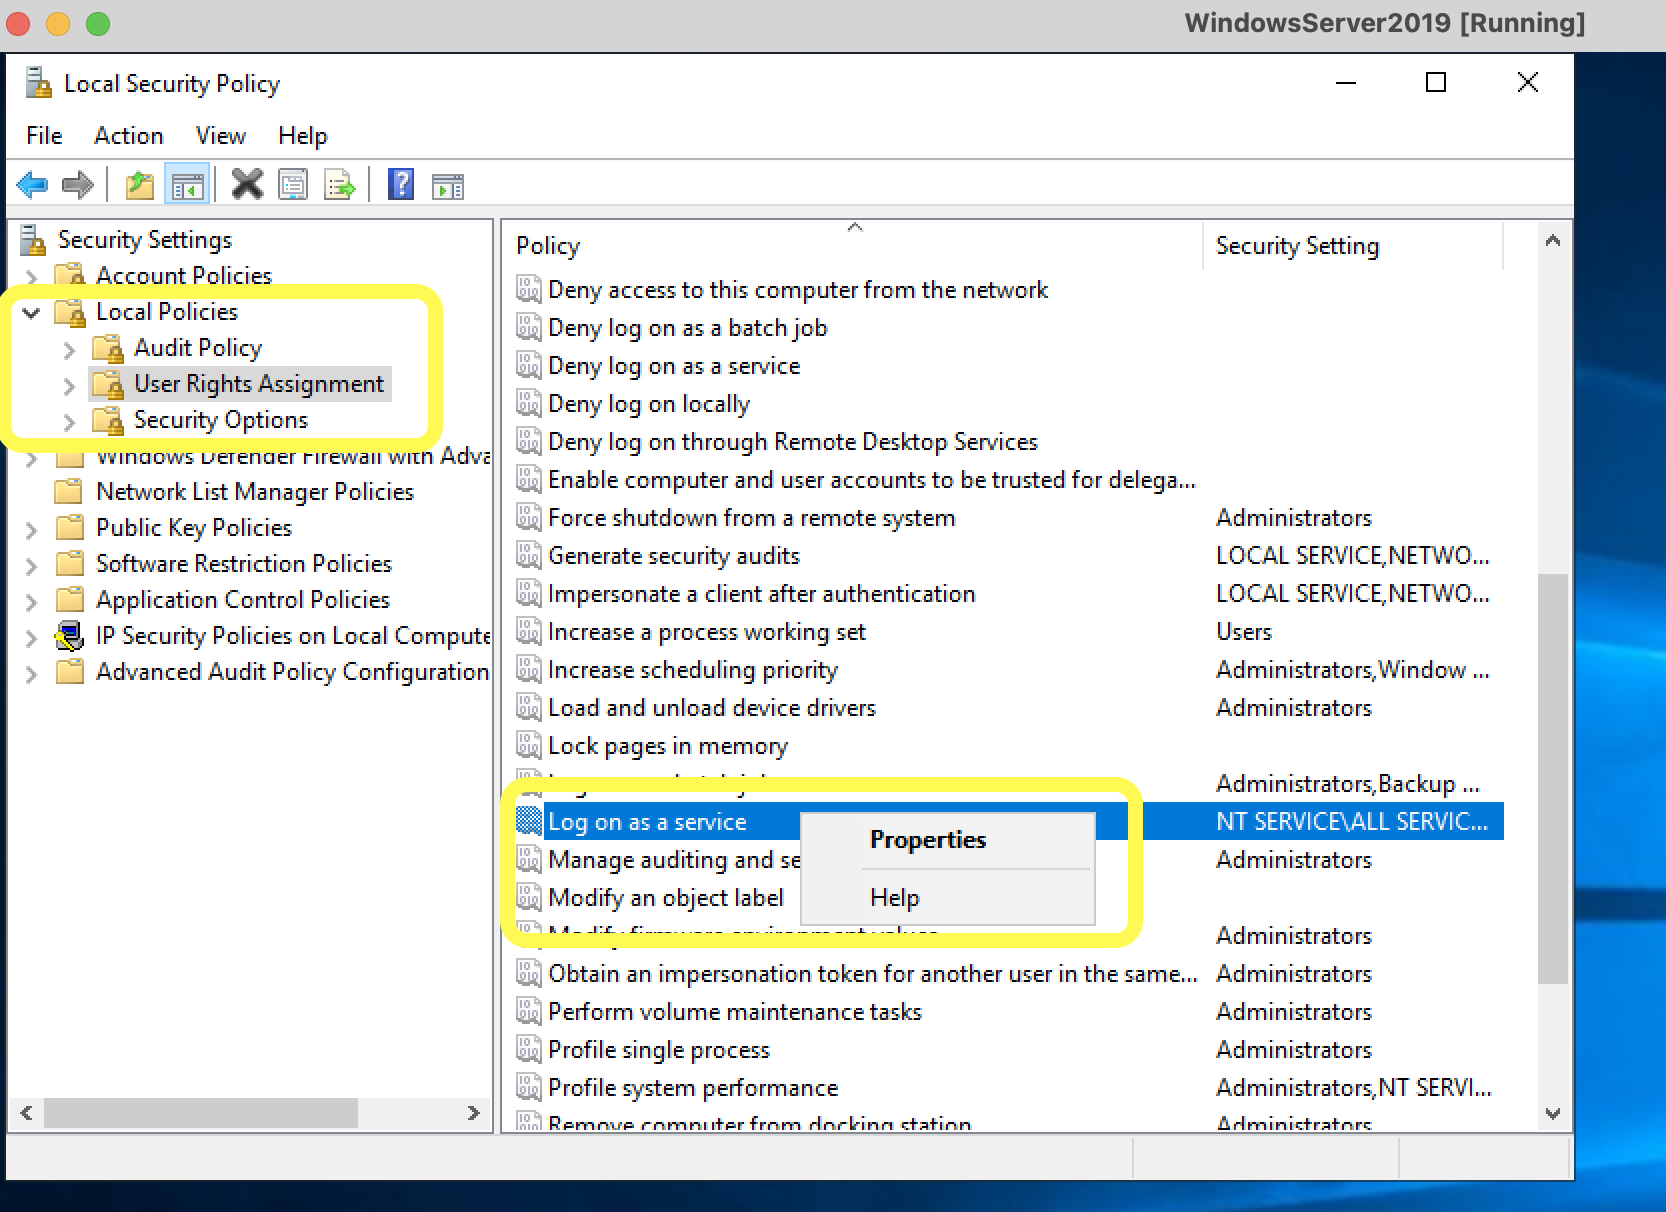
- Select 'User Rights Assignment' and right-click on 'Log on as a service'. Select 'Properties'
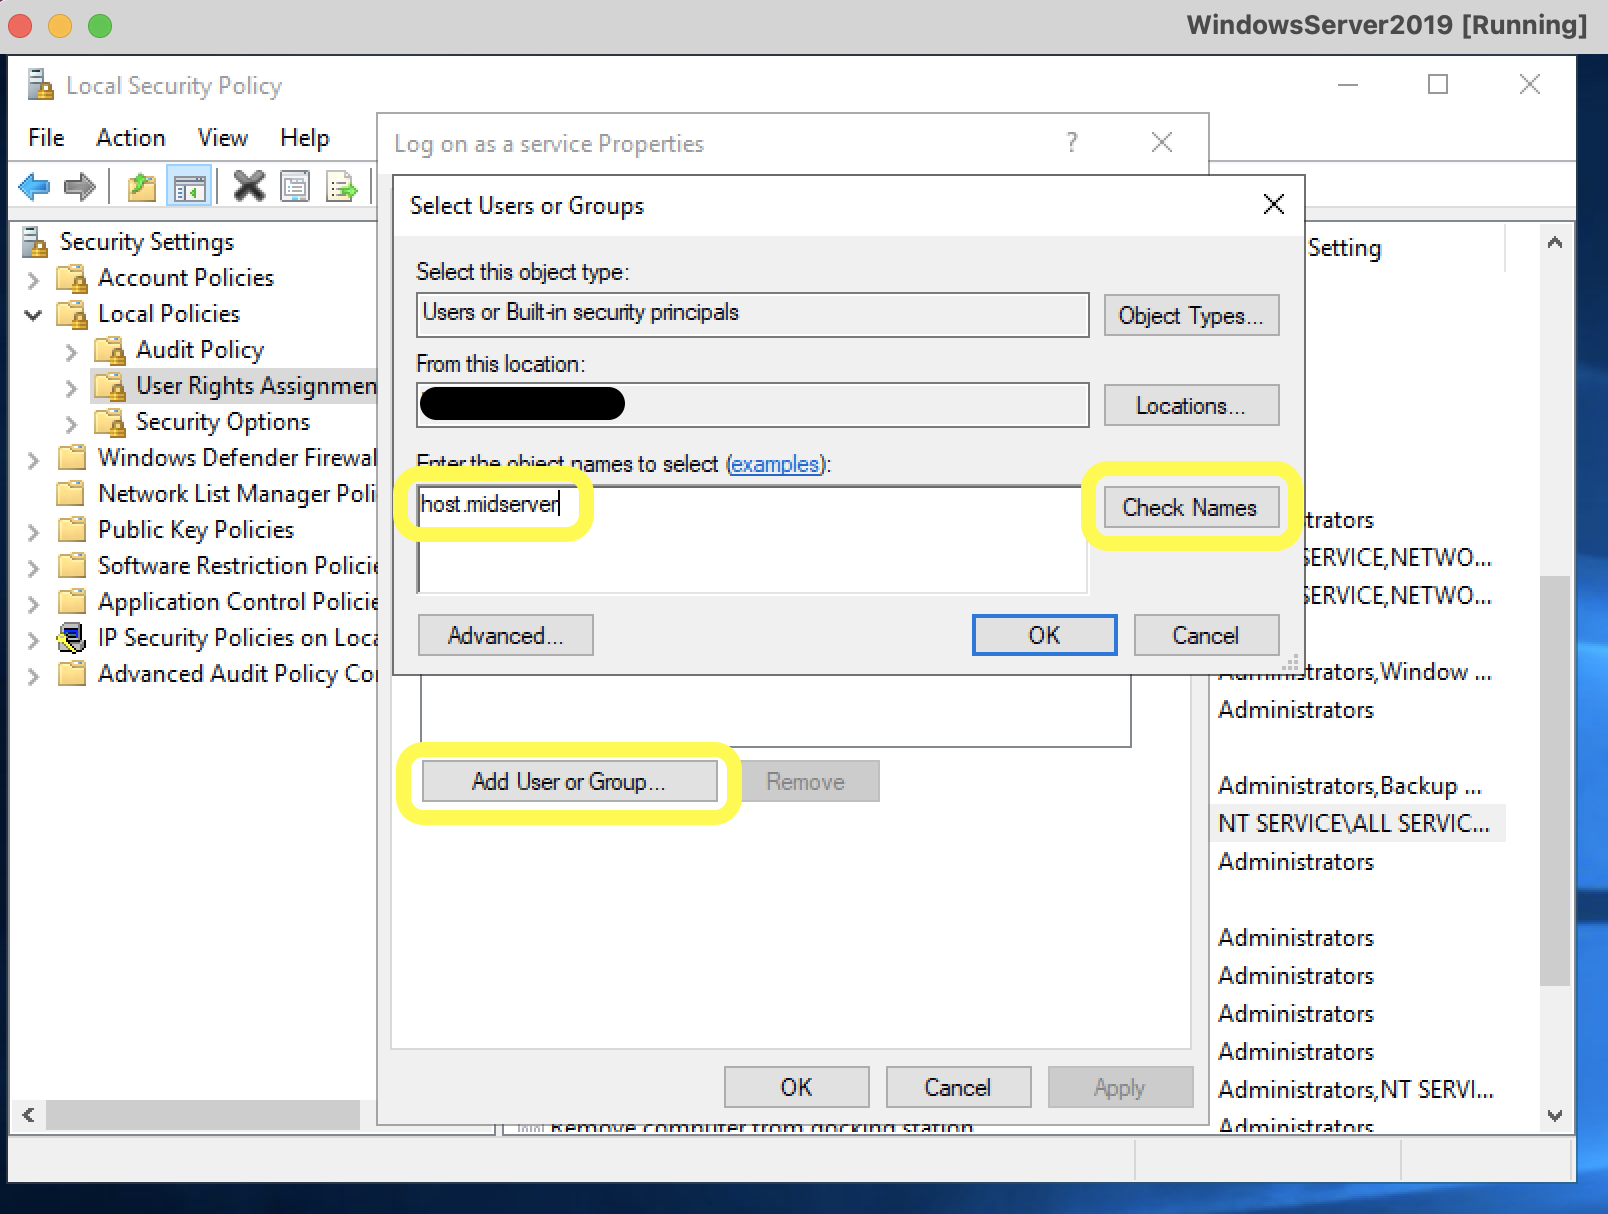
- Add host.mid server user (created on step 4) by clicking on 'Add User or Group..' and then type in the name. Finally, click 'Check Names'
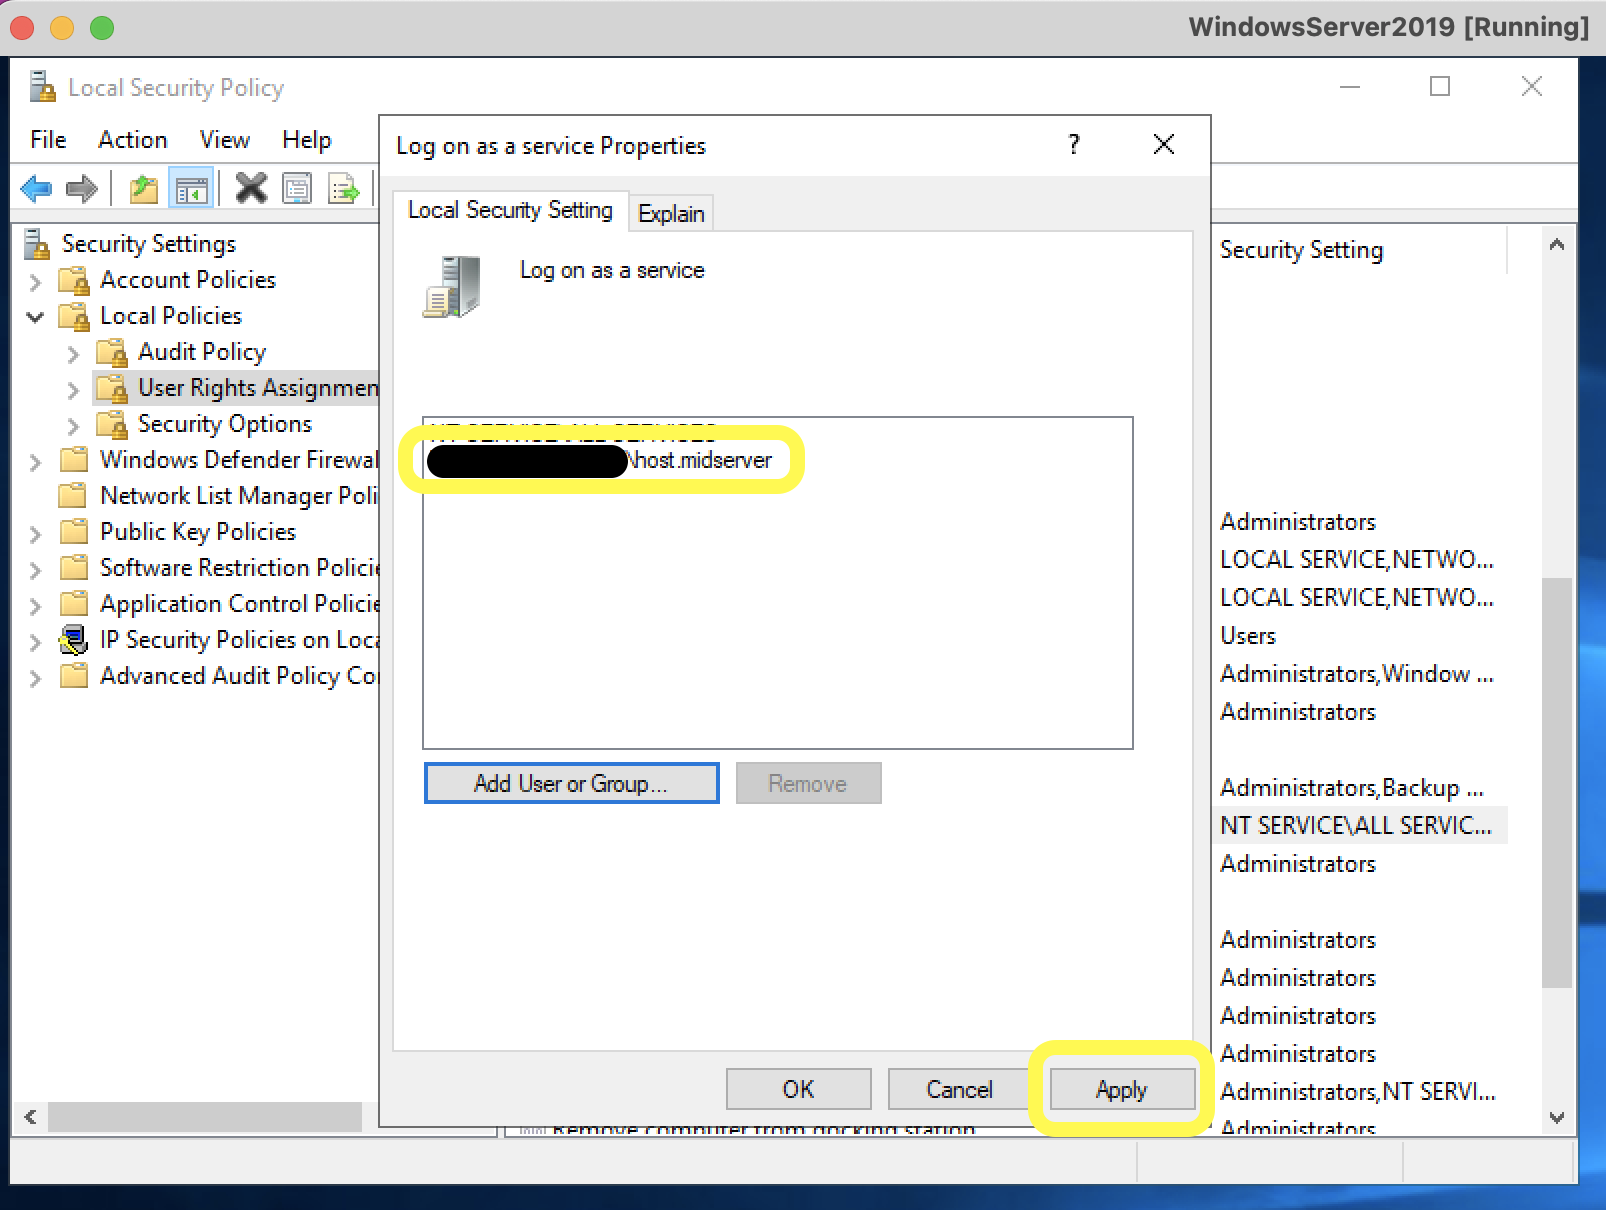
- Verify the user has been added and click 'Apply'
- Create a new ServiceNow folder on the C: drive
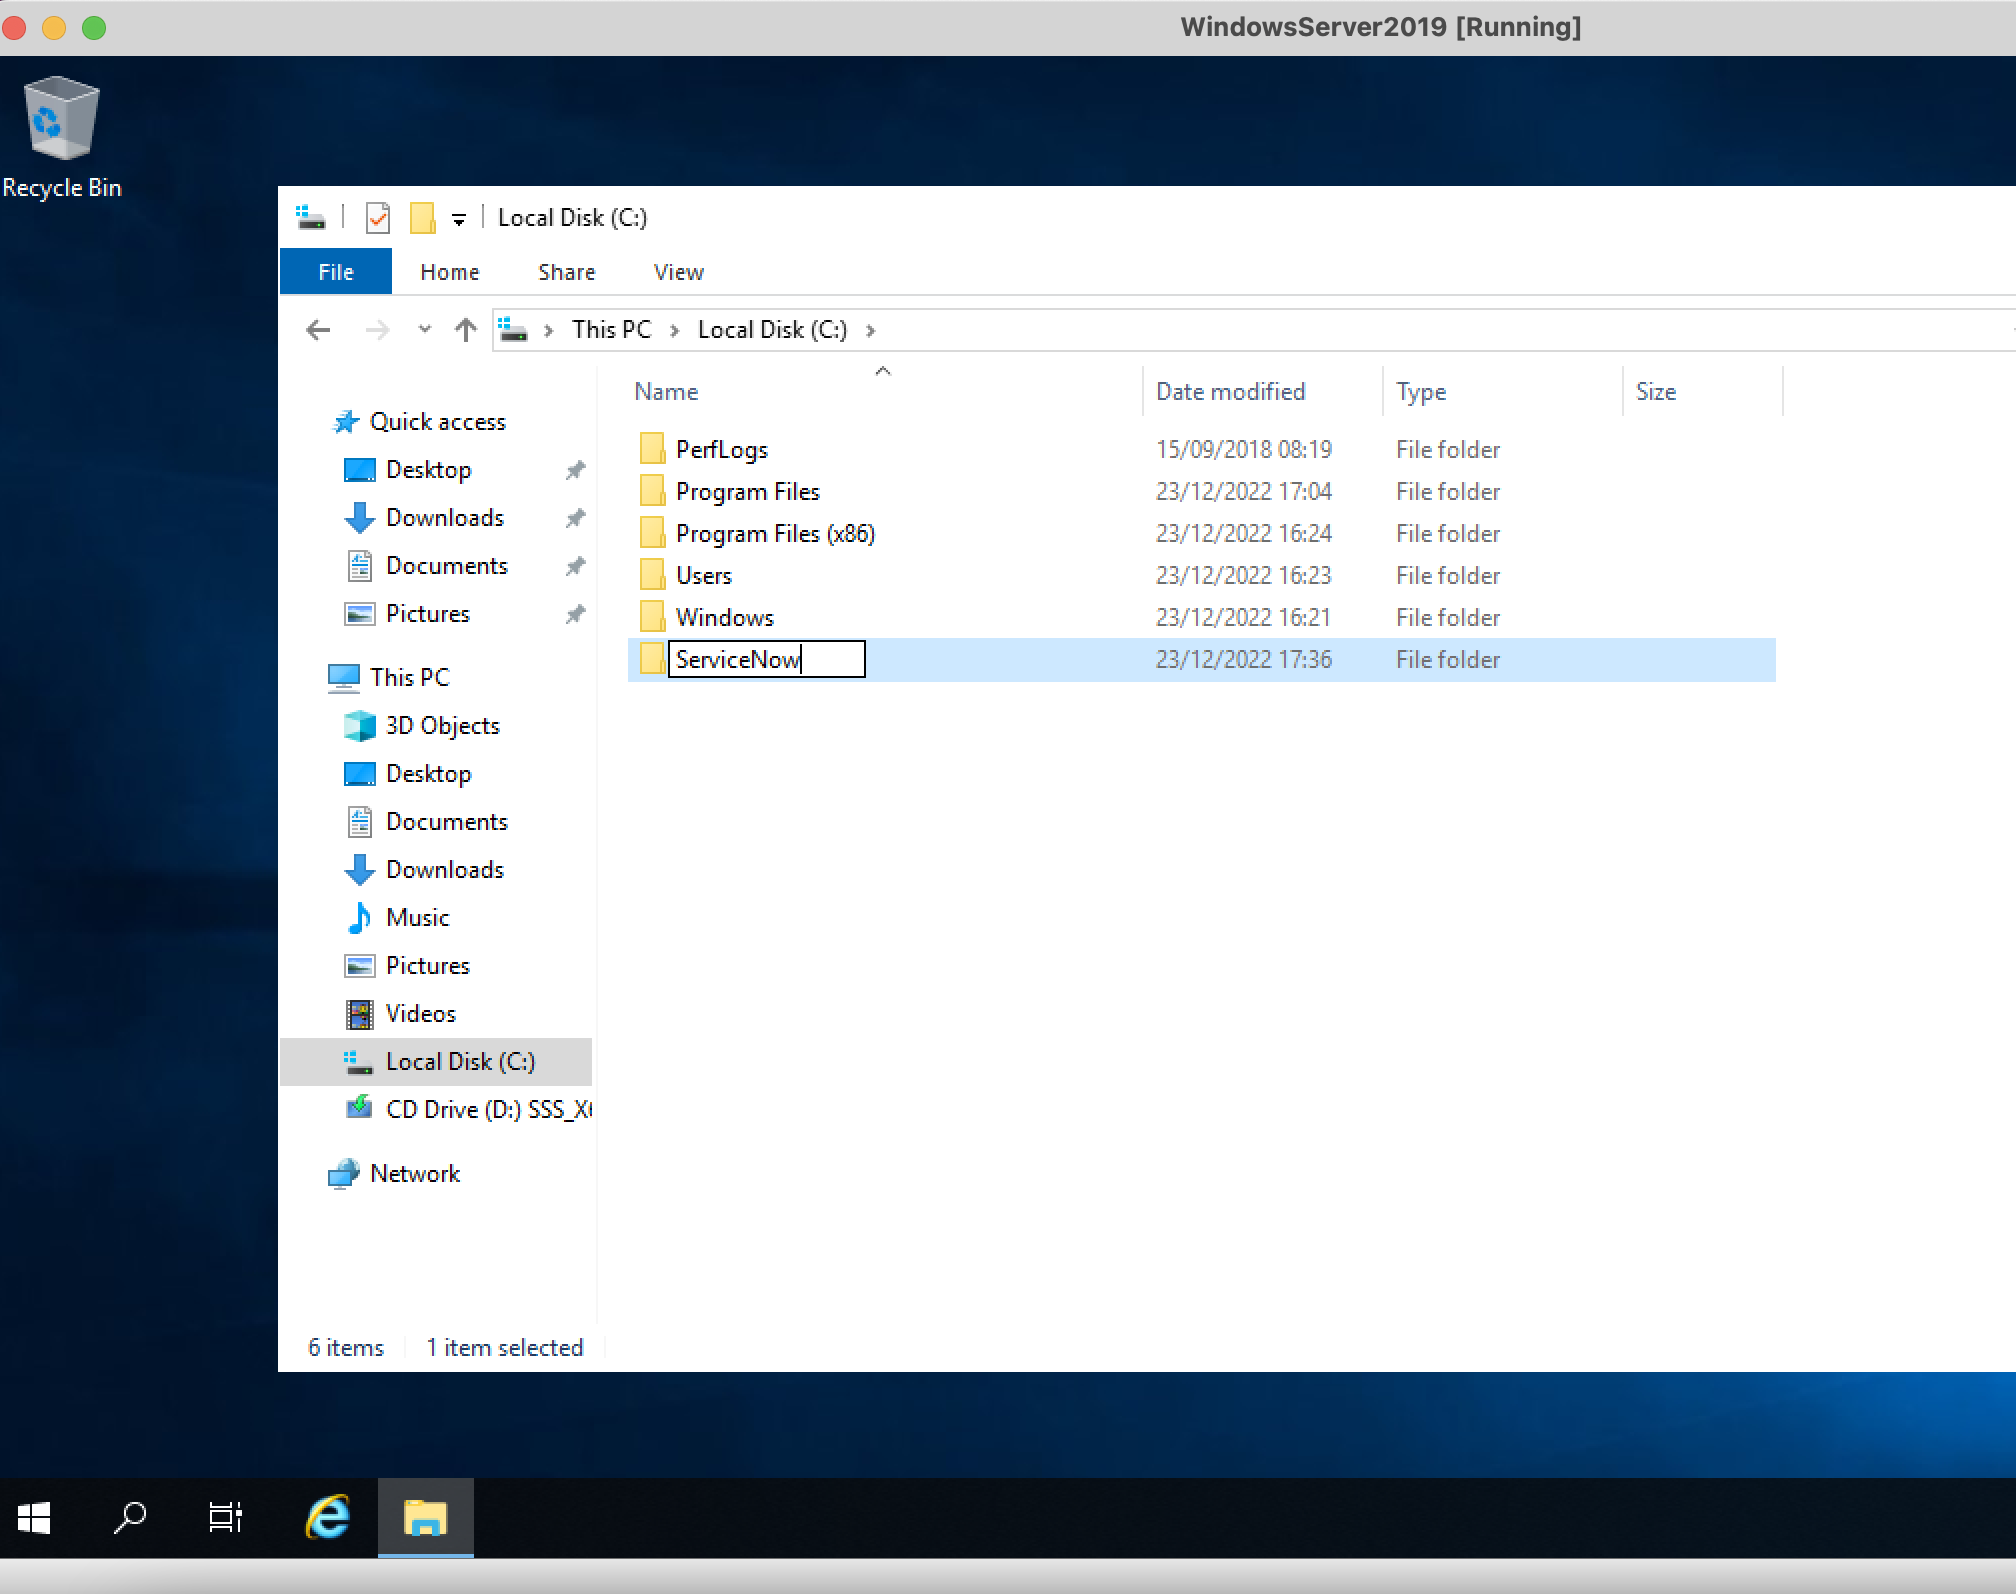
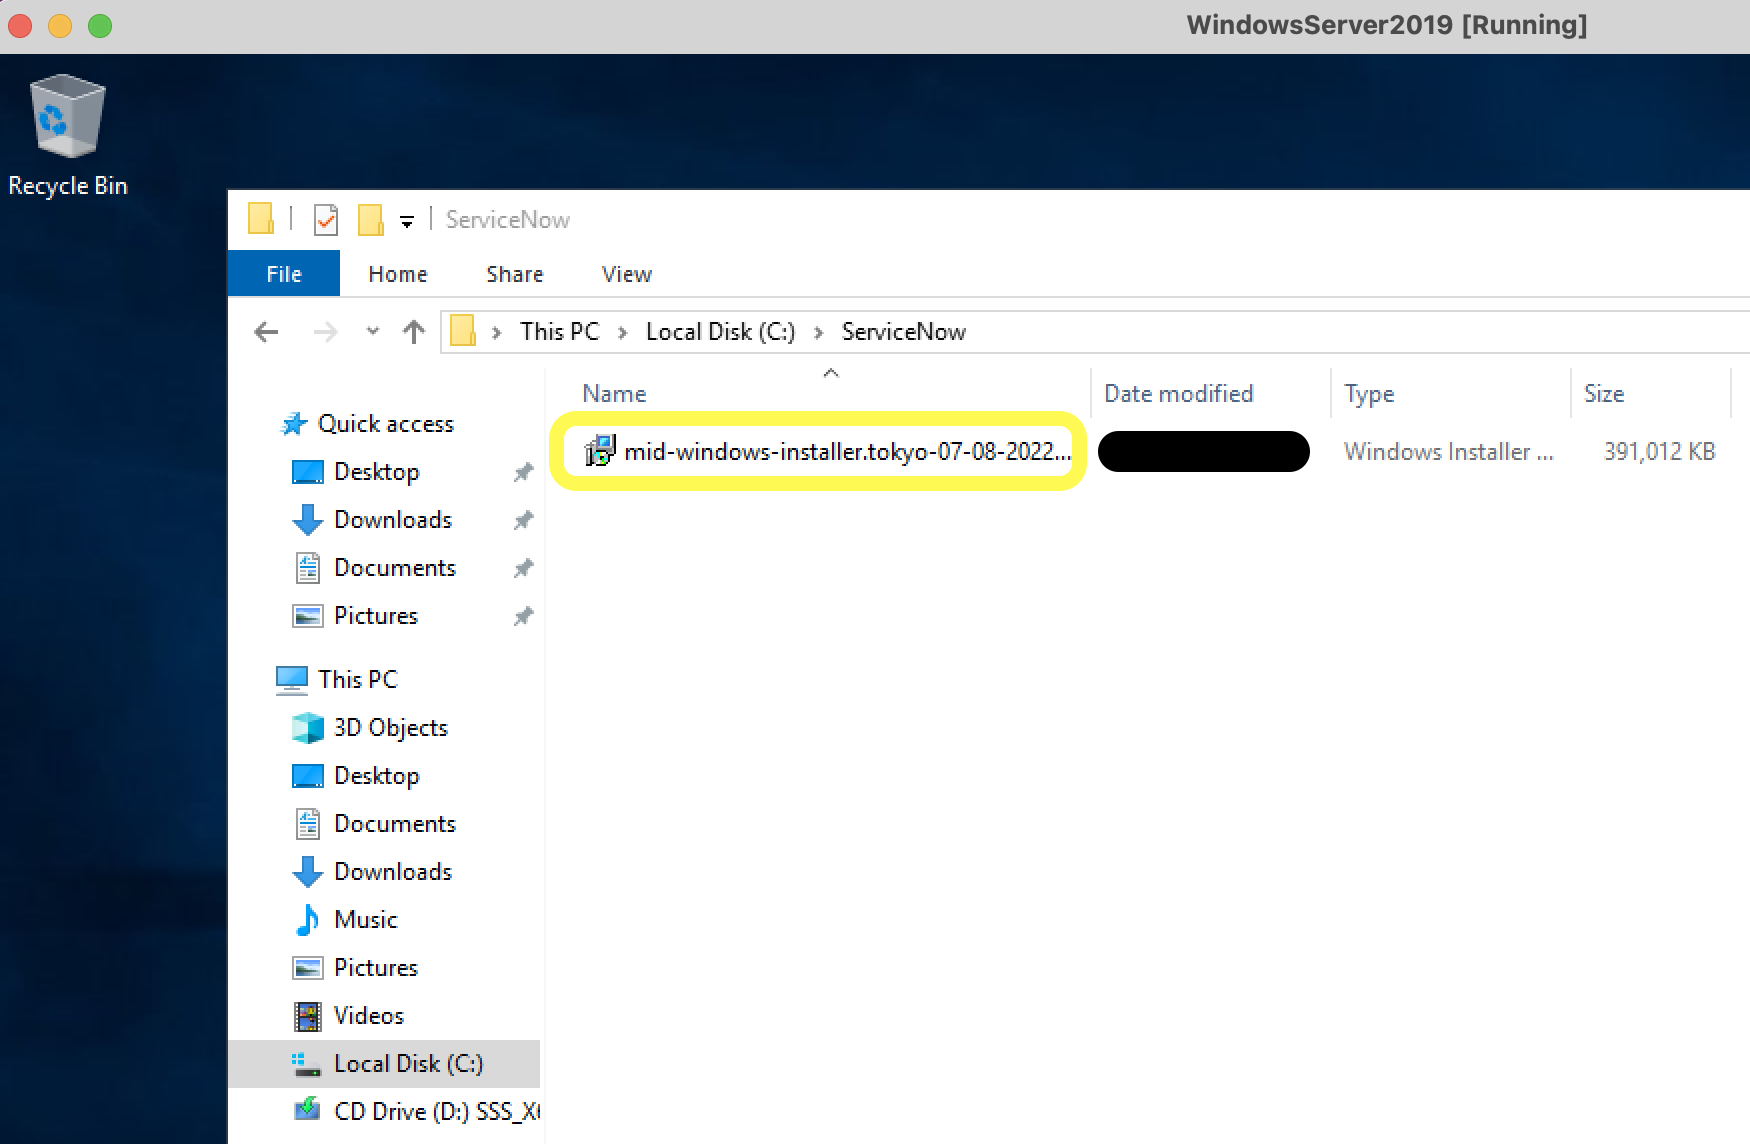
- Drag and drop the MID Server installer file (which was downloaded in Part 4) from macOS to the guest ServiceNow folder
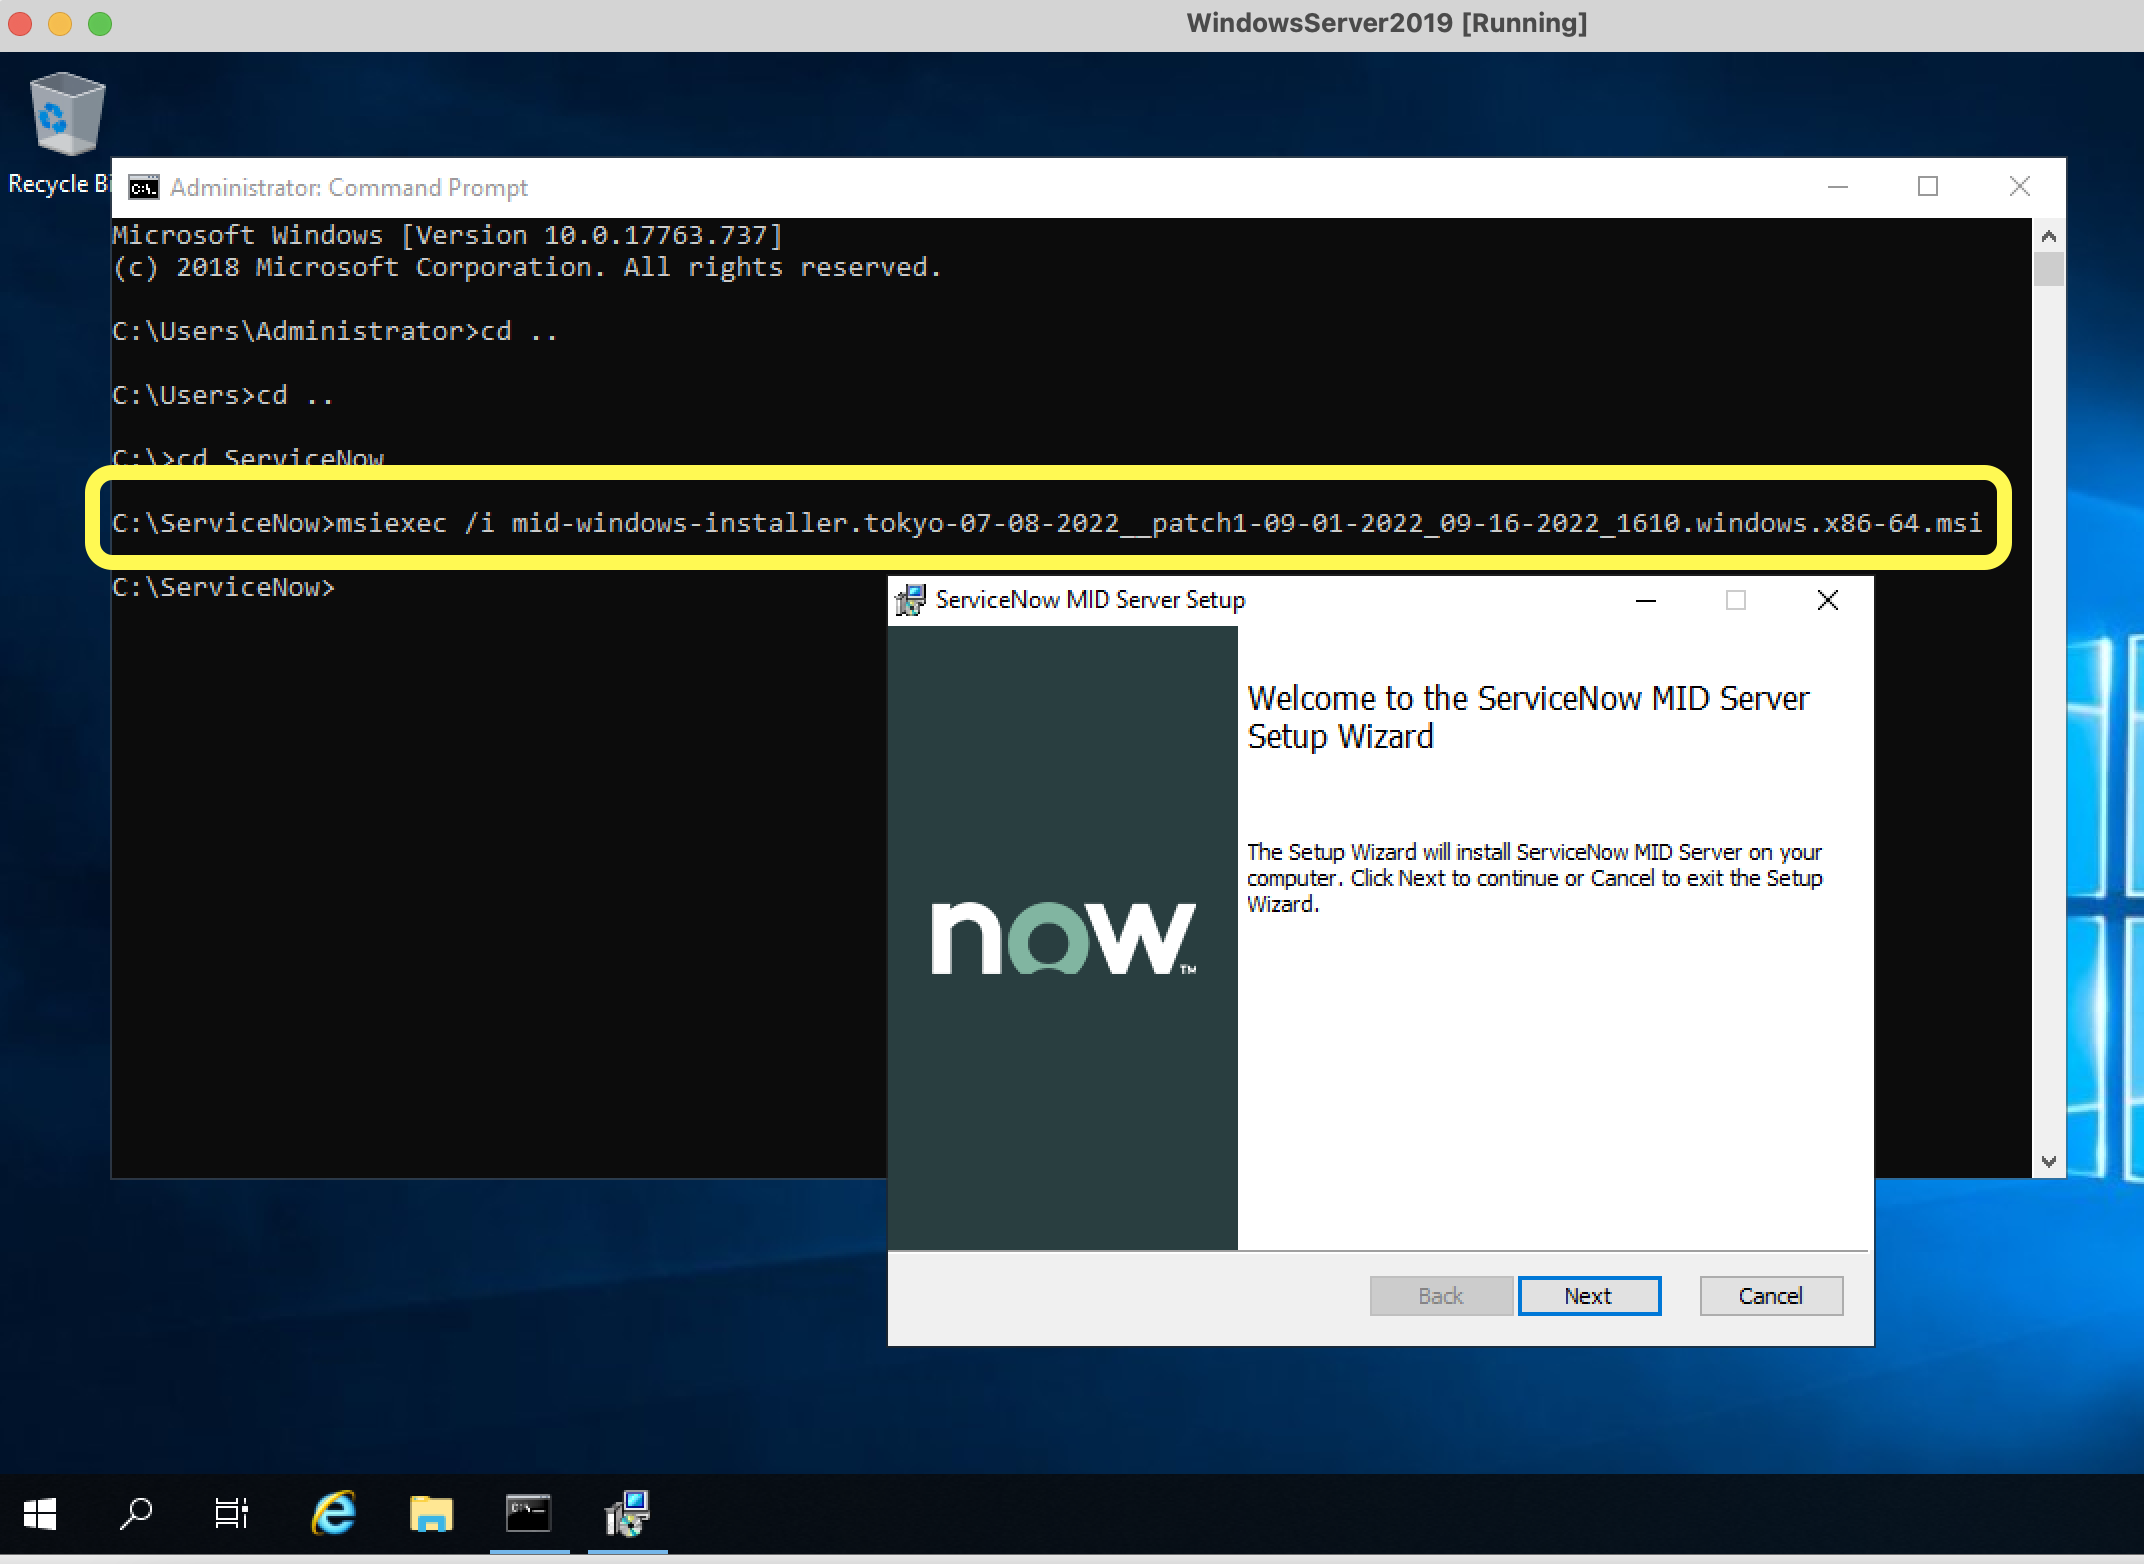
- Open the command prompt (search for Command Prompt) and at the correct path execute the following command to install the file (as System Administrator) (NOTE: ensure msi file is named correctly). This will initiate the MID Server Setup installation process. Click 'Next' and accept the License Agreement
msiexec /i mid-windows-installer.tokyo-07-08-2022__patch1-09-01-2022_09-16-2022_1610.windows.x86-64.msi
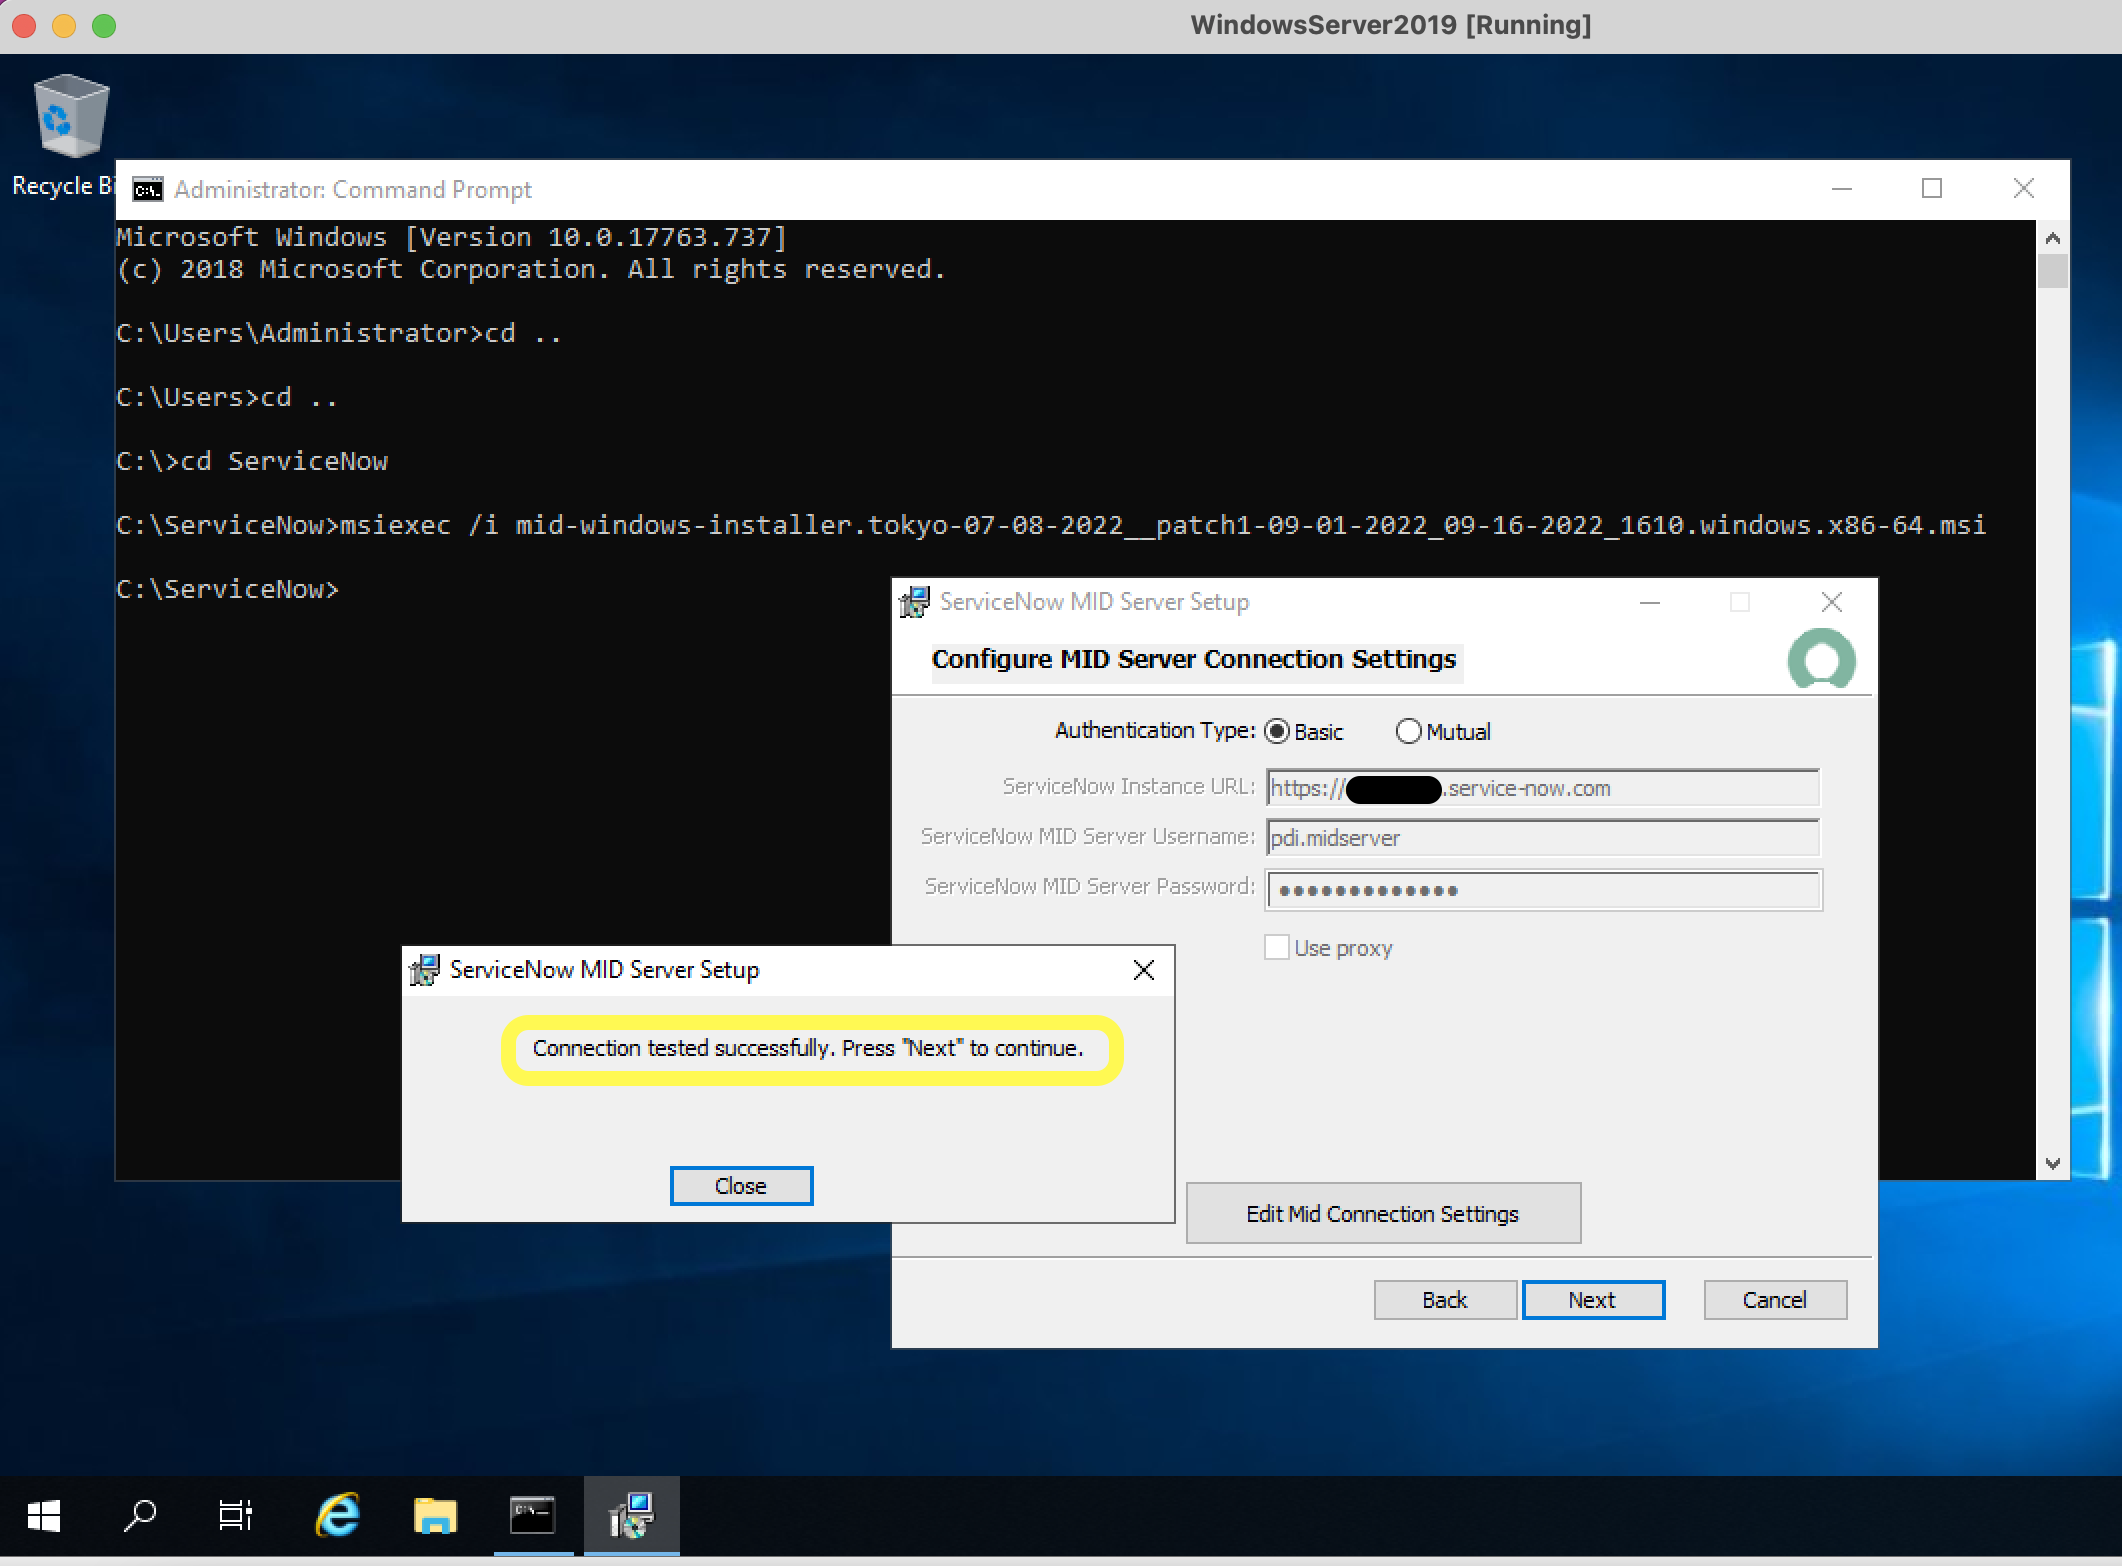
- Enter the PDI URL and credentials of the 'pdi.midserver' user. Click 'Test Your Connection'. A 'Connection tested successfully' message should appear. Click 'Next' to continue
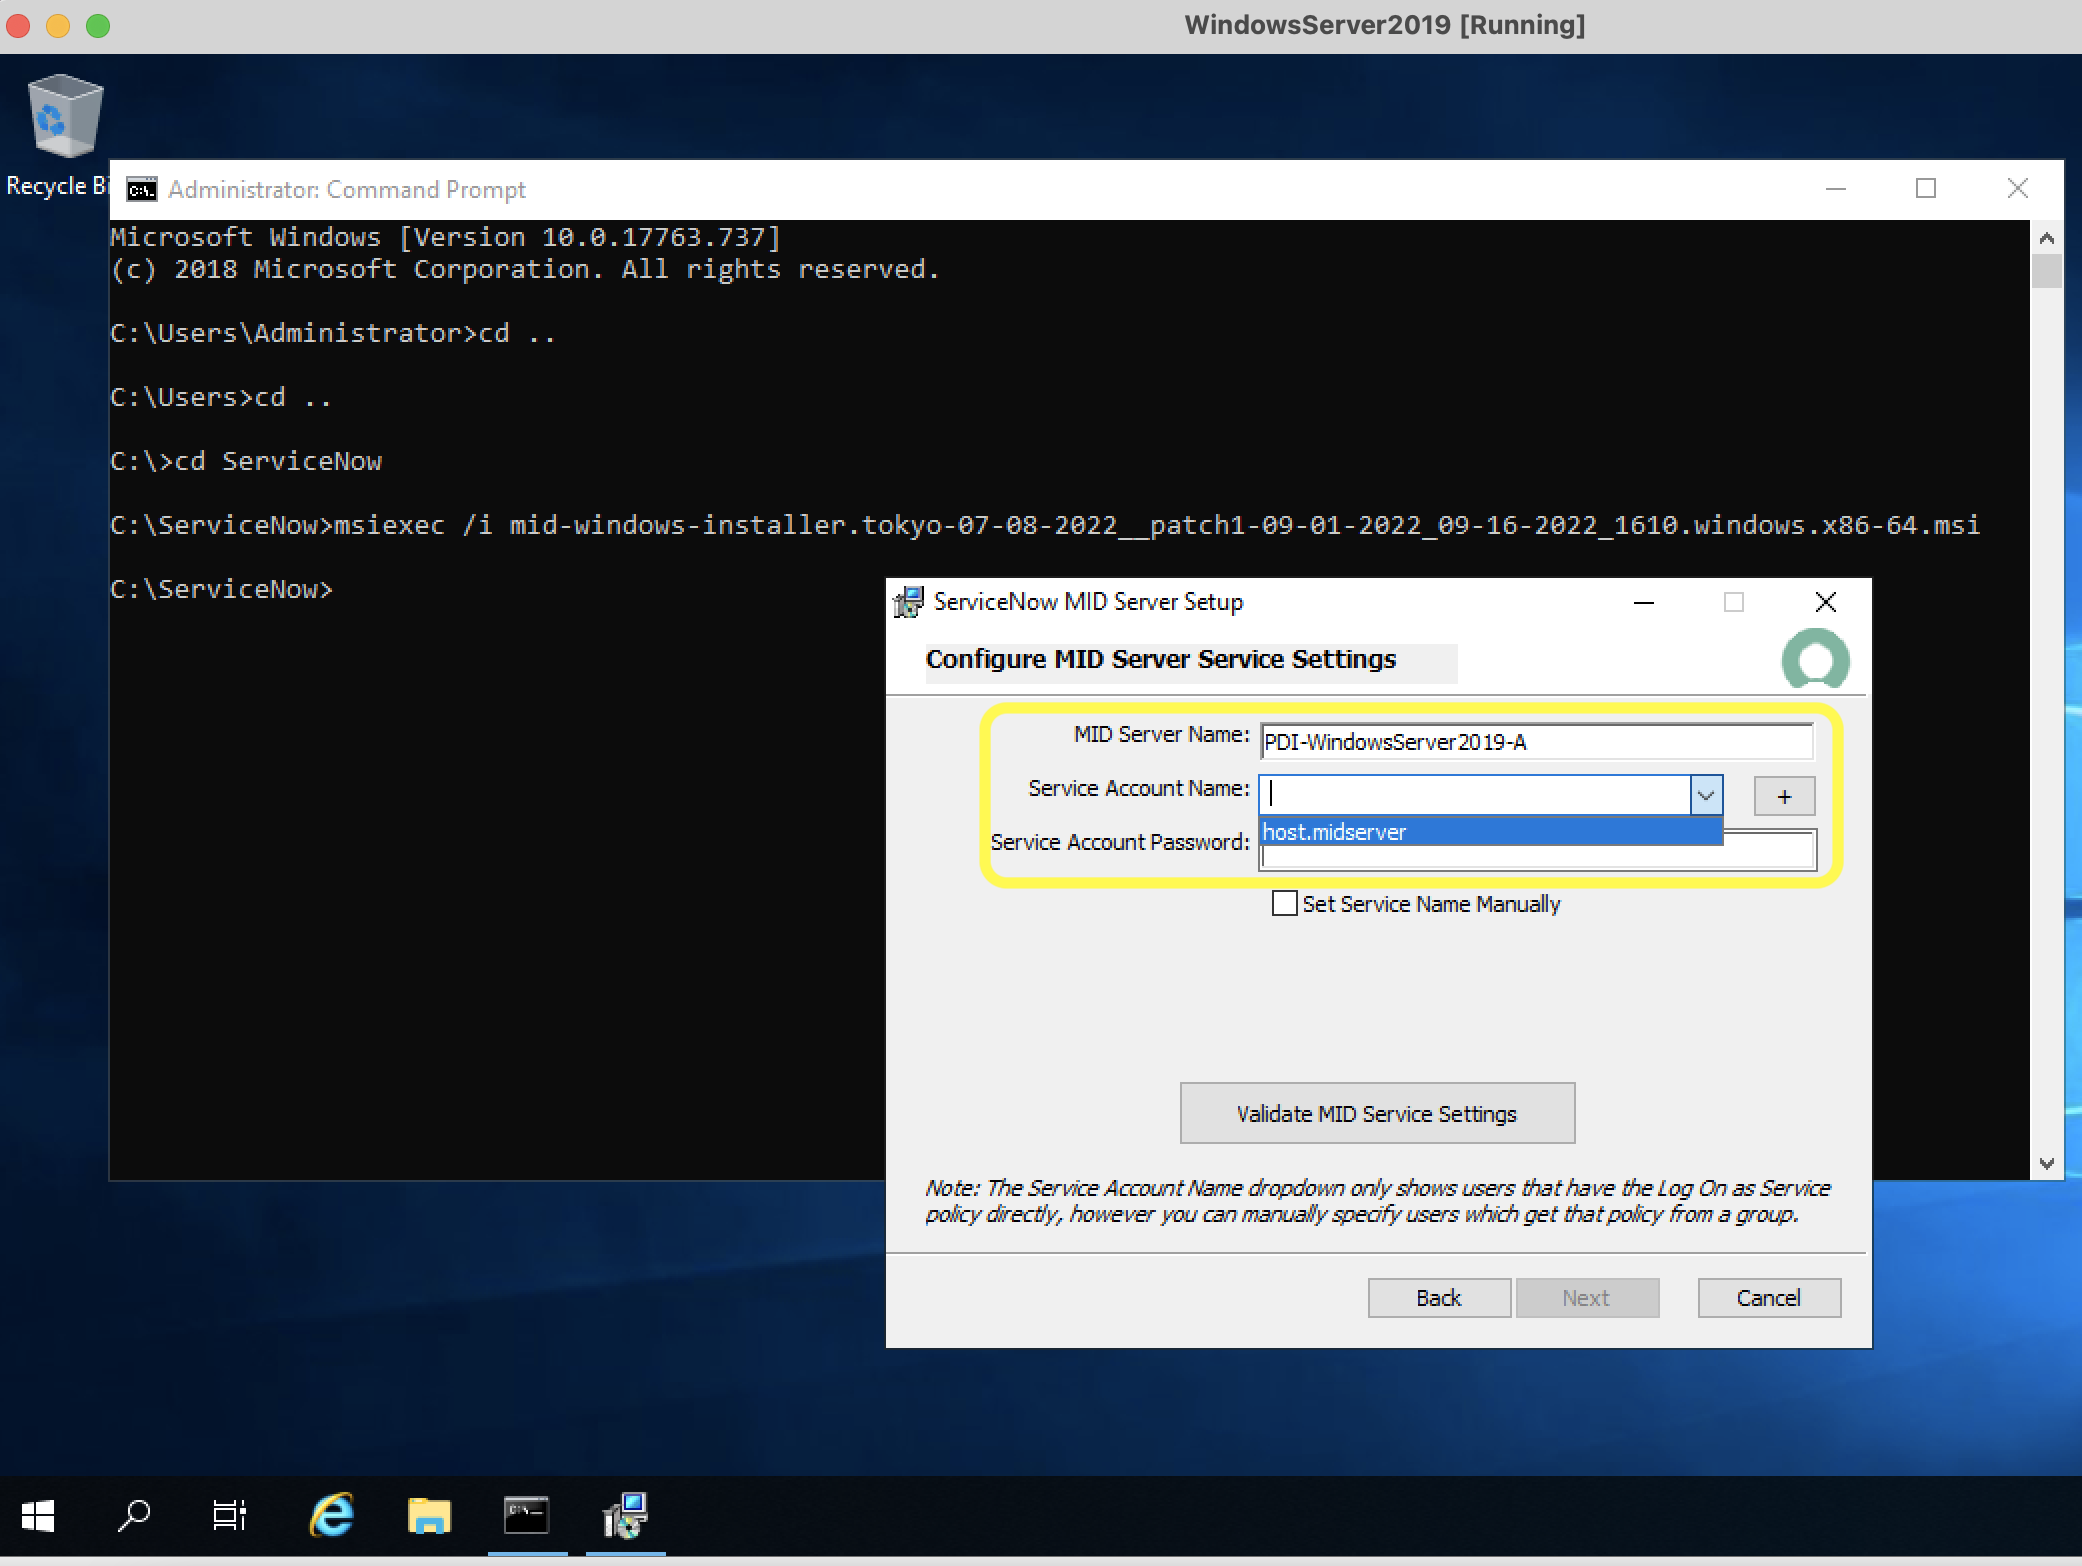
- Enter a MID Server Name and from the drop-down select the Service Account Name ('host.midserver') and the account password. Select 'Validate MID Service Settings' and once validated click 'Next'
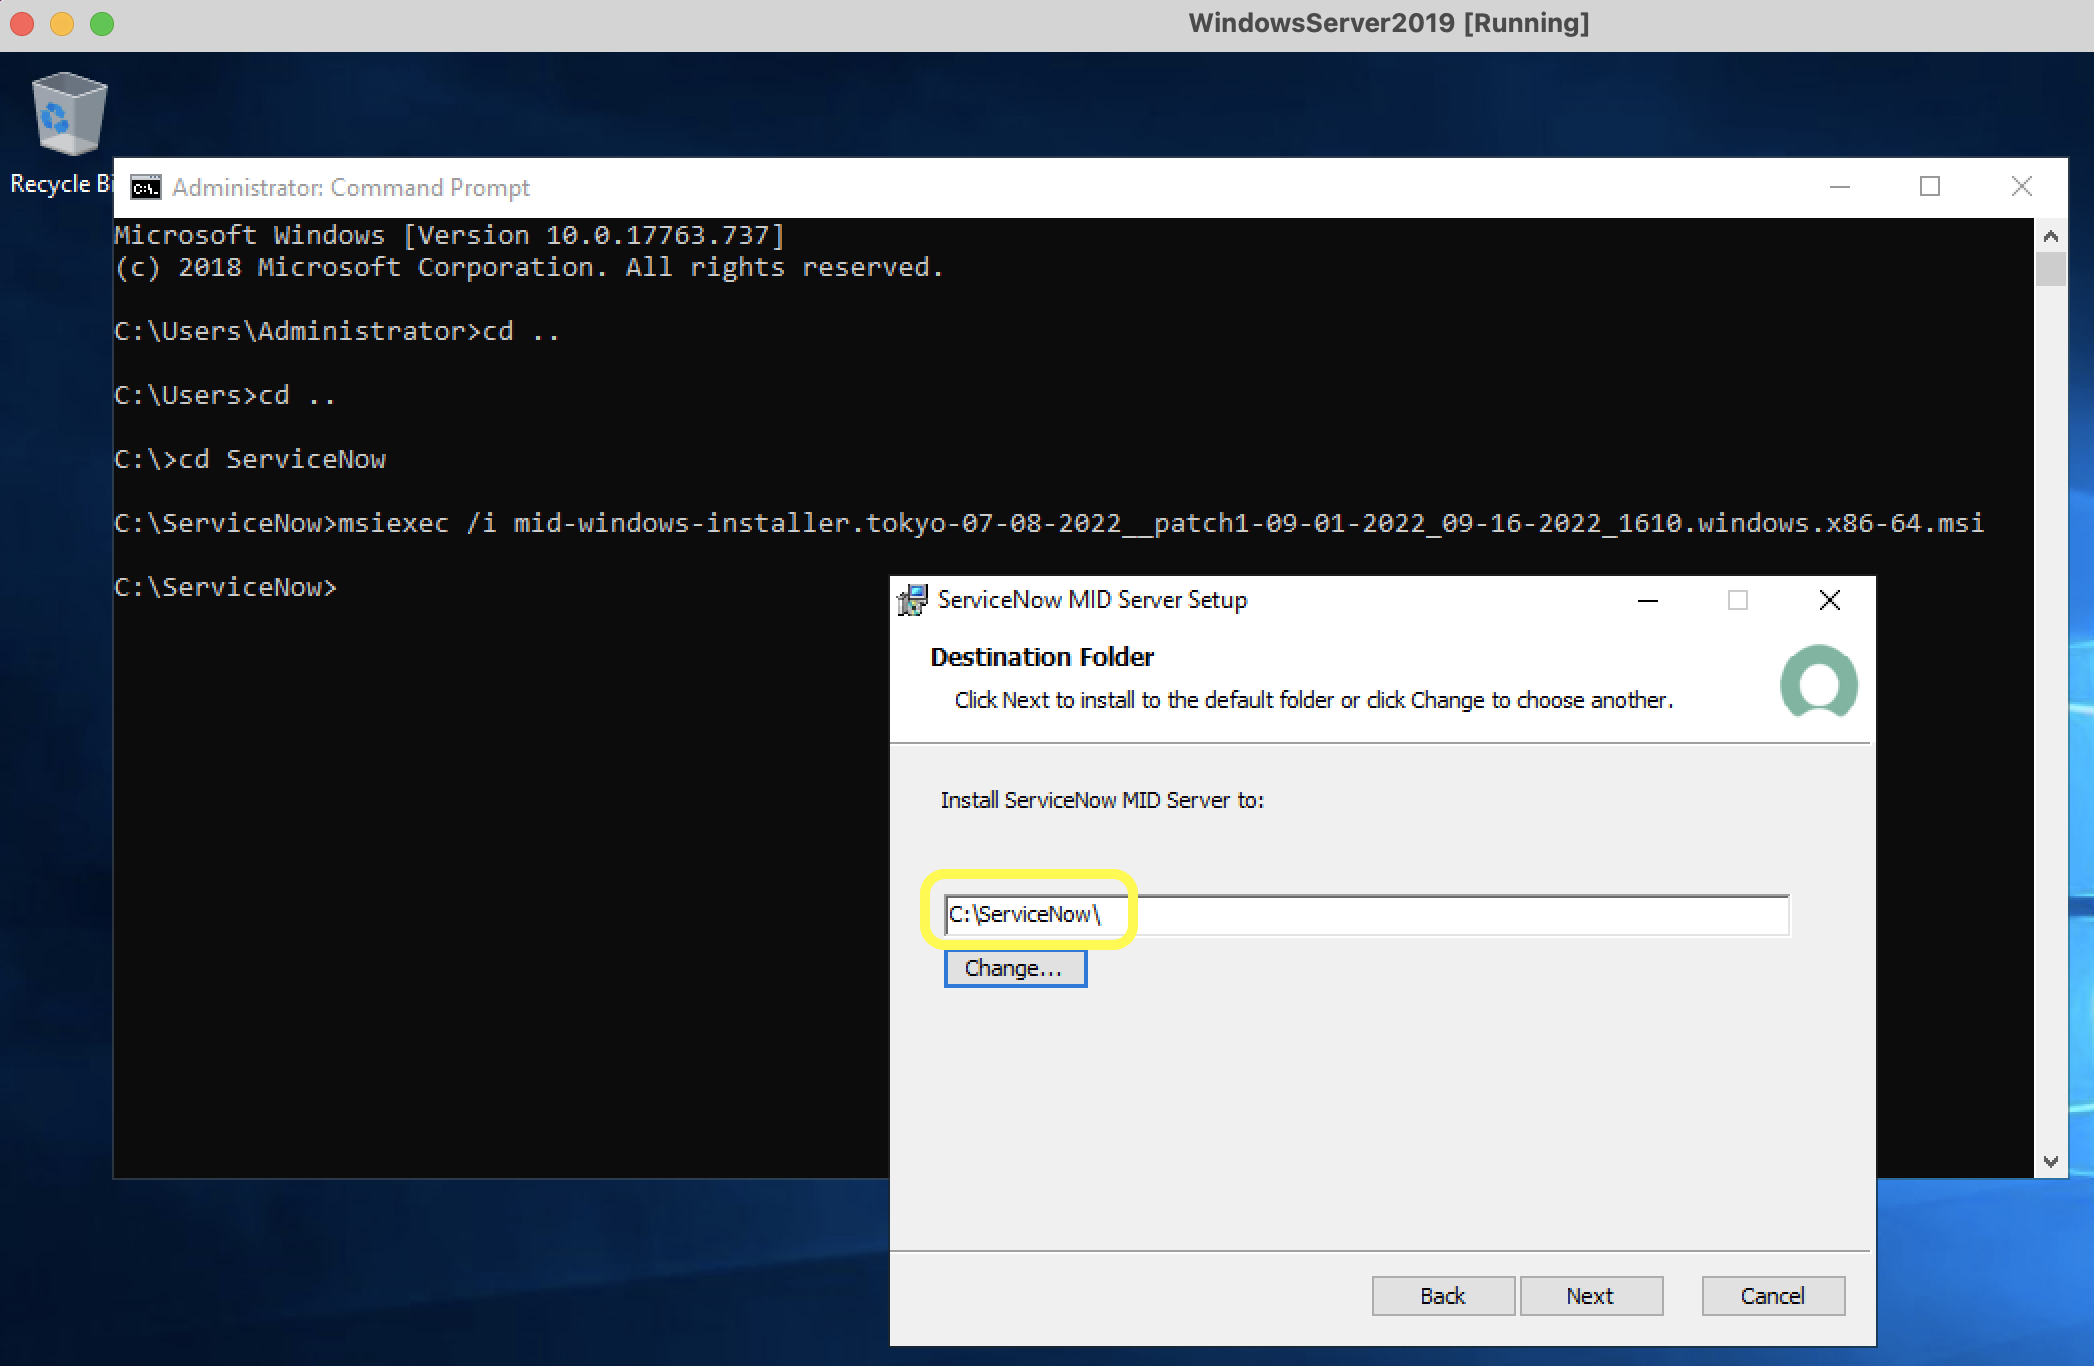
- Choose the destination folder for Installation and click 'Next'
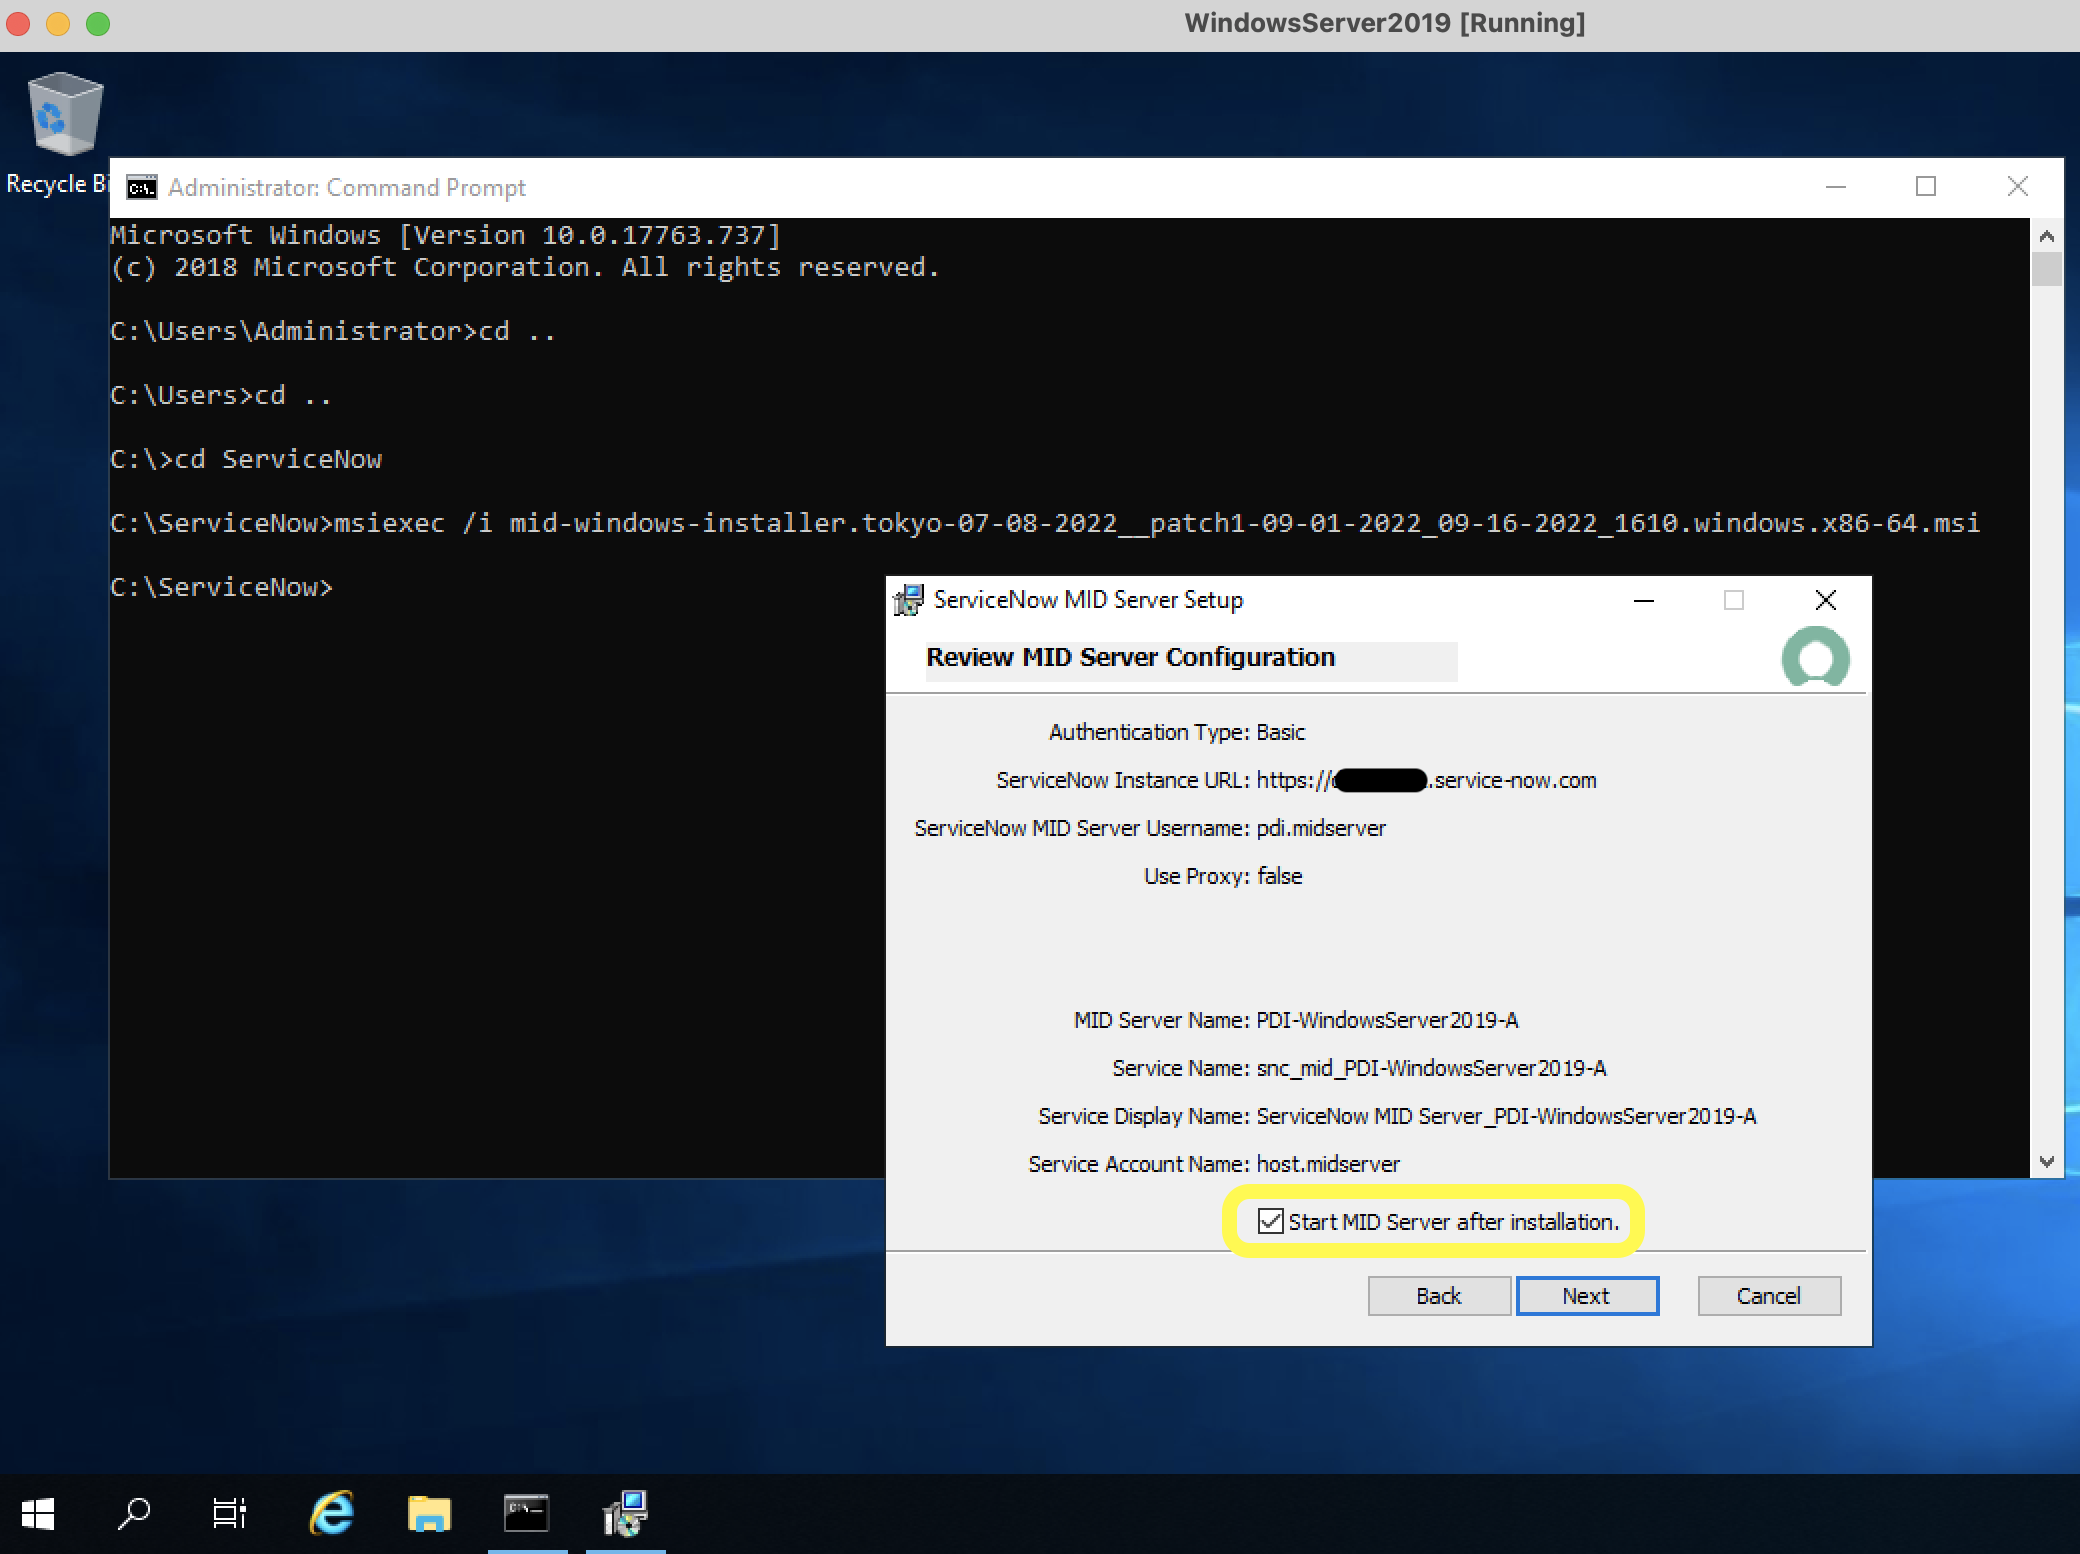
- On the next screen, you can choose to Start MID Server after installation. Click 'Next' and then 'Install' on the subsequent prompt
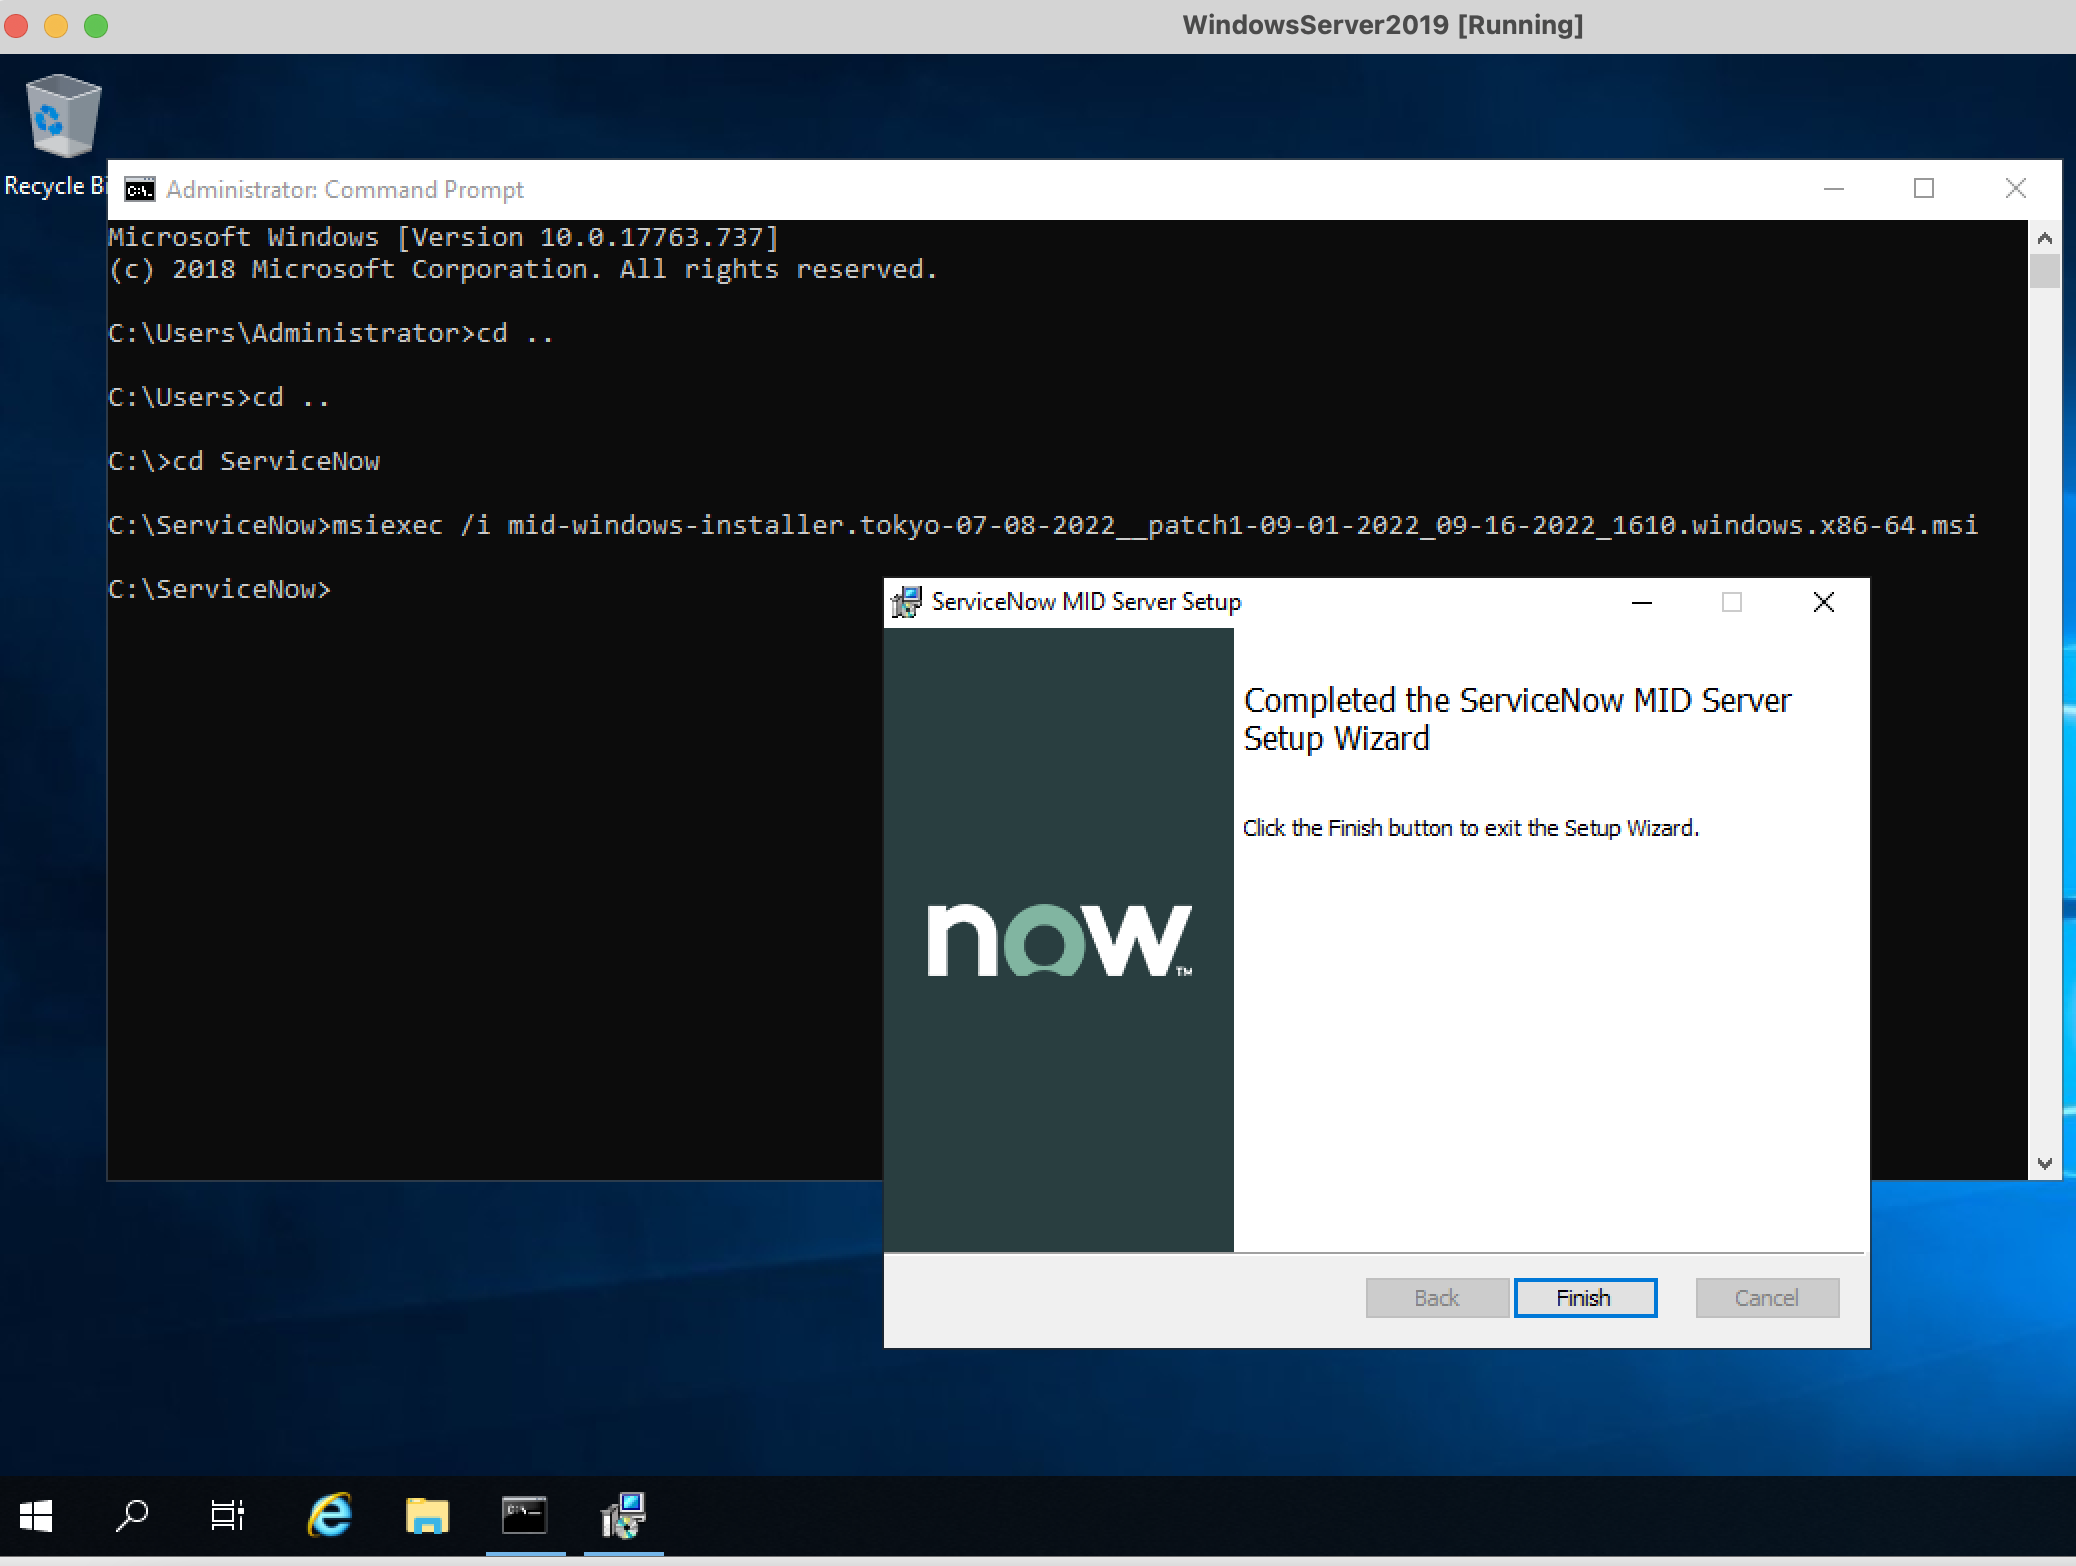
- The installation should complete. Click 'Finish'
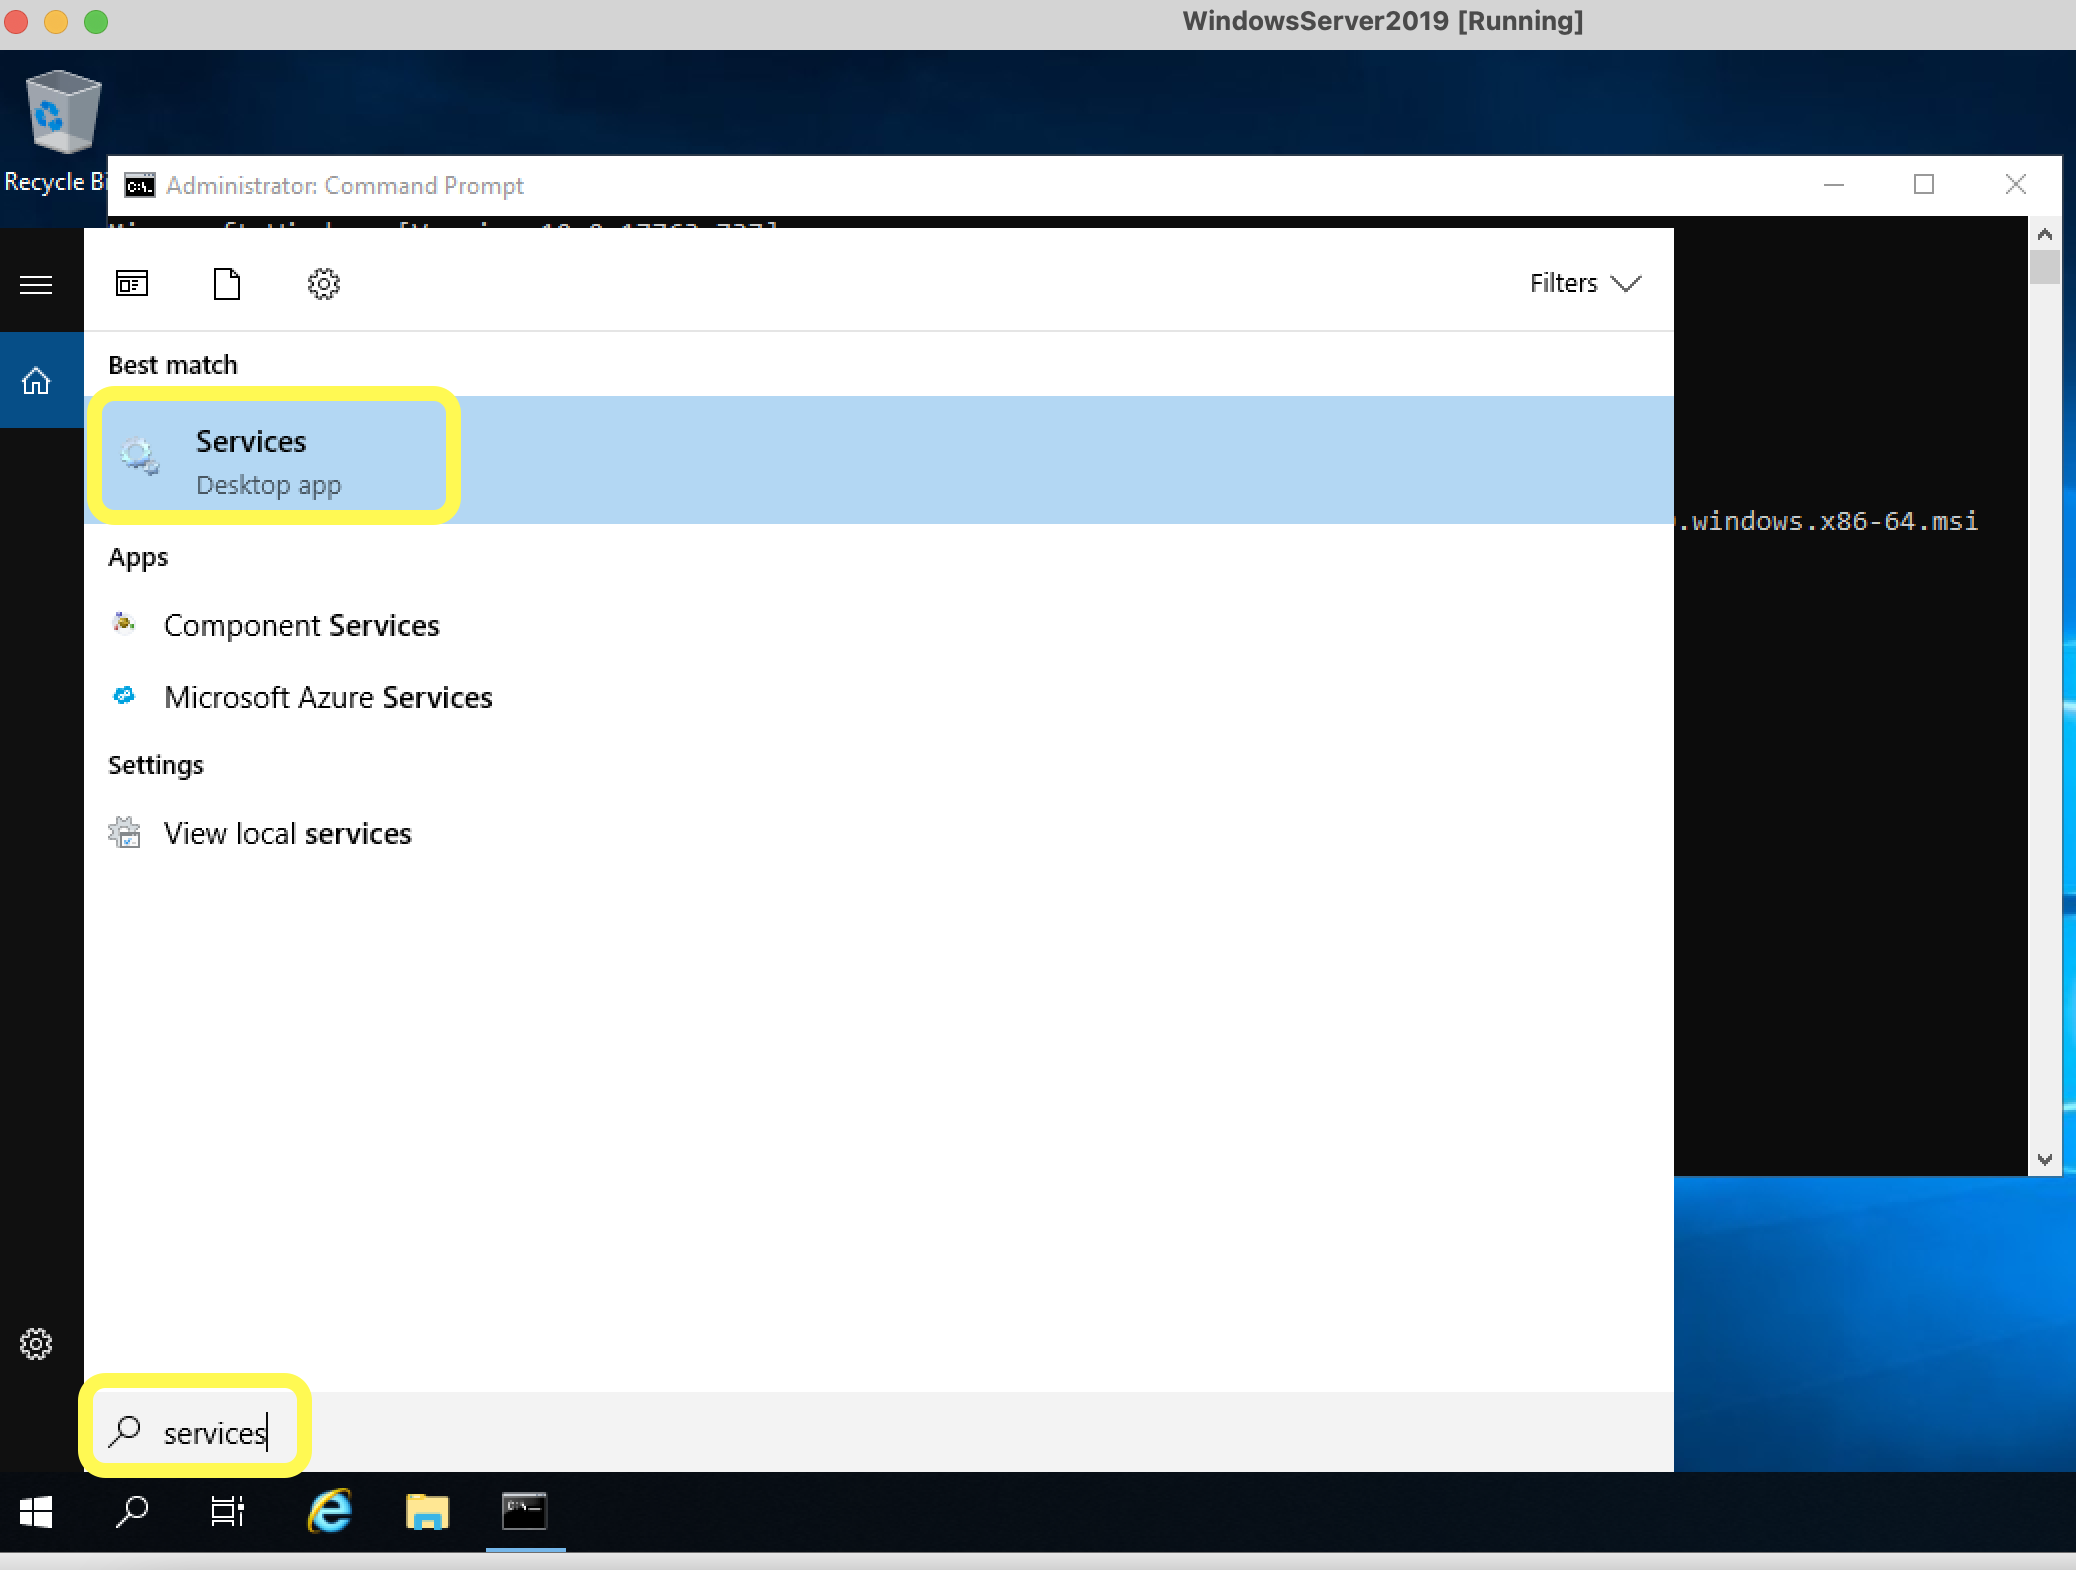
- Validate the MID Server service is running by going to 'Services'
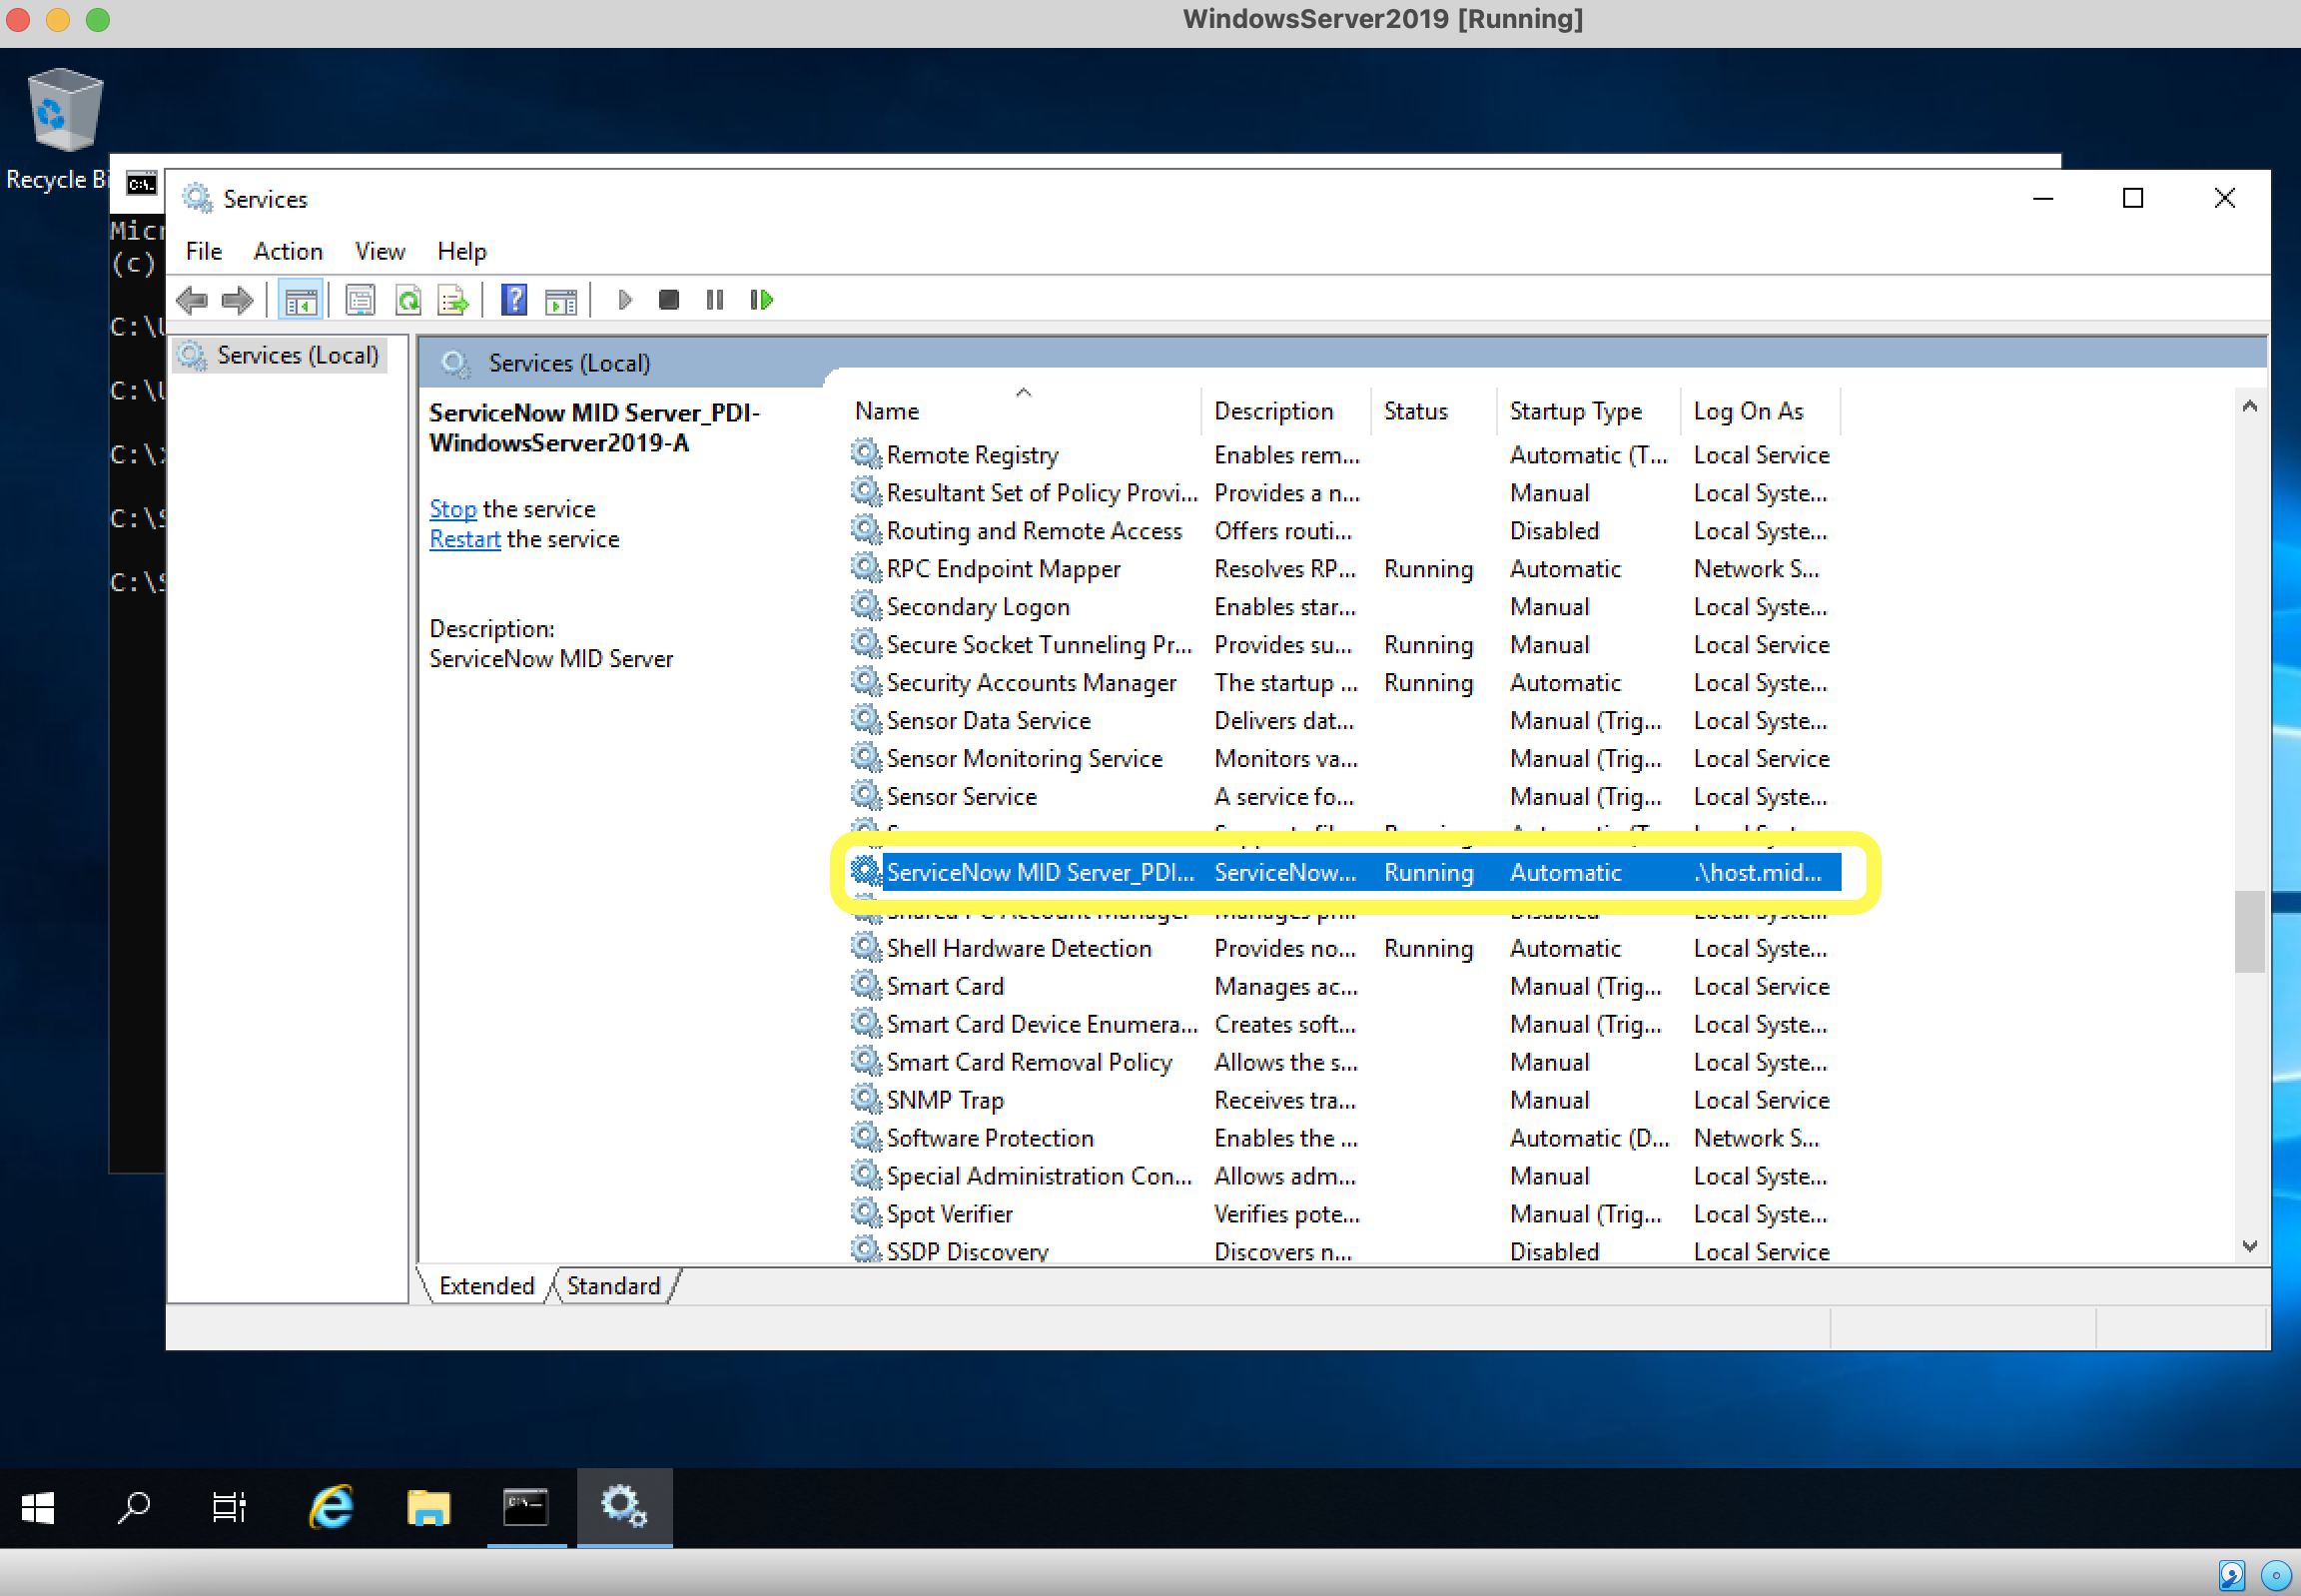
- Locate the MID Server service where the status should be 'Running'. Also, notice 'Log on As' is set to 'host.midserver' user
- Jump back to the PDI and validate the MID Server record on ecc_agent table was created (via MID Server => Servers)

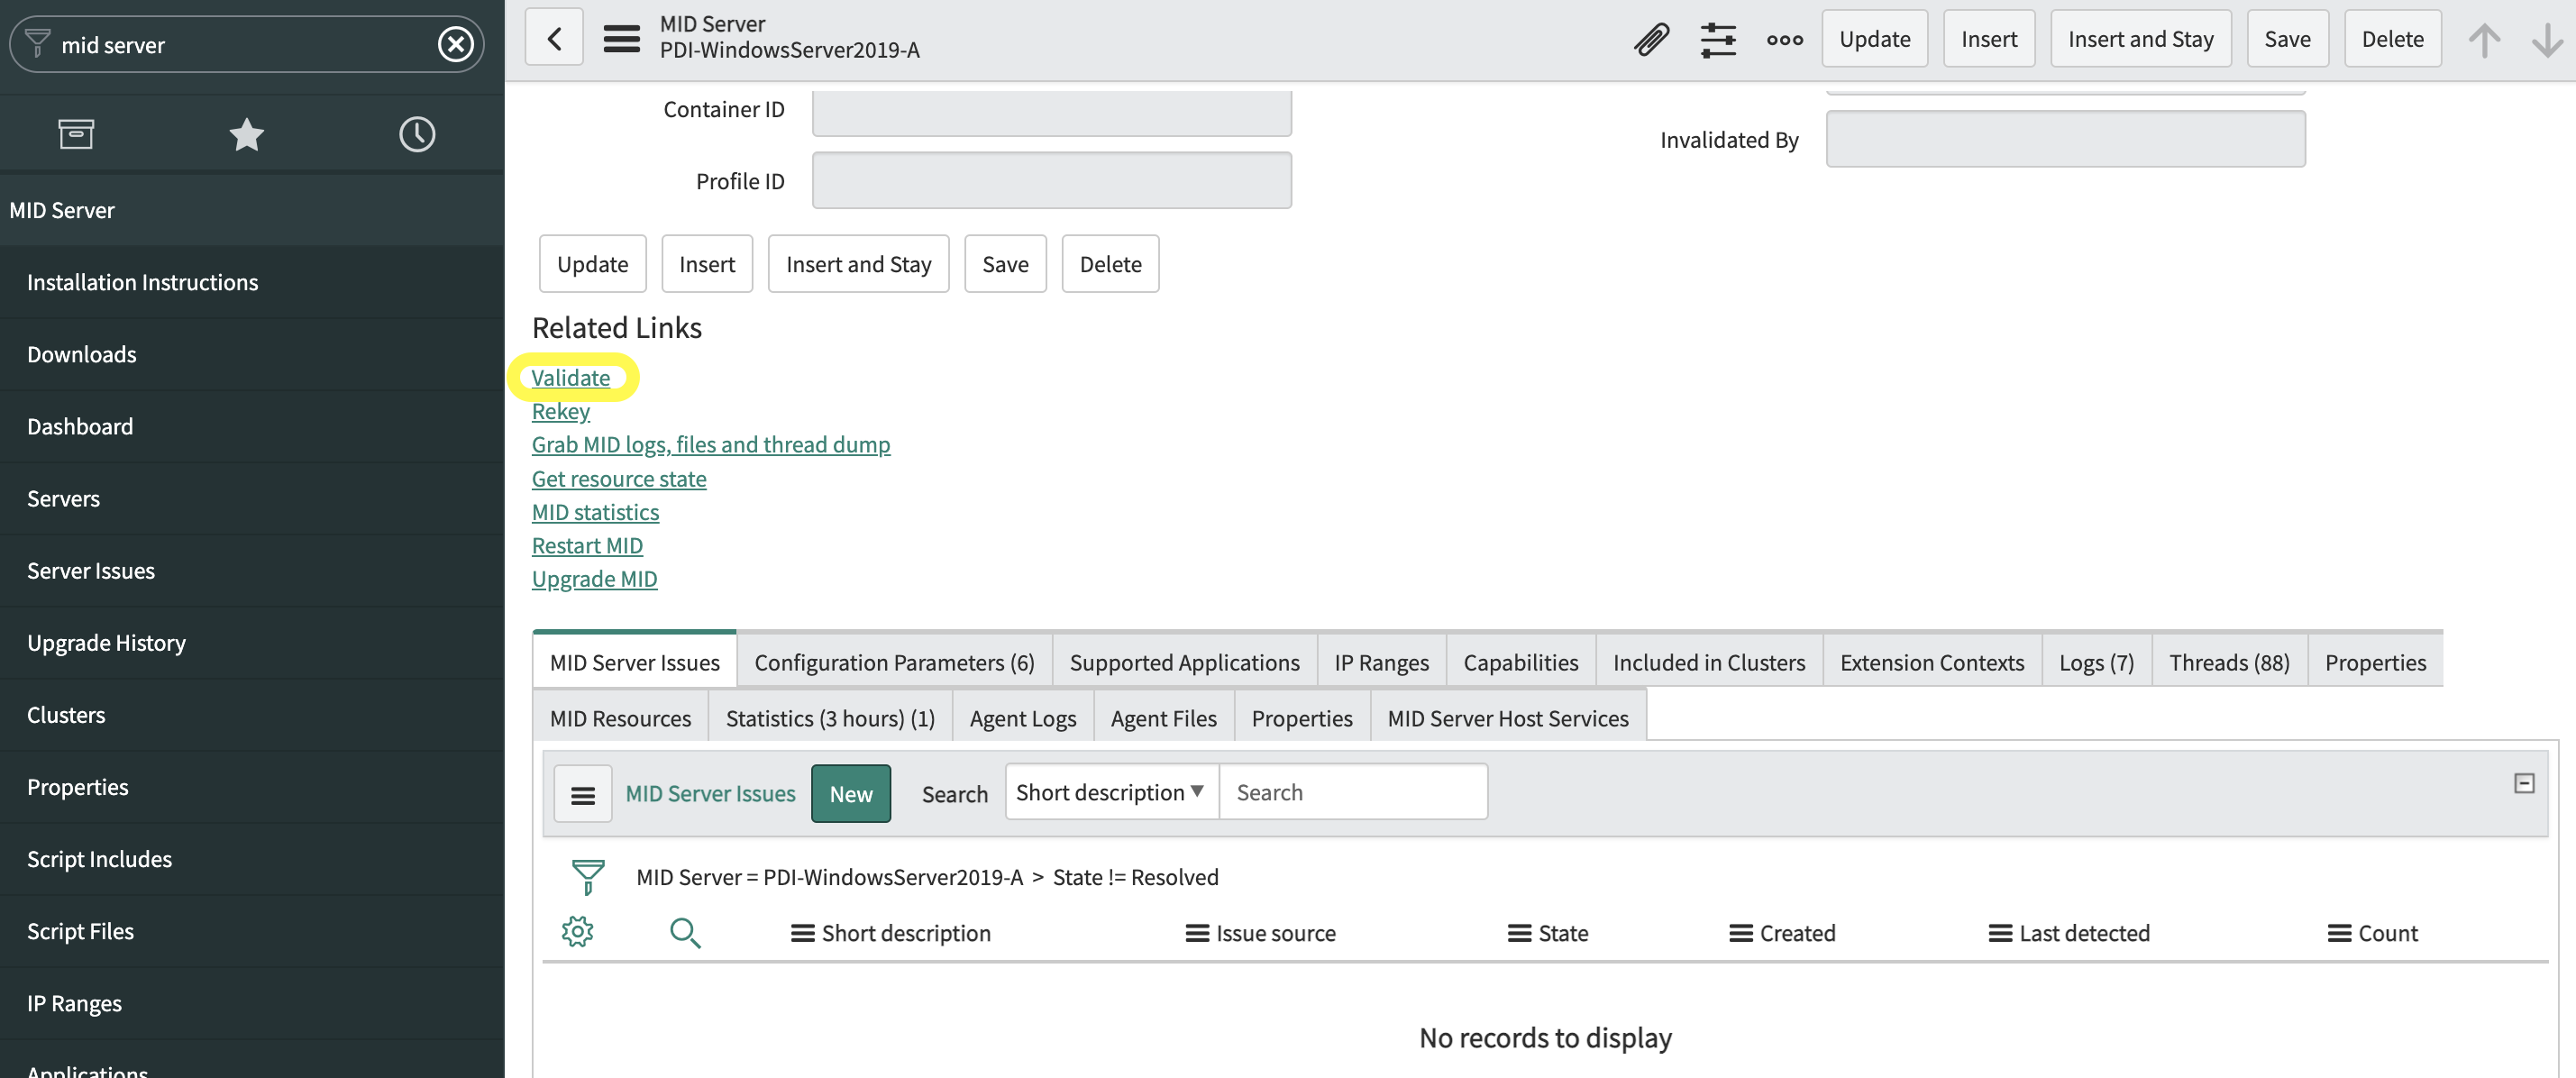
- Click on the name to review the form view for additional details. The MidServer can also be validated. The ServiceNow documentation states 'You must manually validate the MID Server after it is installed to enable it to execute automation tasks'
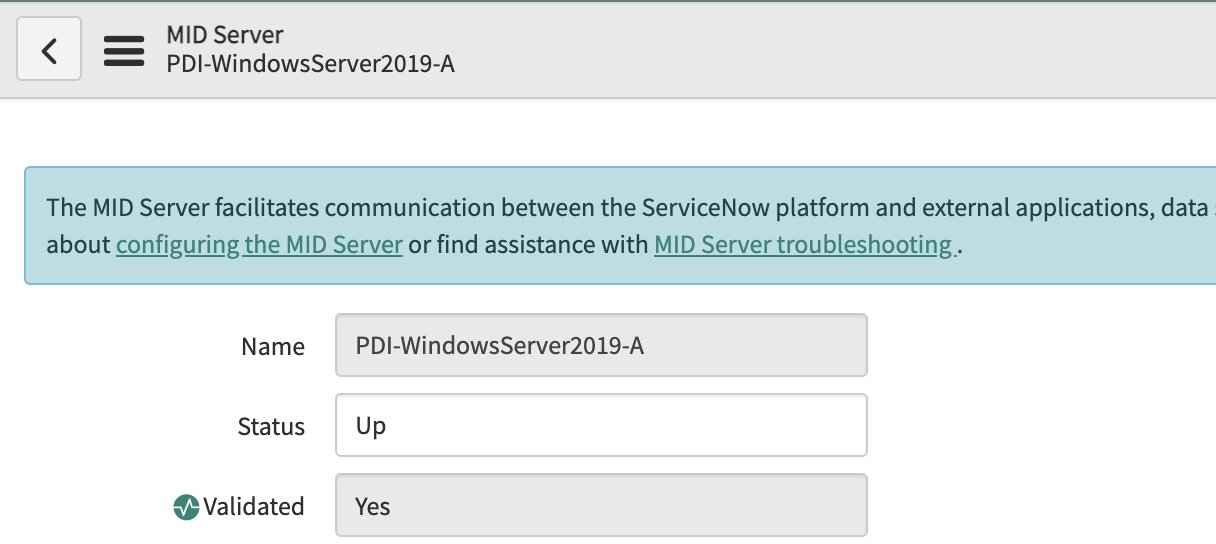
- The MID Server should then resolve to a 'Validated' state
Conclusion
I hope this proves useful in helping set up a MID Server on a PDI running on macOS. If you have any questions, comments or other tips drop them below.
]]>
https://geofftopley.hashnode.dev/servicenow-personal-developer-instance-pdi-mid-server-setup-for-macos