
Generate Attachment via custom Flow Designer Action
 Geoff Topley | ServiceNow Developer
·
Dec 30, 2022
·
article
Geoff Topley | ServiceNow Developer
·
Dec 30, 2022
·
article

<
The steps below will outline how to create a custom action that generates an attachment.
Step 1: Create a new Action
After opening Flow Designer (via filter navigator under the Process Automation application) click on the 'Action' button under 'New'

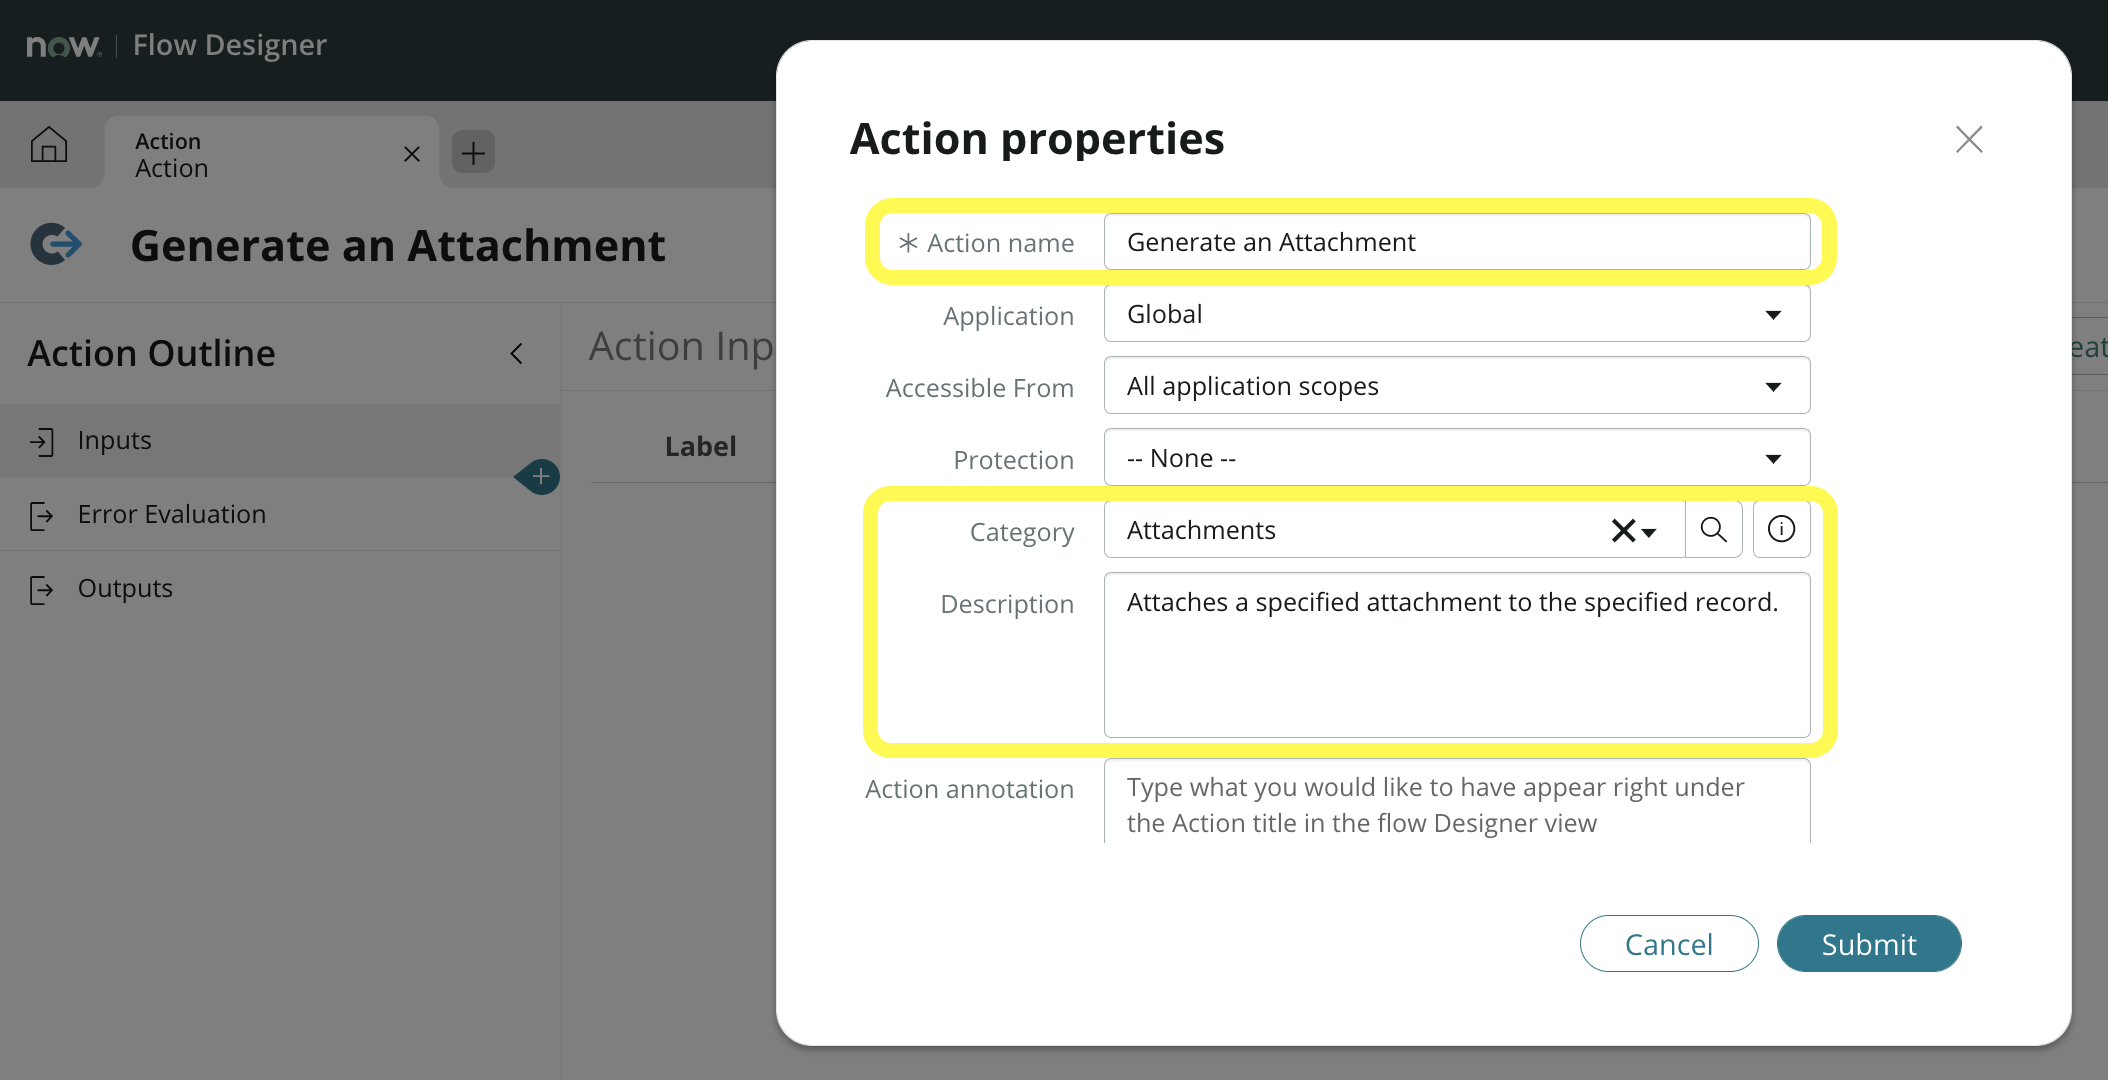
Step 2: Configure the Action properties
Provide the Action Name, set the Category as 'Attachments' and add a suitable description
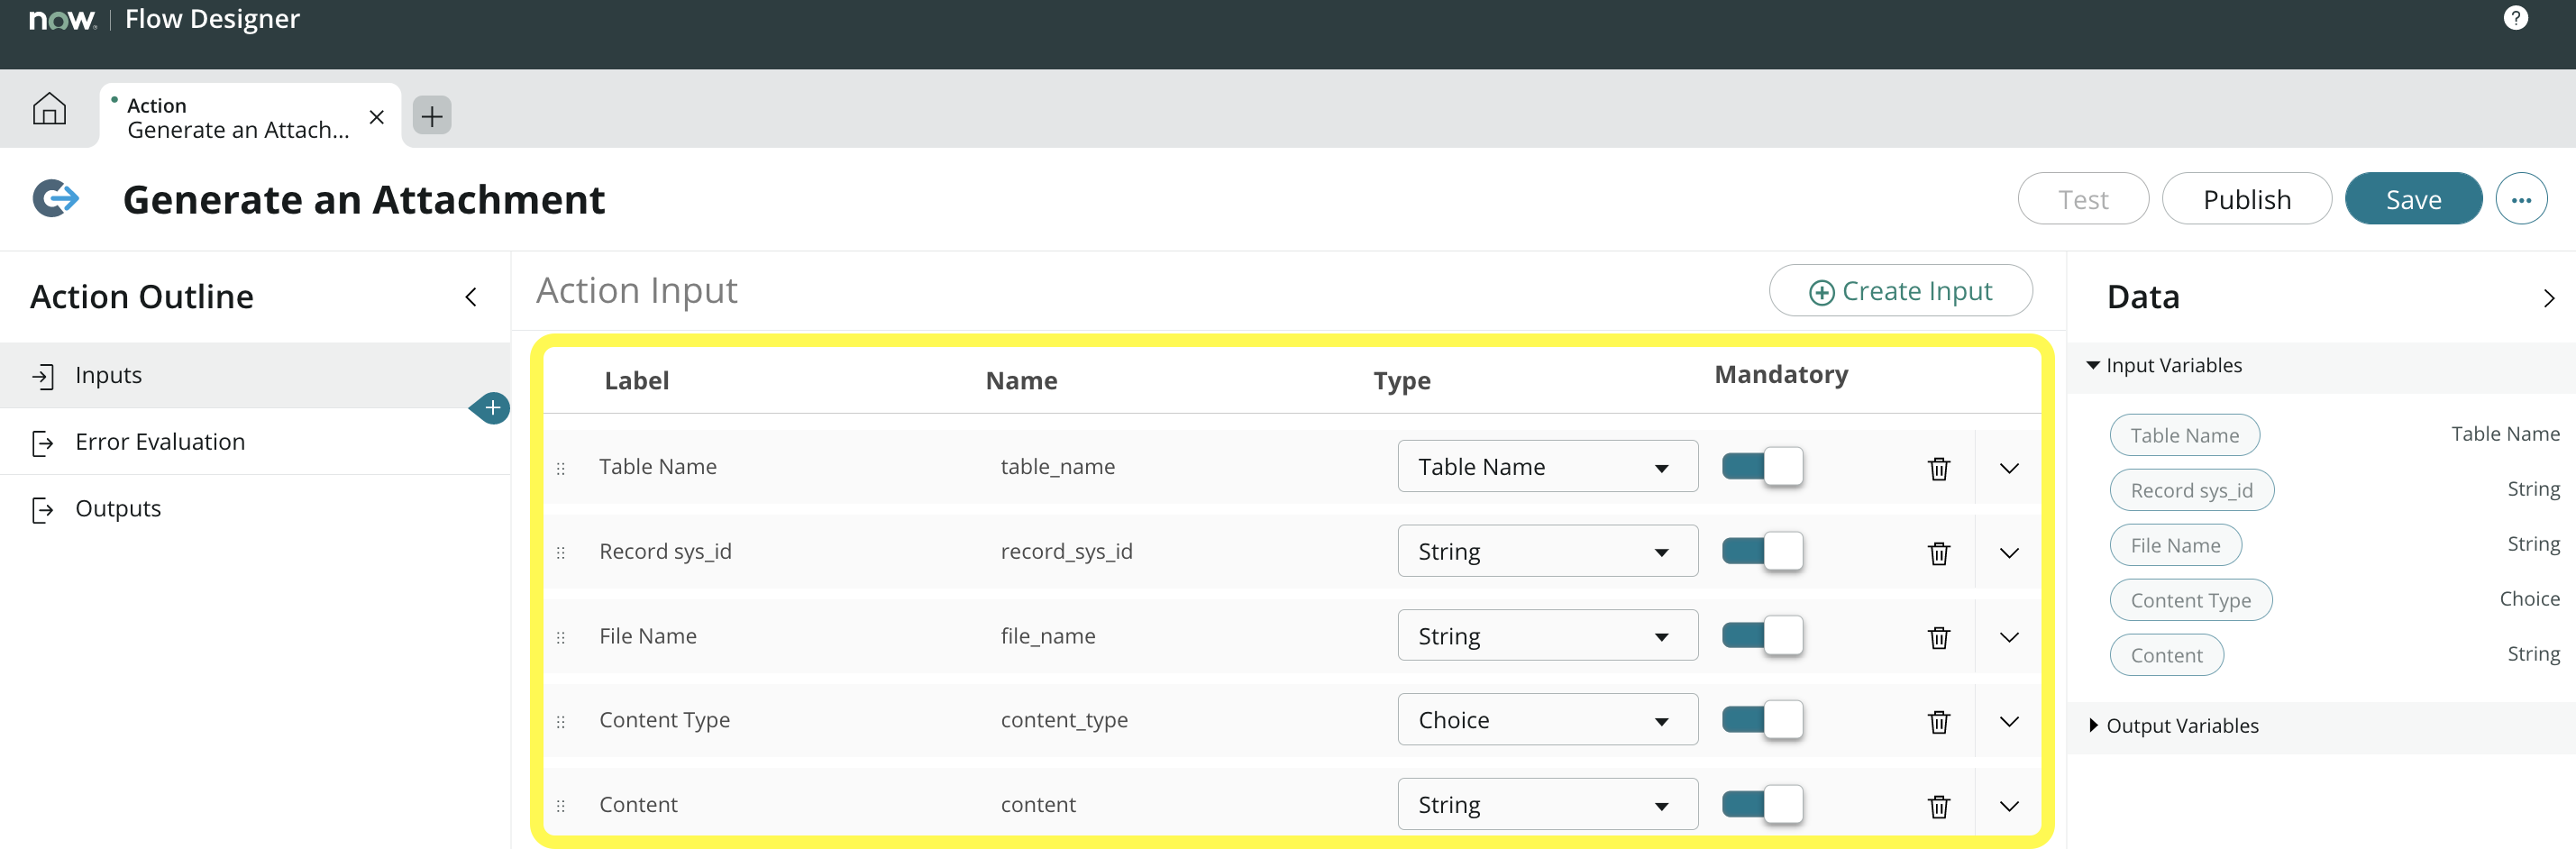
Step 3: Configure the Action Inputs:
There are five mandatory inputs.
- 'Table Name': defines the table where the record resides that the attachment will be added.
- 'Record sys_id': defines the sys_id of the record the attachment will be added.
- 'File Name': defines the attachment file name
- 'Content Type': defines the attachment content type (A Choice Type; examples include text/plain, text/csv, application/pdf)
- 'Content': - defines the attachment content
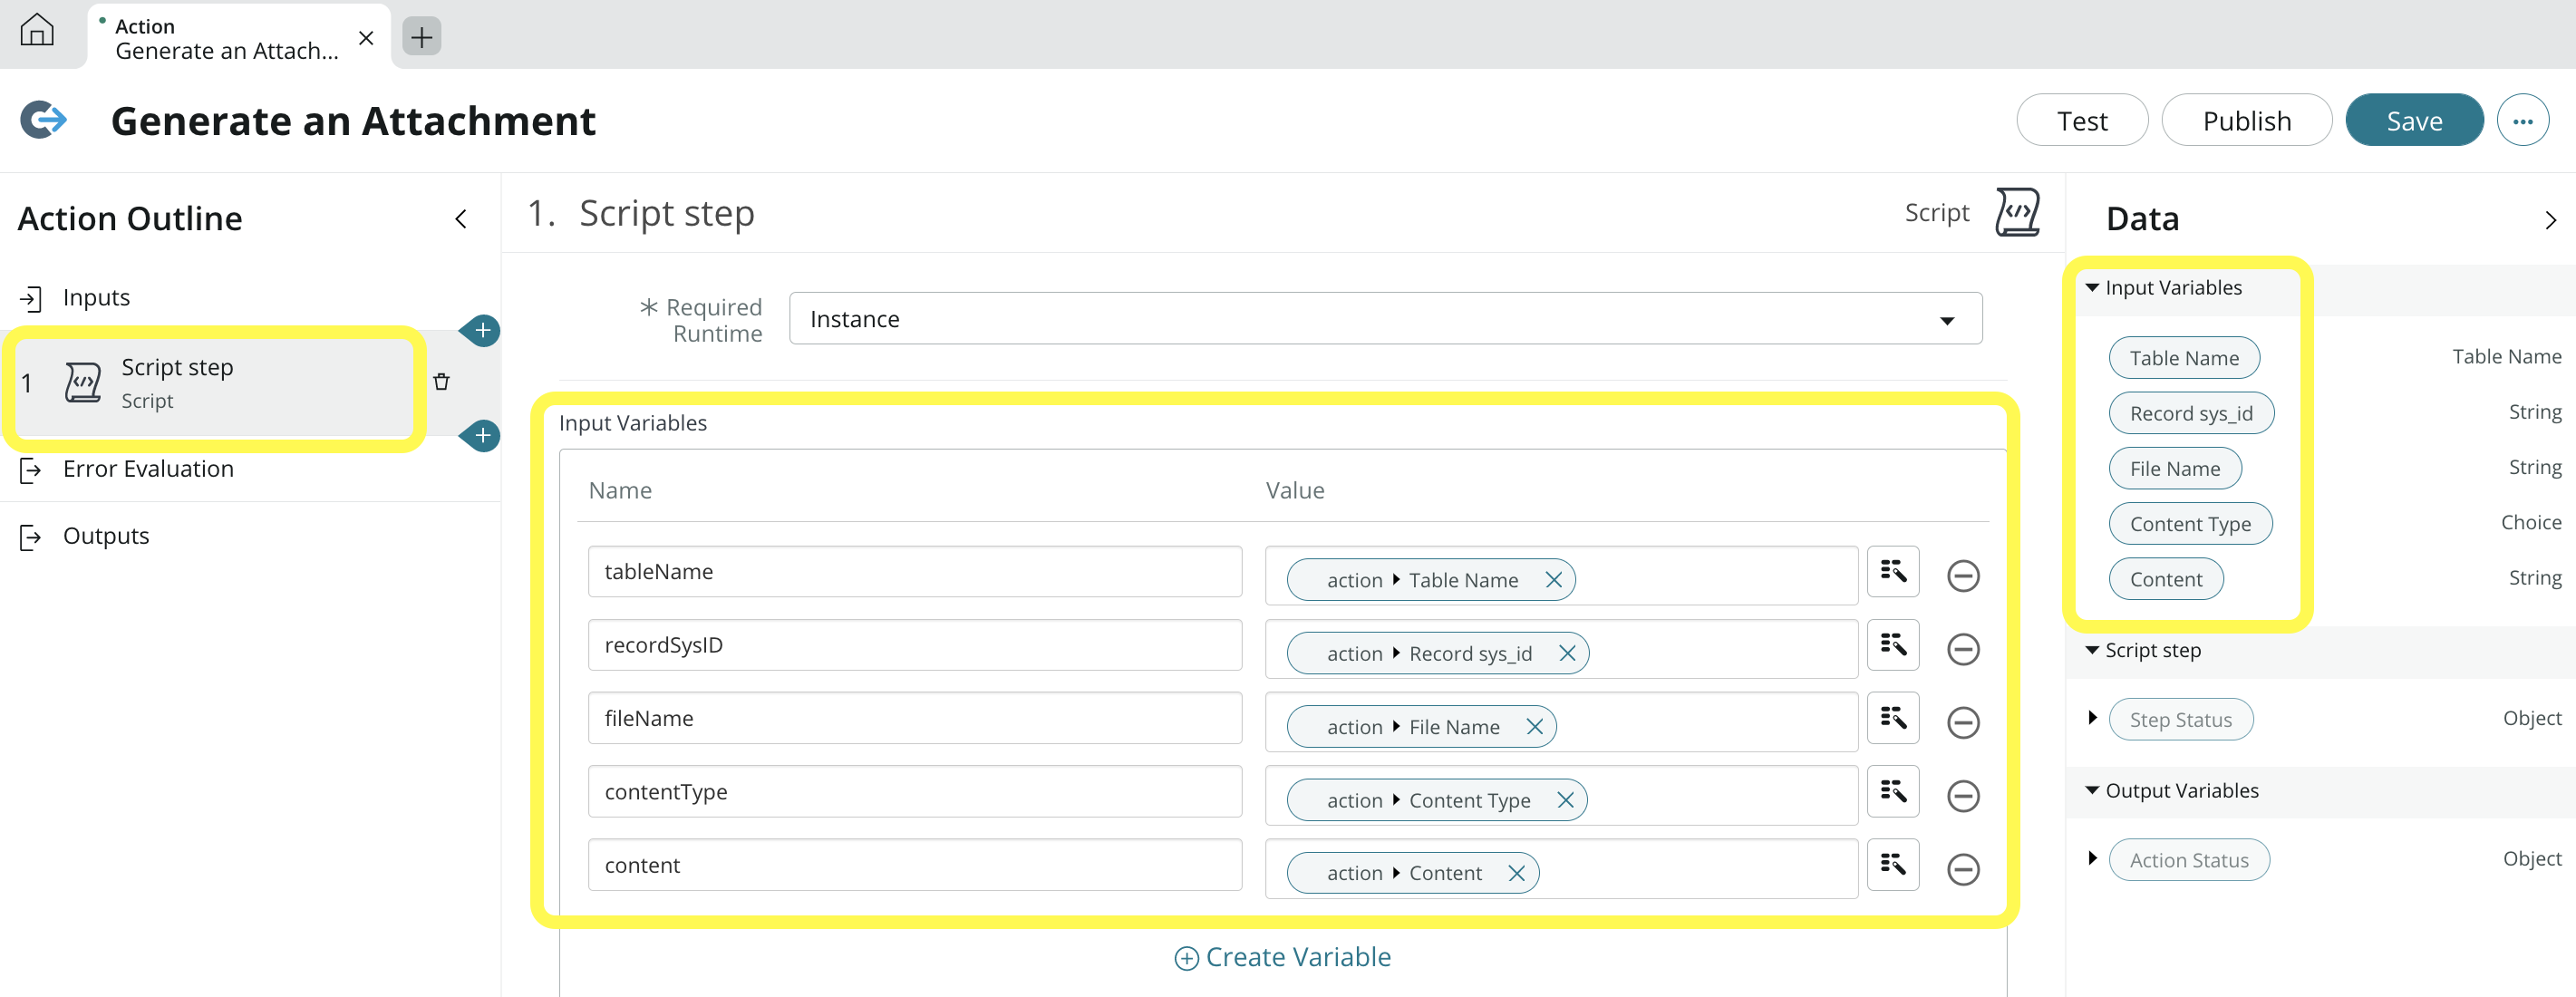
Step 4: Configure the Script Step
Create five Input Variables for the Script Step. They will consume the Action Input variables available in the Data pane
Add the actual script that will generate the attachment on the record specified via the inputs and create an Output Variable that will capture the attachment sys_id
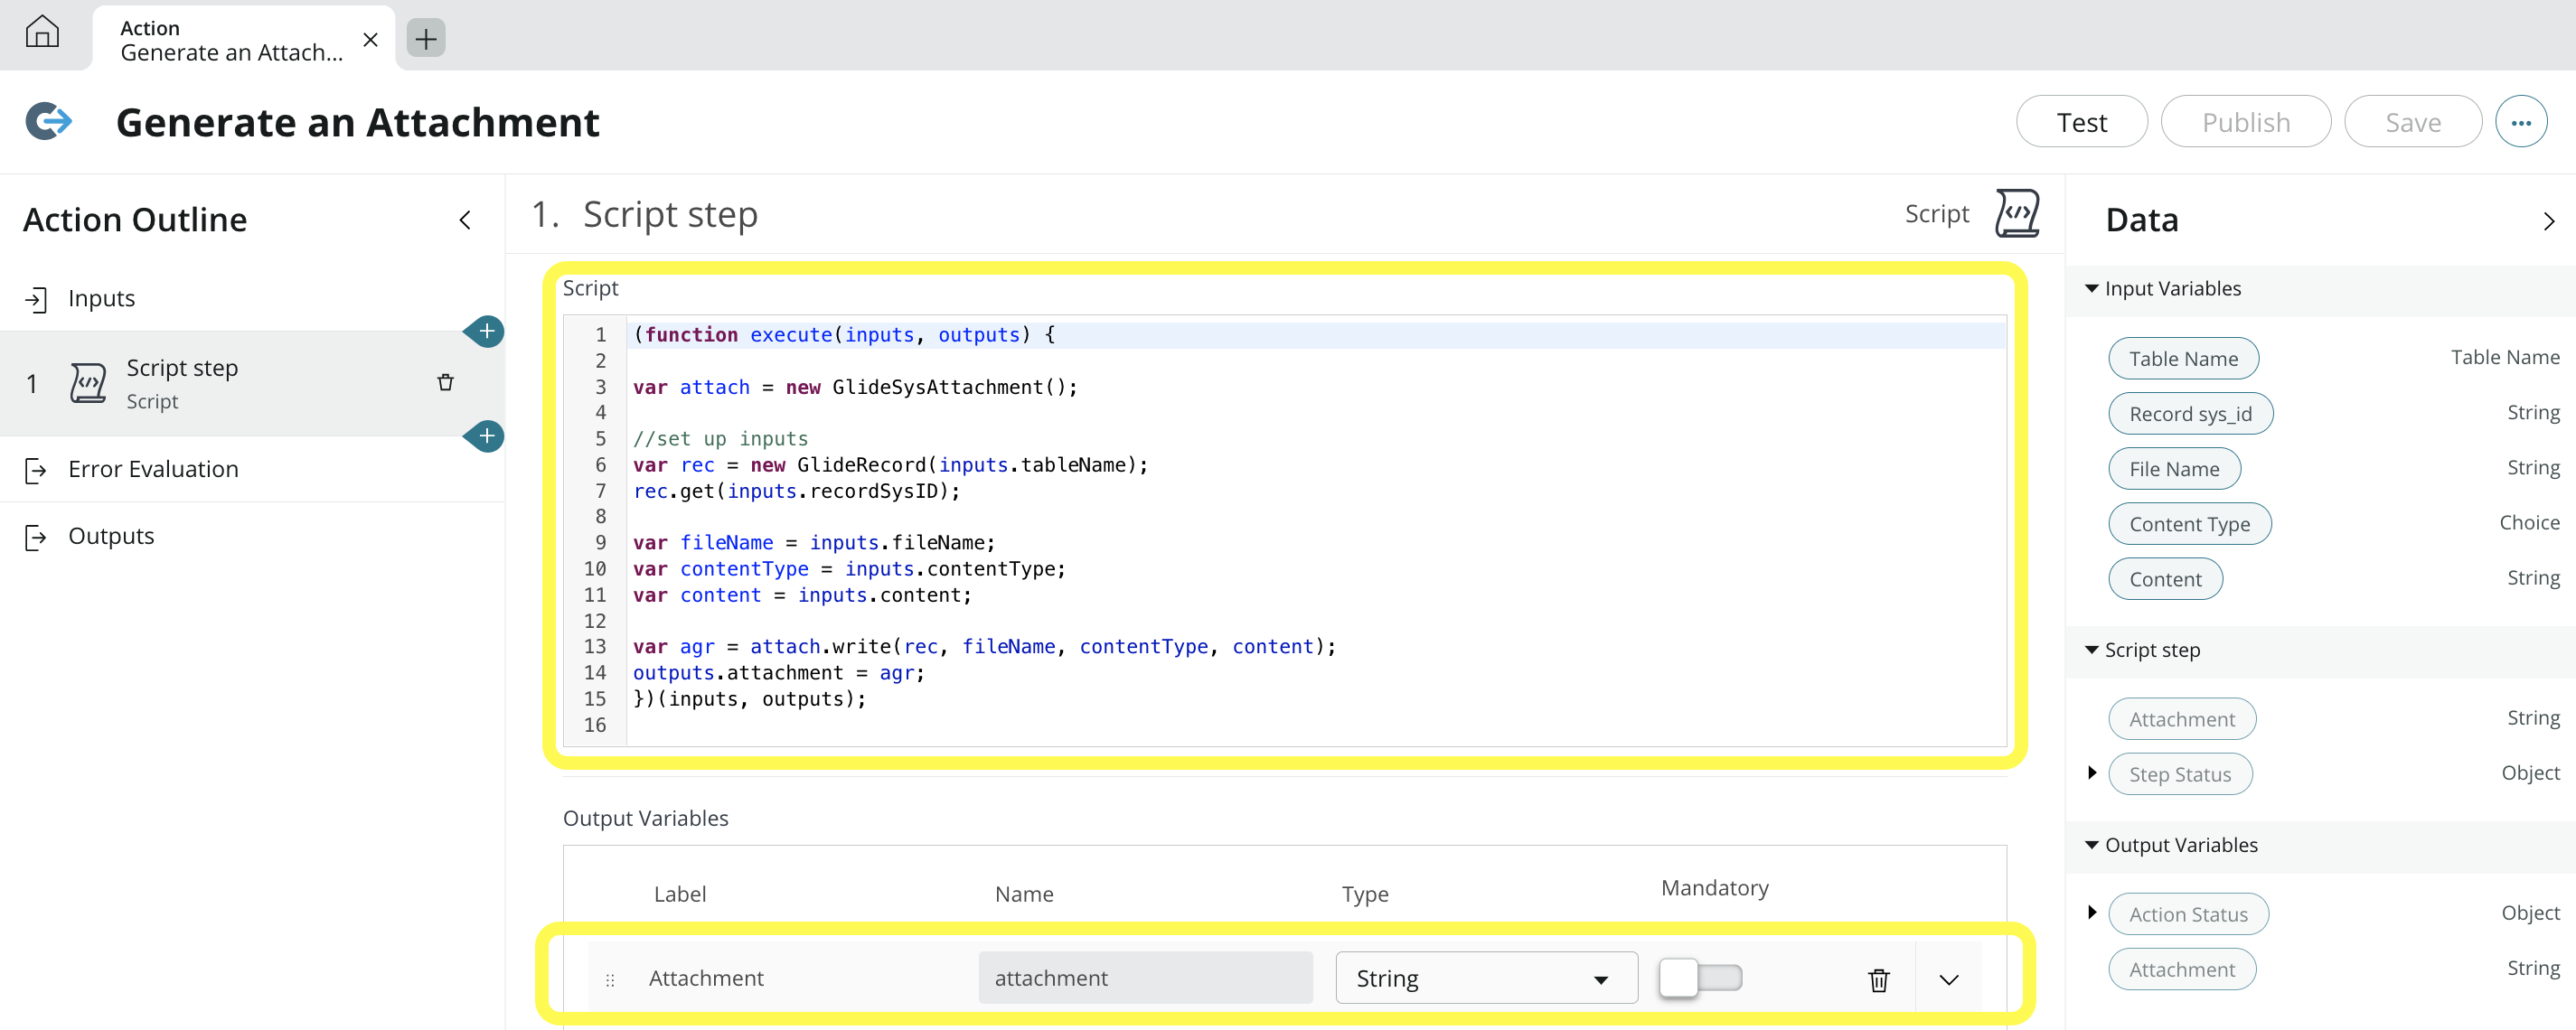
The script itself is utilising the GlideSysAttachment API (documentation located here on the developer docs). Essentially it gets the record from the table (that was provided as an input) and writes the attachment to that record using the other inputs; file name, content type and content
(function execute(inputs, outputs) {var attach = new GlideSysAttachment();//set up inputsvar rec = new GlideRecord(inputs.tableName);rec.get(inputs.recordSysID);var fileName = inputs.fileName;var contentType = inputs.contentType;var content = inputs.content;var agr = attach.write(rec, fileName, contentType, content);outputs.attachment = agr;})(inputs, outputs);
Step 5: Configure the Action Output
The action output is used to pass back the sys_id of the generated attachment record to the flow that utilises the action. (Note: this sys_id will reference the attachment in the sys_attachment table)
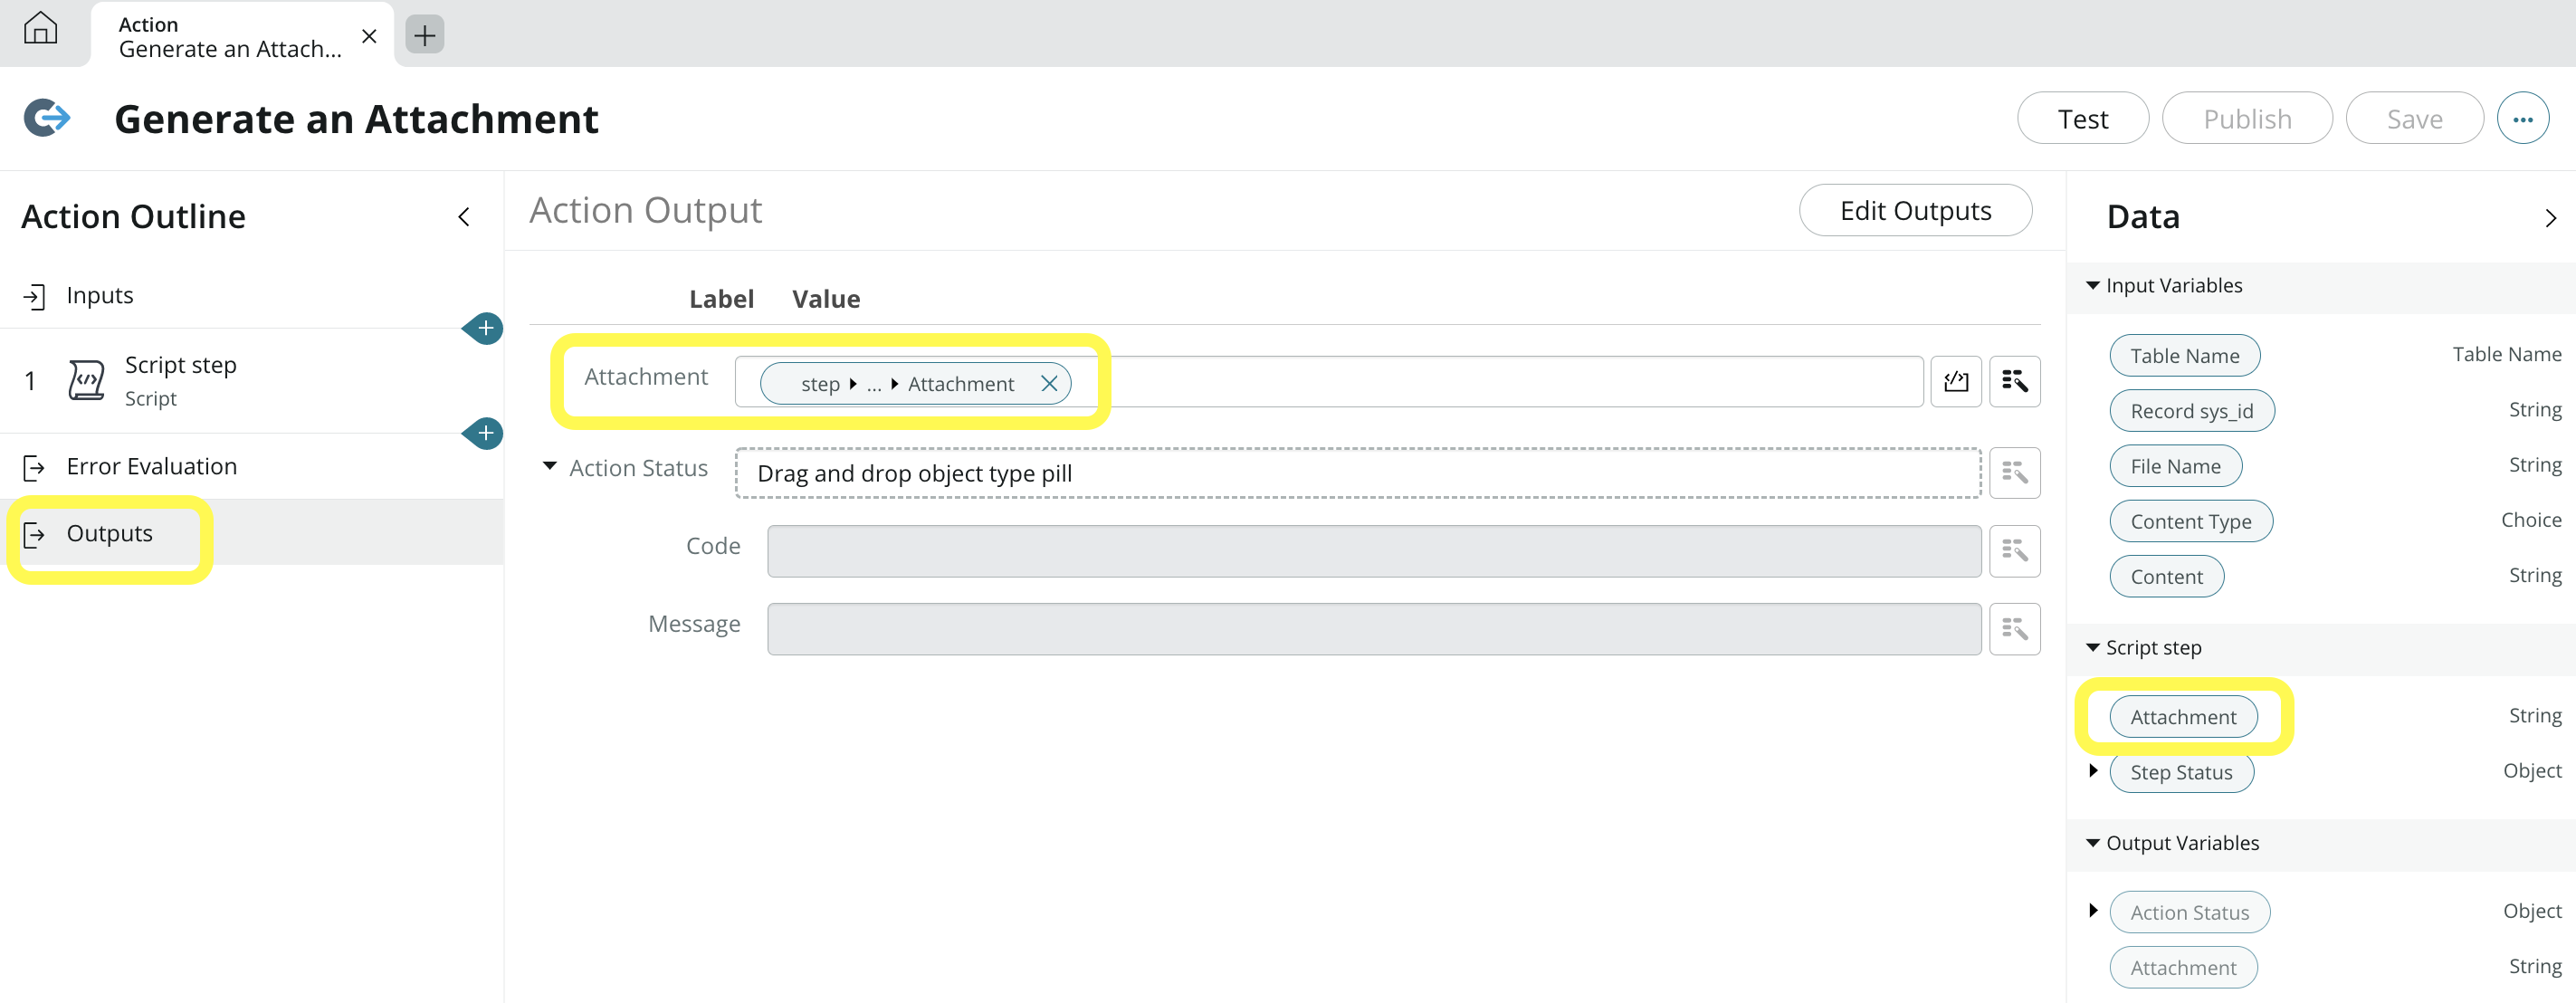
Step 6: Test, Save and Publish Action
The action can now be tested providing the required inputs. Once verified that the attachment is created as expected, save and publish the action. The action can be located in the 'Global' spoke and used in a flow as required
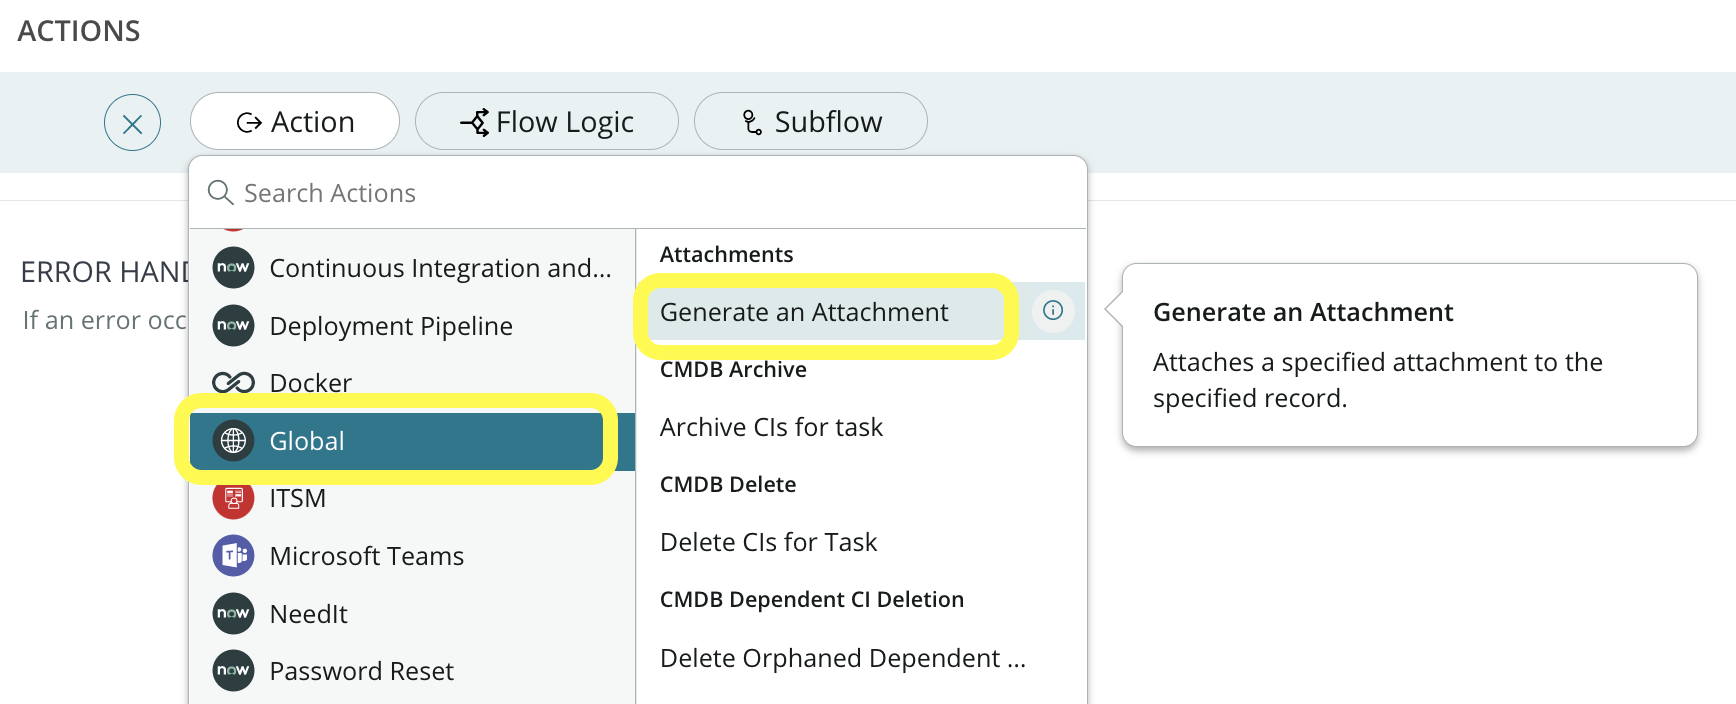
That's everything completed! A custom action to generate an attachment on a record of your choice.
Use Case Example
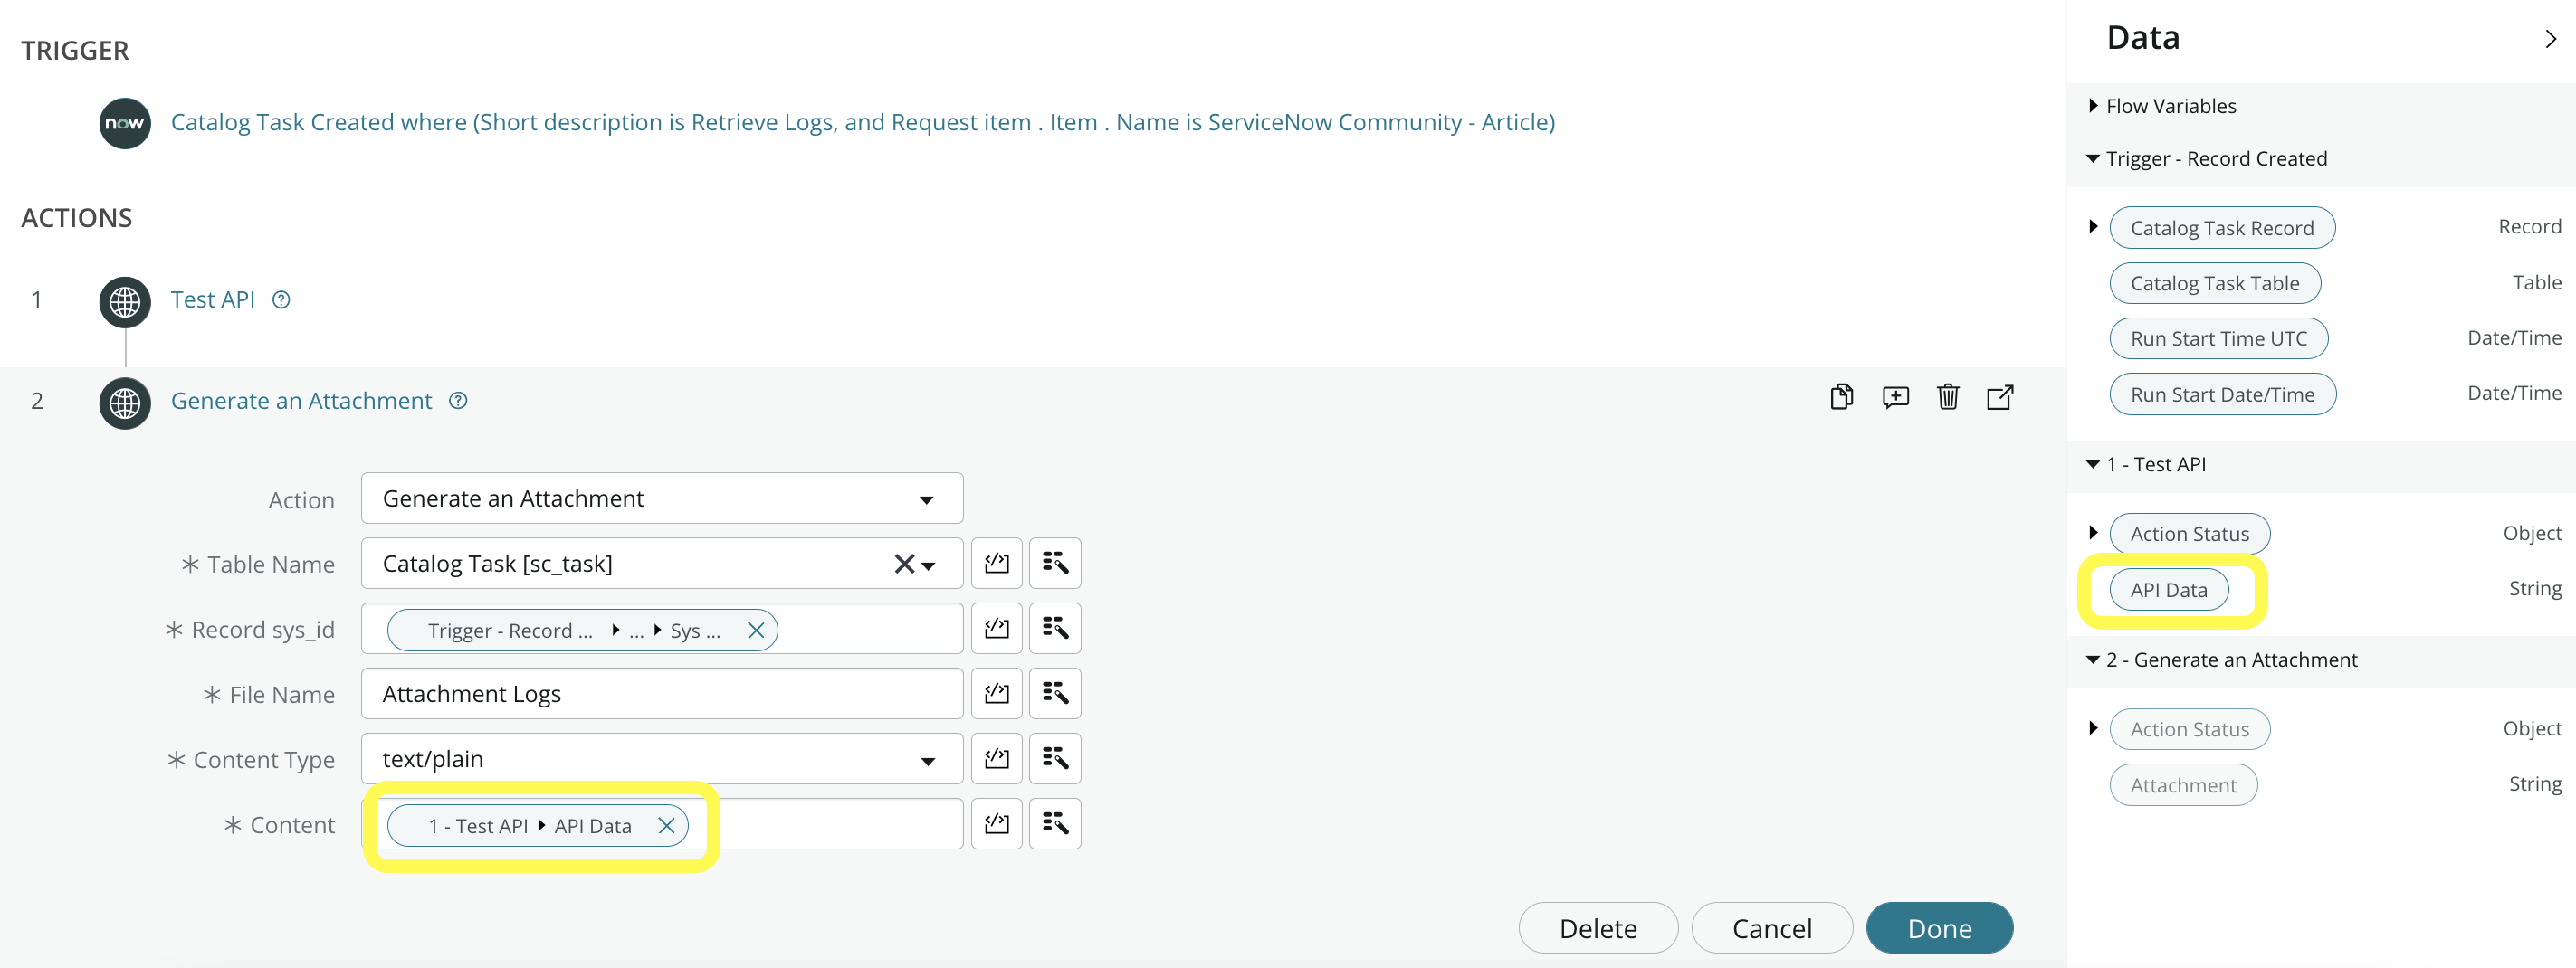
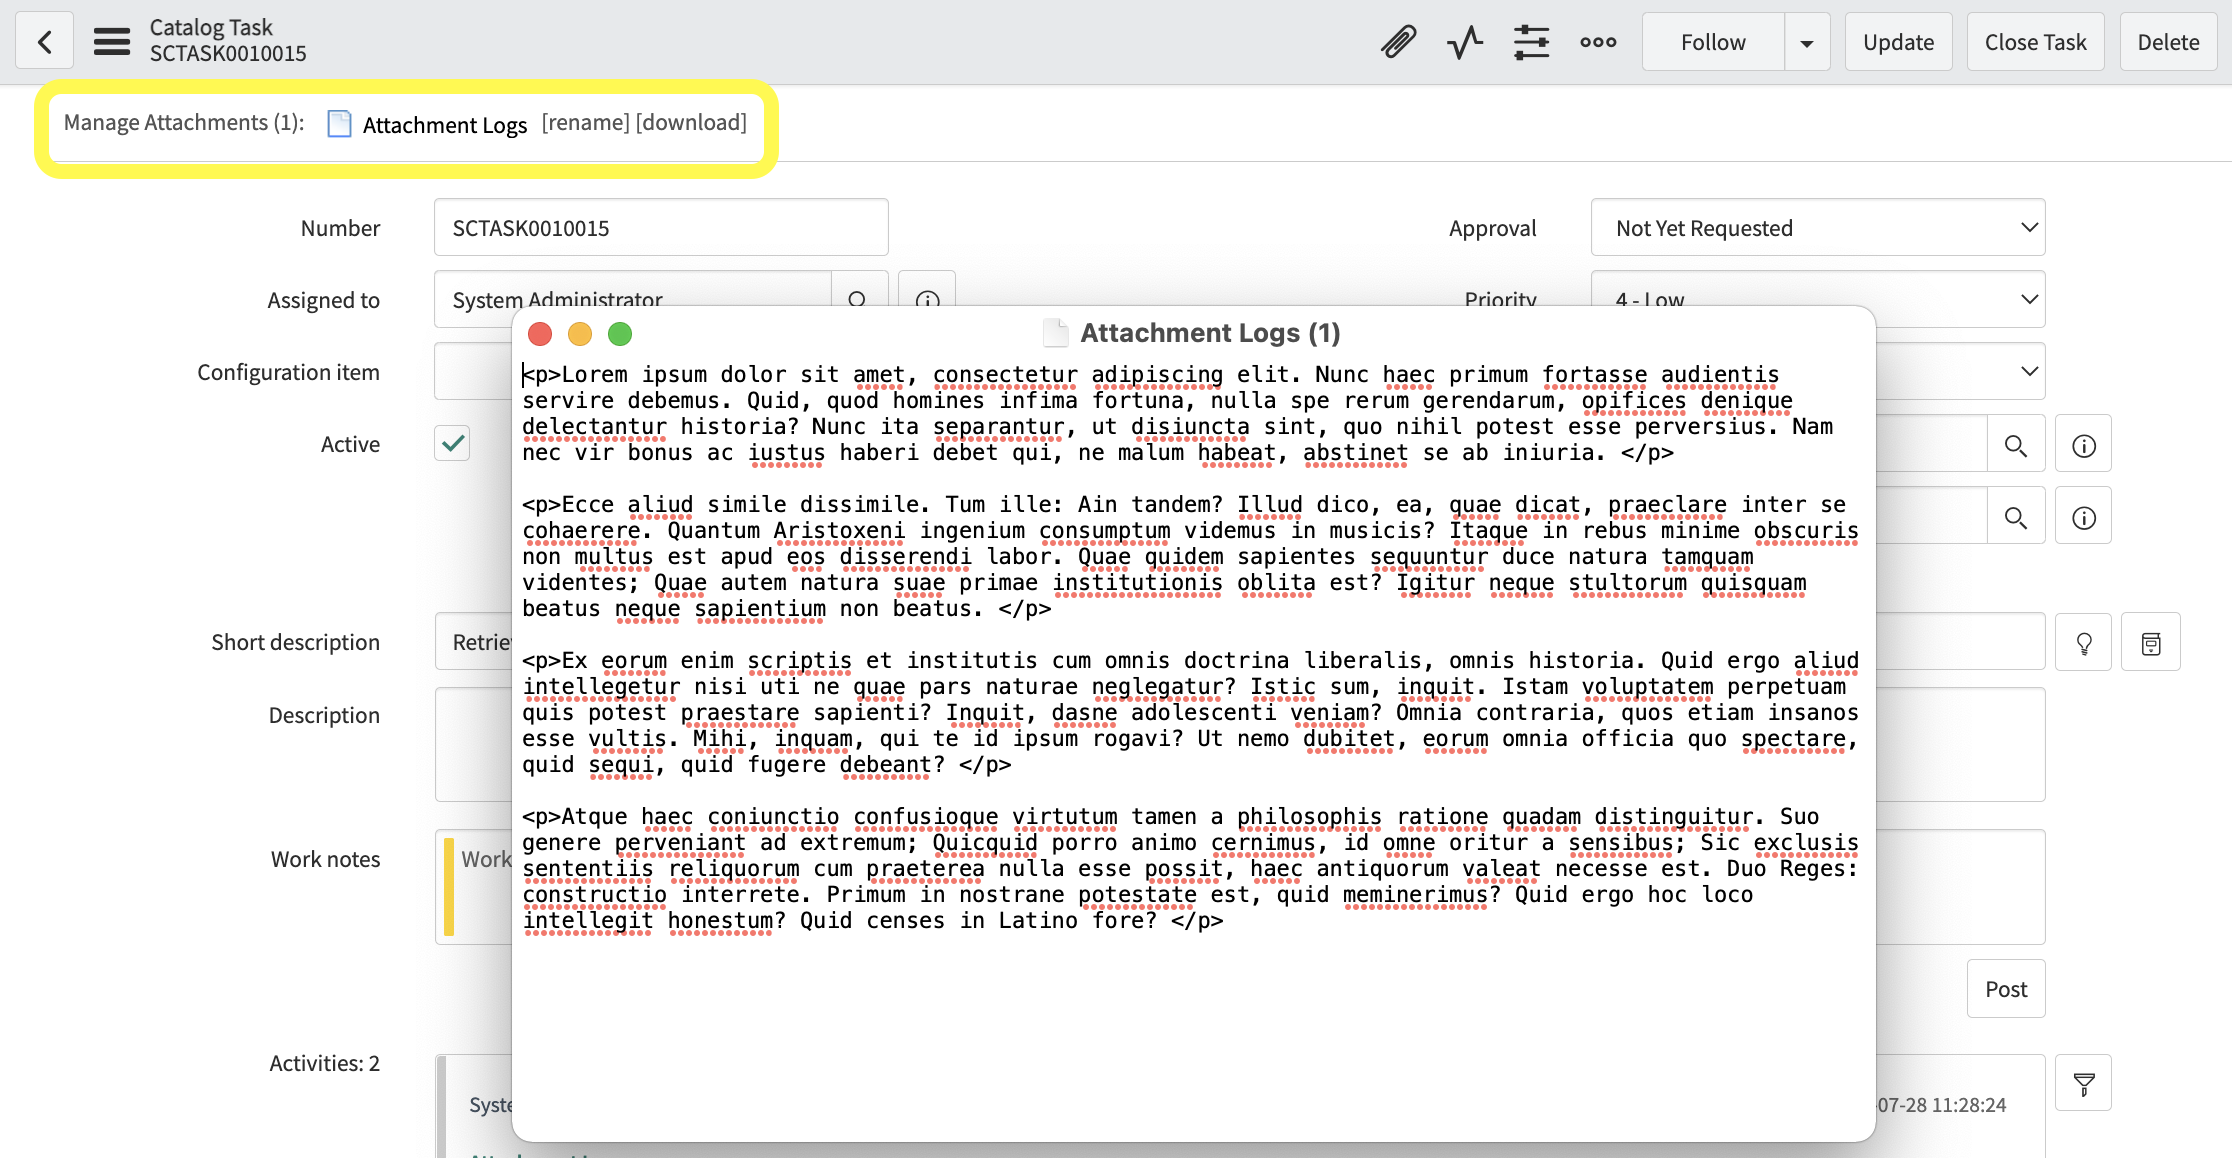
Below I demonstrate a sample use case I've mocked up. A flow triggered on the creation of a Catalog Task makes an API call with the Test API action. The response data makes up the content of the attachment that is added to the trigger record.
In the sample flow below, highlighted is the API Data pill (output from the Test API action). Pass that into the Content input and complete the other mandatory inputs
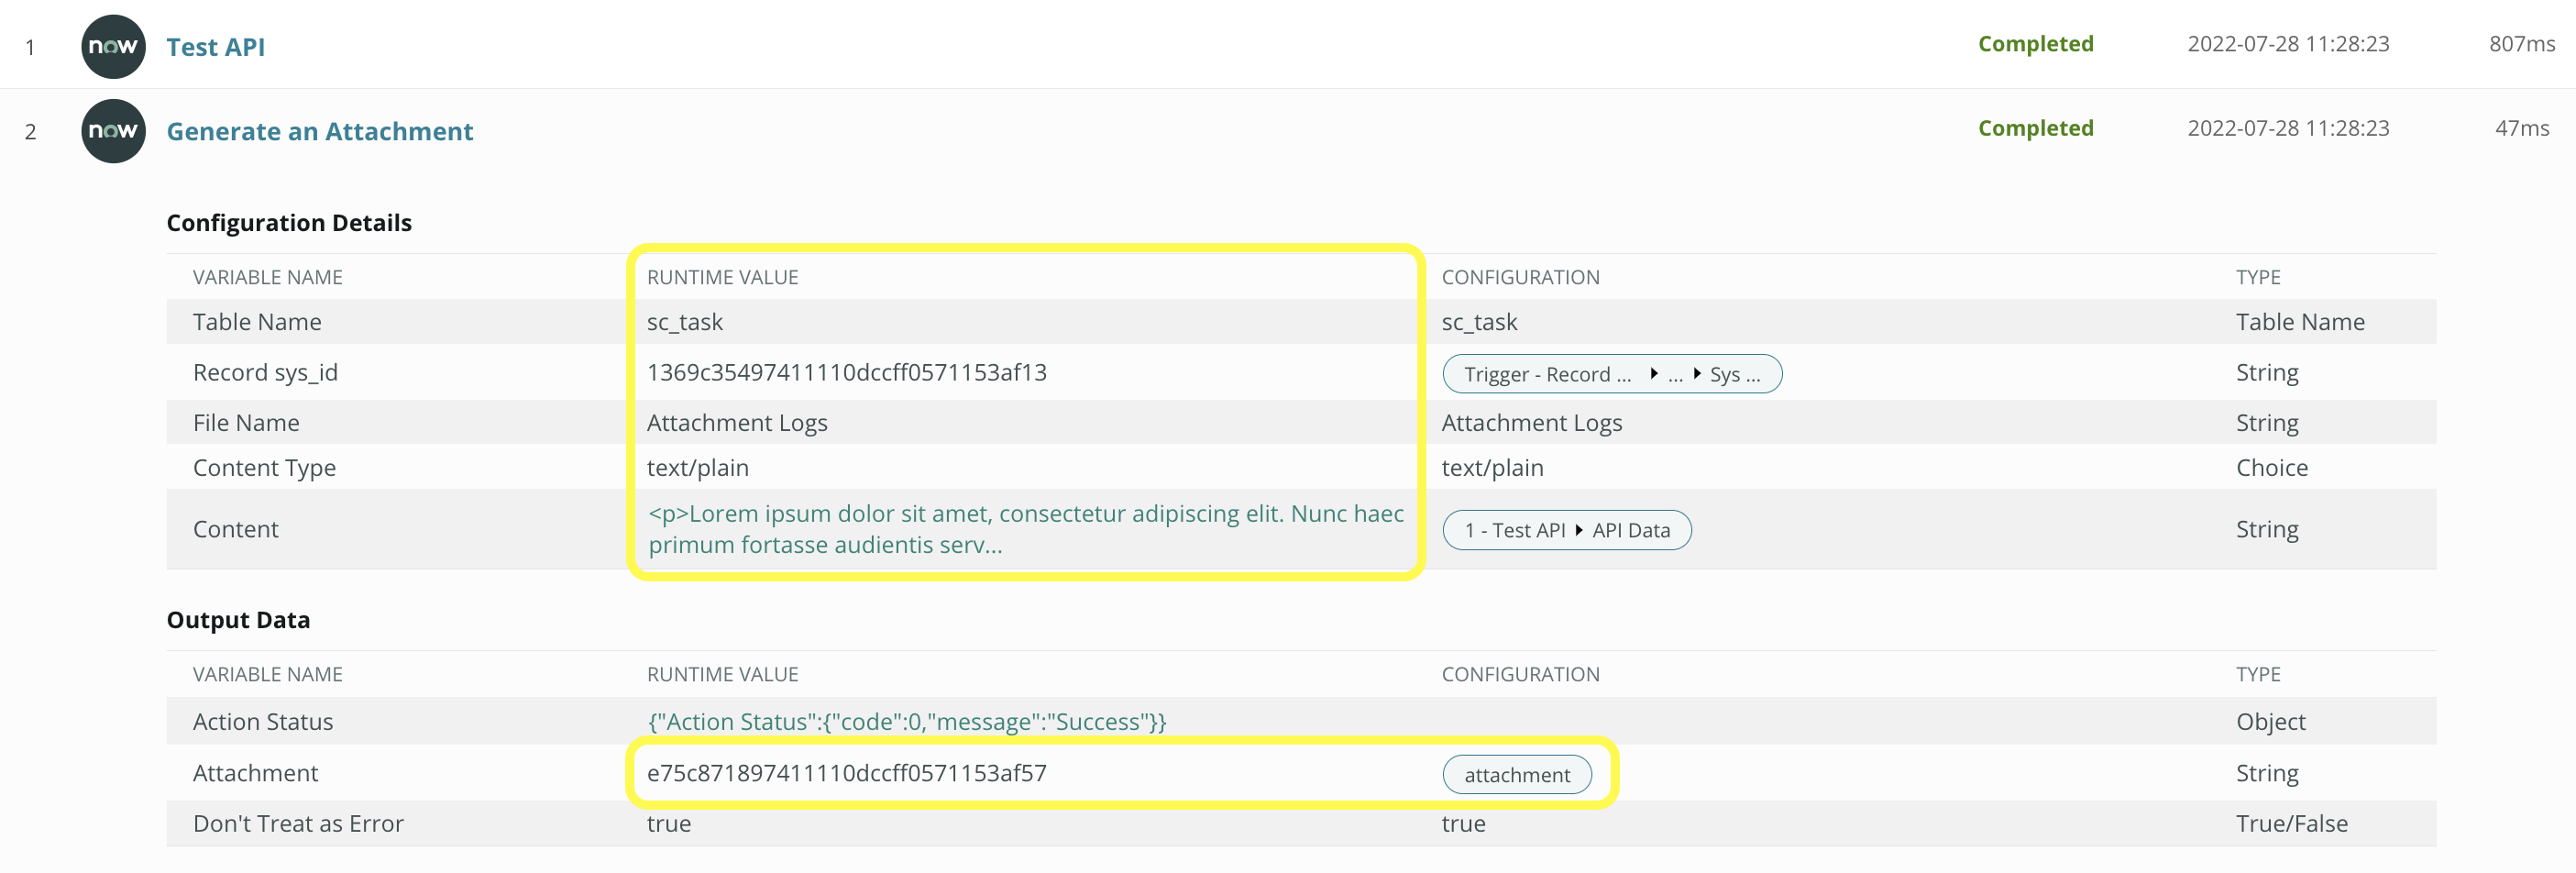
The execution details of the flow below highlight the inputs and successful Attachment sys_id output
Finally, on the Catalog Task, the attachment is added as expected
Conclusion
I hope you found this article useful. If you have any questions, comments or other tips drop them below.
]]>
https://geofftopley.hashnode.dev/generate-attachment-via-custom-flow-designer-action