
One daily email reminder that contains all approvals which can be approved or rejected
Hello Everyone,
Thanks for taking the time to view my article. Searching the community you can see there is no shortage of posts on how to create Approval Reminders. There are different ways they can be send out using like a scheduled job, the workflow engine and the great new Flow Designer. One I have used in the past is @marcguy's answer in this thread.
The problem I always had was the number of emails generated to an approver with outstanding approvals. Every approval required its own notification so when you replied 'Approve' or 'Reject' the proper approval would be updated. So every morning an executive or director will log in and check their email and if they did not keep up on their approvals (or a delegate) they would have multiple email reminders. This article will focus on a solution that builds one email that contains all of the users outstanding approvals and will allow them to respond 'Approve' or 'Reject' on each approval that is contained in one email message. This is done by querying the sys_watermark table for the message in the notification email script.
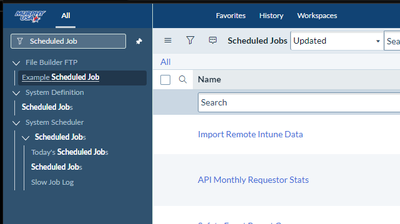
If you currently have a scheduled job or flow you may just need to edit your email notification script. If not navigate to System Definition ->Scheduled Jobs

Click the New button select Automatically run a script of your choosing

Give your new scheduled script job a name, select the frequency it will run and a time. If you would like for your reminders to run only on weekdays enter in the following script in the Condition script editor field.
(function(){
    //run on weekdays only
    var day = new Date().getDay();
    return (day != 0 && day !=6);
})();
In the Run this script field we will need to query all unique users that have outstanding approvals. We can do that by entering in the following script.
var arrUtil = new ArrayUtil();
var answer = [];
var app = new GlideRecord('sysapproval_approver');
    app.addQuery('state','requested');
    app.orderBy('approver');
    app.query();
while(app.next()){
    if (arrUtil.indexOf(answer, app.approver)==-1) {
        answer.push(app.approver.getValue());
    }
}
for (var i = 0; i < answer.length; i++) {
    gs.eventQueue('open.approval.reminders', app, answer[i]);
}
This queries all approvals with a State of Requested, gets the unique approver user and creates an event log entry named open.approval.reminders with the sys id of the approval and user.
Your scheduled job should look something like this

In the Event Registry create a record and name it open.approval.reminders

Once the scheduled job runs you should see multiple entries in the event log with the name you specified and in Parm1 you will see sys_id's from the sys_user table (the approver reference field in the sysapproval_approver record)

Creating the notification email script.
Filter on 'notification email' and select 'Notification Email Scripts' to create a new mail script

Give your email script a name. I name mine the same as my event record in the registry 'open.approval.reminders' and in the script enter in the first two lines,
baseUrl = gs.getProperty("glide.servlet.uri") + 'YOURPORTALNAME?sysparm_content_url=';
mailto = 'mailto:' + gs.getProperty("glide.email.user");
Replace YOURPORTALNAME with the name of your instance's service portal (this could be sp). We will use these 2 variables further in our script
Then we will need to get the Requested Items for the approvals using the part of the mail script.
//Get Requested Items needing approval
var app = new GlideRecord('sysapproval_approver');
    app.addQuery('state','requested');
    app.addQuery('approver', event.parm1);
    app.addQuery('sysapproval.sys_class_name','sc_req_item');
    app.query();

while(app.next()){
        var ritm = new GlideRecord('sc_req_item');
            ritm.get(app.sysapproval);
Now let's write this data to an html table.
//Request Header Short Description and RITM
    template.print('<table style="border-left: 4px solid #7bb342; width:100%; border-collapse:collapse;">');
    template.print('<tbody>');
    template.print('<tr style="background-color: #7bb342;">');
    template.print('<td style="text-align: left;"><span style="font-size: 10pt; font-family: Montserrat, sans-serif; color: #ffffff;"><strong>' + ritm.short_description + '</strong></span></td>');
    template.print('<td style="text-align: right;"><span style="font-size: 10pt; font-family: Montserrat, sans-serif;"><strong><a style="color: #ffffff;" href=' + baseUrl + ritm.getLink() + '>' + app.getDisplayValue('sysapproval') + '</a>' + '</strong></span></td>');
    template.print('</tr>');

//Request Description
    template.print('<tr>');
    template.print('<td colspan="2"; style="text-align: left; margin: 3px; font-size: 10pt; font-family: Montserrat, sans-serif; ">' + ritm.description + '</td>');
    template.print('</tr>');
    template.print('</tbody>');
    template.print('</table>');
This was the best way I could get this into a table in the format I wanted. If anyone has a better way to do this or even has a better-looking result, please comment below with a better solution. This will create the following table in the body of your email.

The top row is the RITM short description and also includes a link to the RITM. I chose green for Requested Items but feel free to use any colors or fonts you would like. The script will get all approvals for the user so you can have more that 1 table in your email like this depending on how many requested approvals there are for the user.

Now, we need to build the links to accept or reject. In order for the approval or rejection to go the proper approval we will need to query the sys_watermark table for particular approvals sys id in the source id field. When the approval email is received ServiceNow will know which approval it applies to because we will be getting the Ref:MSG number from this record.
Example of a sys_watermark record

To get this we will add the following to our mail script
//Approval or Reject Links
    var msg = new GlideRecord('sys_watermark');
        msg.addEncodedQuery('source_id='+ app.sys_id);
        msg.query();
    var number = '';
    if(msg.next()) {
        number = msg.number;
    }
Now to build the Approve or Reject reply links for the ritm approval. Again, as earlier, this was the way I was able to get it to work any thoughts on improvement are welcome.
var approve = mailto + '?subject=RE:%20' + app.getDisplayValue('sysapproval') + '%20-%20approve&body=%0D%0A%0D%0A%0D%0ARef%3A' + number;
    var reject = mailto + '?subject=RE:%20' + app.getDisplayValue('sysapproval') + '%20-%20reject&body=%0D%0A%0D%0ARef%3A' + number;

    template.print('<table style="border-left: 4px solid #7bb342; width:100%; border-collapse:collapse;">');
    template.print('<tbody>');
    template.print('<tr>');
    template.print('<td style="border-radius: 5px; background-clip: padding-box; background-color:#7bb342; text-align: center; margin: 3px; width: 10%;";><span style="font-size: 10pt; font-family: Montserrat, sans-serif;"><a style="color: #ffffff;" href=' + approve + '><strong>' + "Approve" + '</a></strong></span></td>');
    template.print('<td style="background-color:#ffffff; width: 80%;"></td>');
    template.print('<td style="border-radius: 5px; background-clip: padding-box; background-color:#df2027; text-align: center; margin: 3px; width: 10%;"><span style="font-size: 10pt; font-family: Montserrat, sans-serif;"><a style="color: #ffffff;" href=' + reject + '><strong>' + "Reject" + '</a></strong></span></td>');
    template.print('</tr>');

    template.print('</tbody>');
    template.print('</table>');
    template.print('<br>');
}
This is all you would need for requested items. You can add Changes, Knowledge articles and any other approvals you may have and append to the script.
I have included my email script which includes Change Requests as well. Change requests are blue and will also be included in the email but the format is a bit different because we are getting more fields from the change record.

You will also need to add the email script to a notification. Create a new email notification and for 'Send when' choose Event is fired and then select your event name you created earlier.

On the who will receive tab check 'Event parm 1 contains recipient' and 'Send to event creator'

Finally, on the What it will contain make sure you have ${mail_script:open.approval.reminders} in the message HTML to add your script to the email notification

Once the links are clicked in their default email client the mail script we created earlier will populate the Subject and add the Ref:MSG# in the body of the email

All the user has to do now is click send to approve the RITM.
Let me know if you have any questions in the comments below.
Thank you,
David Whaley
https://www.servicenow.com/community/now-platform-articles/one-daily-email-reminder-that-contains-all-approvals-which-can/ta-p/2390219